
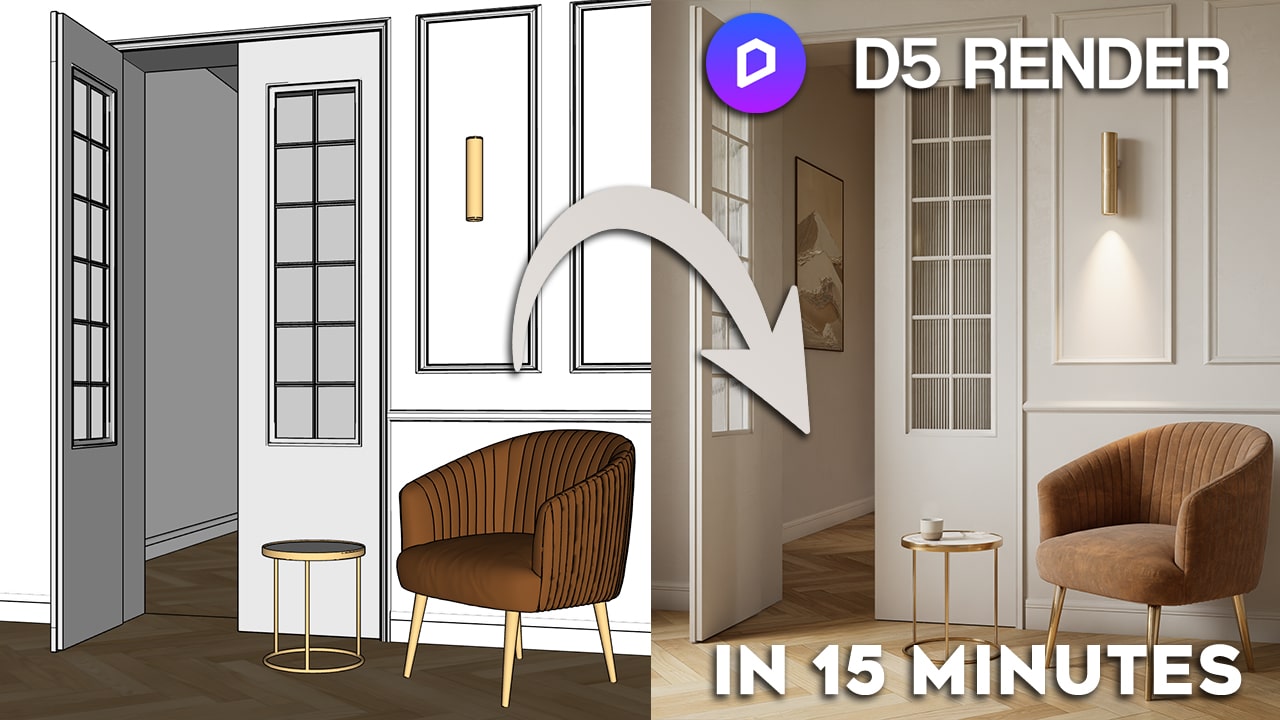
If you’ve never used D5 Render before, don’t worry—you’re in the right place. In this tutorial, I’ll guide you through the entire process of creating a beautiful interior visualization in just 15 minutes. We’ll cover everything from setting up your SketchUp model to adding materials, lighting, and rendering your final image. Let’s dive in!
1. System Requirements for D5 Render
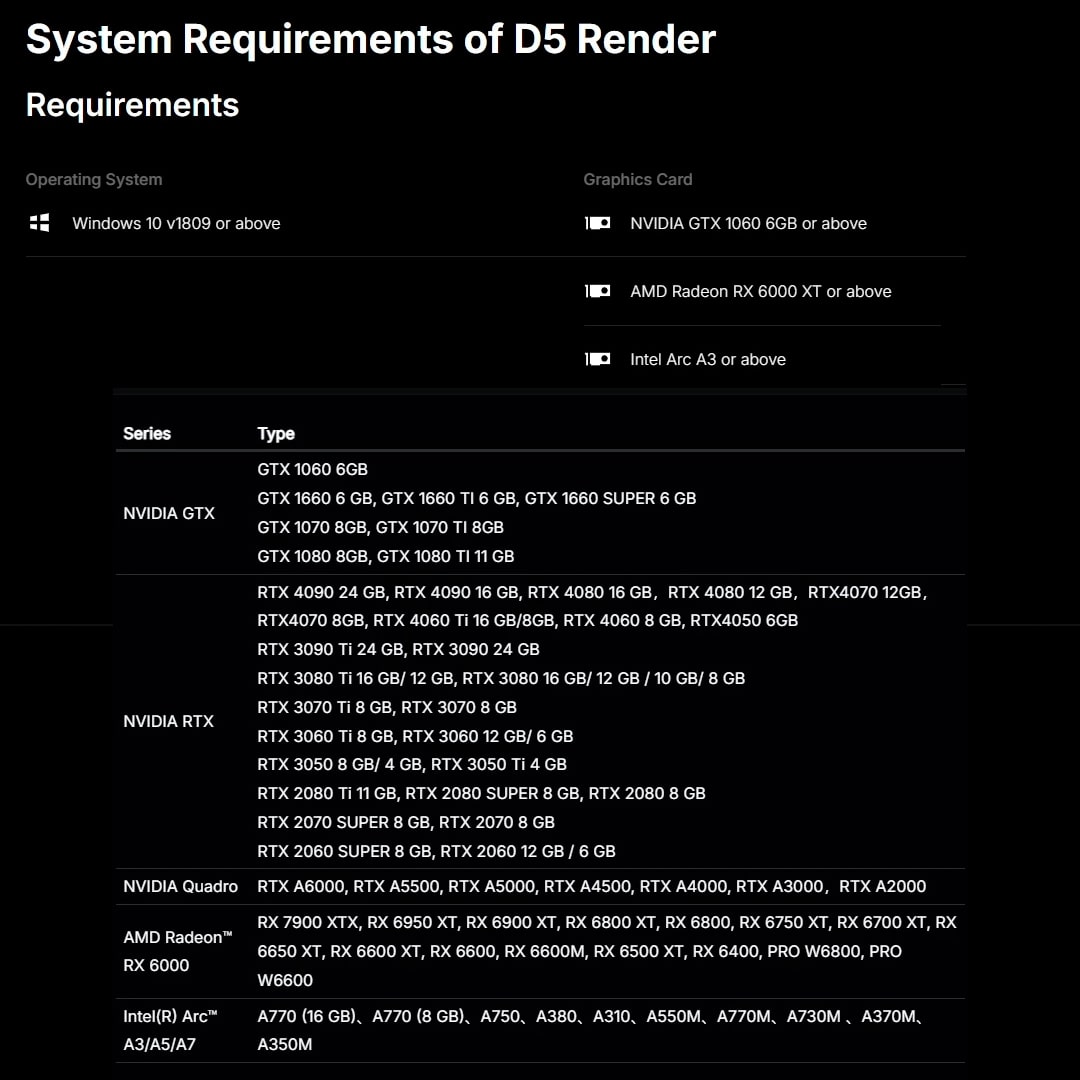
Before we get started, make sure your computer meets the system requirements:
- Windows 10 or newer
- A GPU with ray tracing support (required for D5 to run)
D5 Render won’t work without the right graphics card—even if your CPU is powerful. You can find a list of supported GPUs in the D5 interface under Detailed Info.
2. Preparing Your SketchUp Model
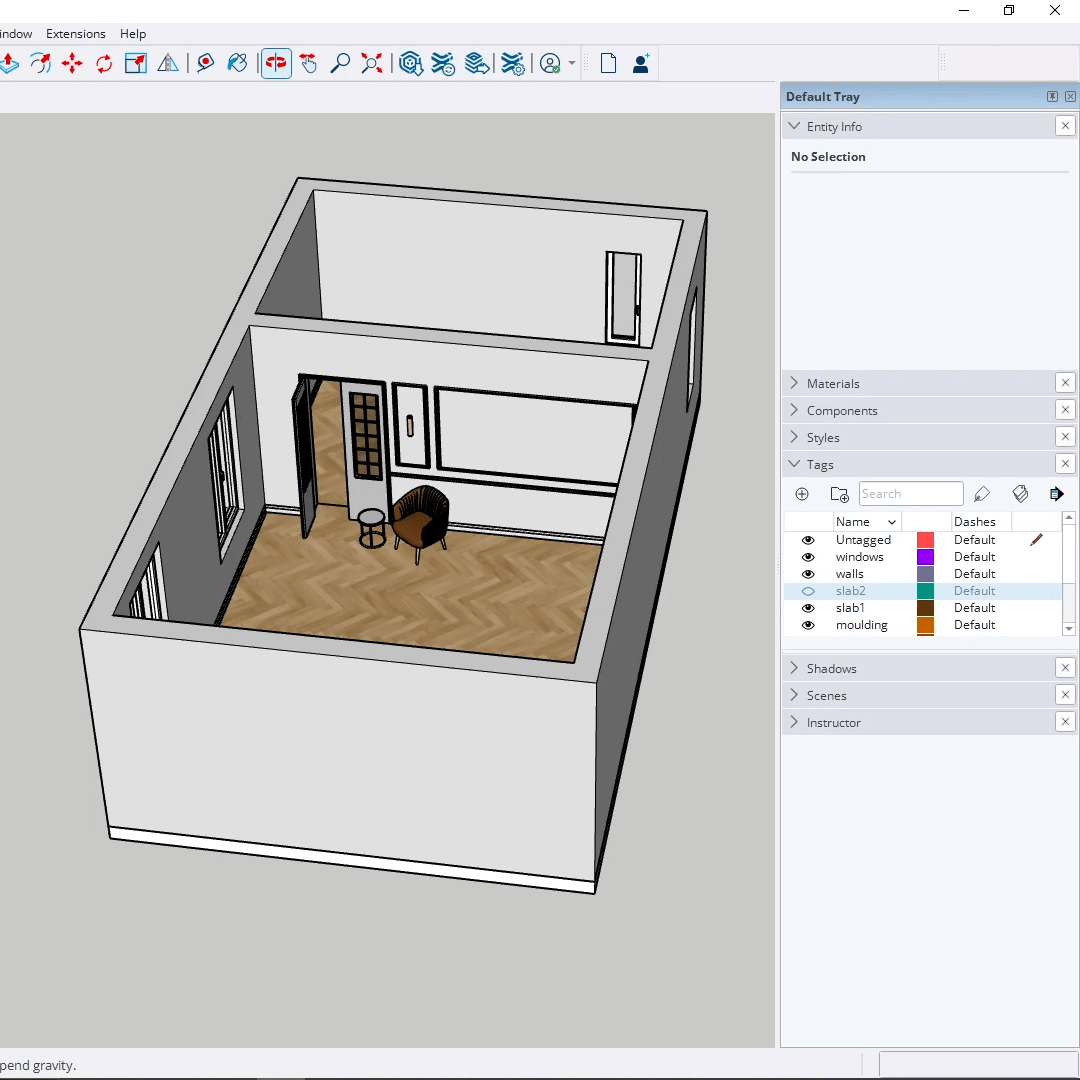
A clean SketchUp model is key to a smooth workflow and great results in D5 Render. Here’s how to prepare it:
- Organize everything into groups and components – this helps you select and adjust objects more easily later.
- Use tags to categorize elements – lighting, furniture, structure, etc.
- Purge unused materials and components to keep your file lightweight.
- Fix reversed faces – D5 may render them incorrectly.
Think of this step like setting the foundation for a house. A messy model will slow you down later in the visualization process.
3. Importing Your Model into D5 Render
- Open D5 Render and go to the Workflow panel.
- Enable Live Sync and connect it to your SketchUp file. This allows real-time syncing between SketchUp and D5.
- Click on New on the left side of the screen

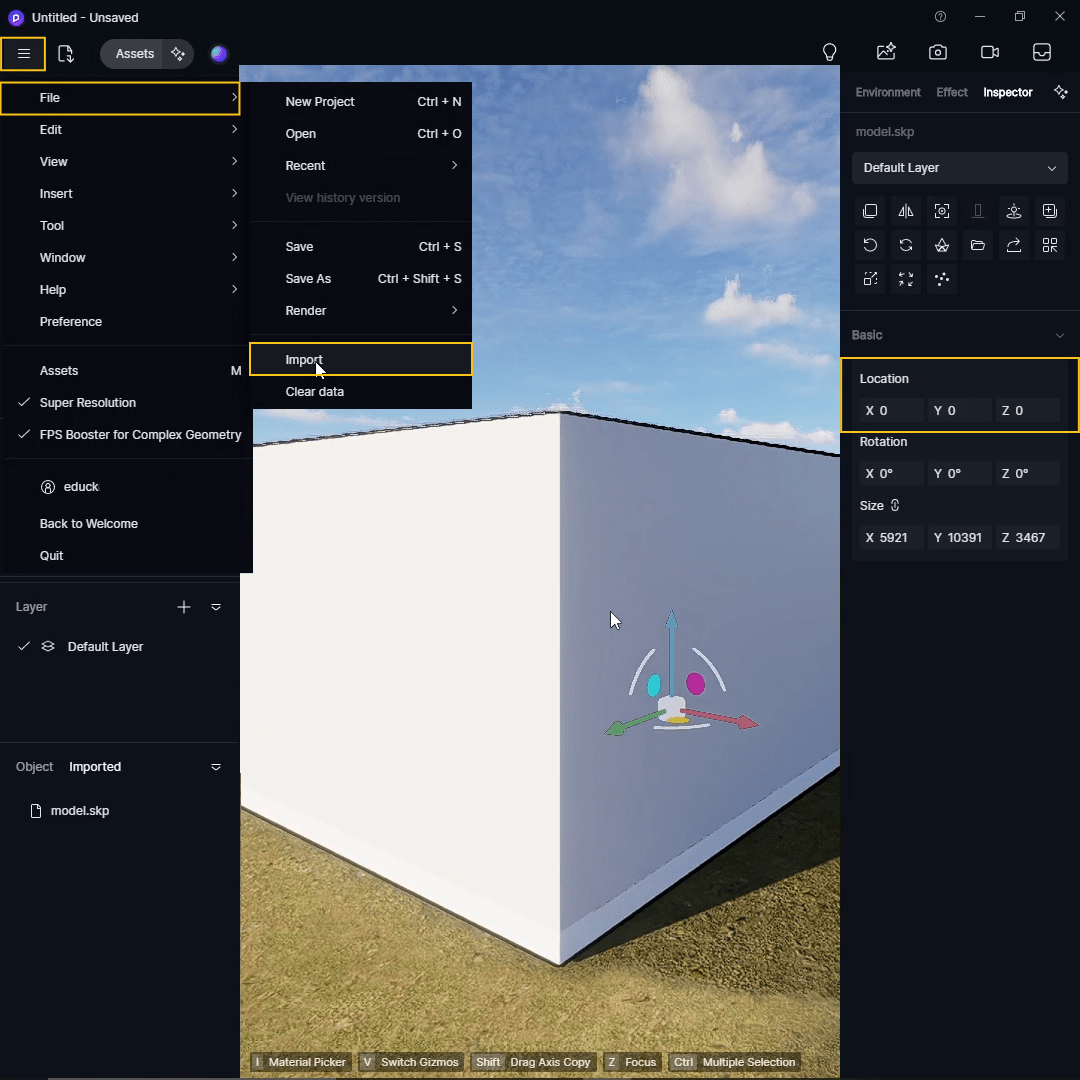
- Import your model by clicking on 3 horizonal lines at the top left corner > File > Import
- When the model appears in your scene, reset its position to X: 0, Y: 0, Z: 0 in the Inspector panel. This ensures it’s centered and easier to manage.
🛠 Pro Tip: If you edit the model in SketchUp later, save the file, go back to D5, right-click the model, and select Reload. Your updates will instantly reflect in the scene without re-importing.
4. Getting to Know the Interface
D5 Render is beginner-friendly, but it’s good to get comfortable with the layout. Here’s a quick breakdown:
- Left Panel: Contains your scene list, layers, and imported models. This is where you manage what’s in your scene.
- Top Toolbar: Tools for placing lights, terrain, particles, and more.
- Right Panel: Includes the Environment tab (lighting and weather settings), the Effects tab (for post-production), and the Inspector (for detailed object and material properties).
- Assets Button (Top Left): Gives you access to D5’s vast library of models, materials, vegetation, and HDRI maps.
Spend a few minutes clicking through these areas—you’ll be navigating like a pro in no time.
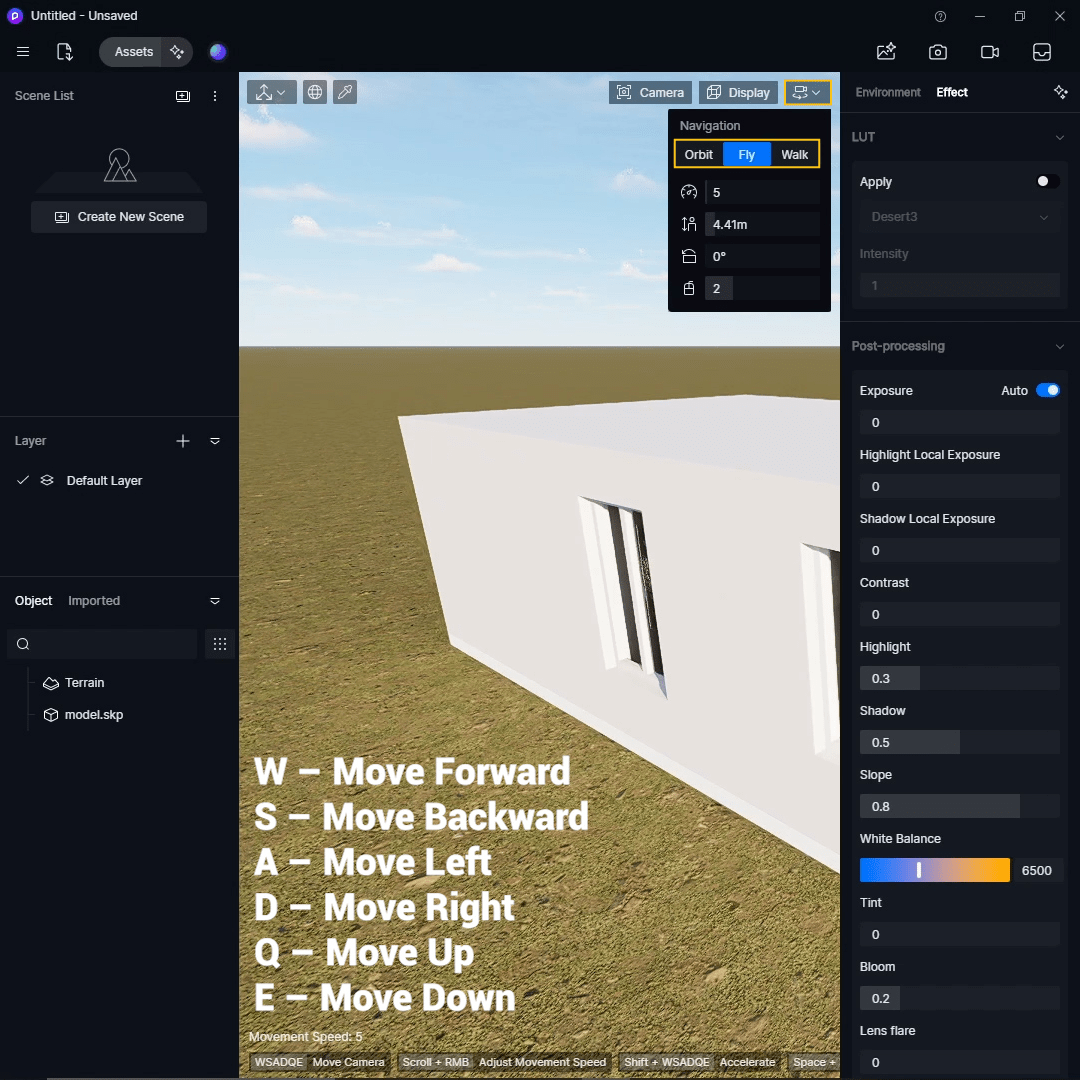
5. Navigating the Scene
D5 Render offers three navigation modes:
- Orbit Mode: Best for a SketchUp-style feel. Rotate around your model by dragging the middle mouse button.
- Fly Mode: Allows free movement using keyboard controls—WASD to move, Q/E for up/down, and mouse for looking around.
- Walk Mode: Designed for interior walkthroughs, simulating a first-person perspective.
Other useful tips:
- Use the scroll wheel to zoom in and out.
- Hold Shift to move faster, or Spacebar to slow down.
Getting comfortable with navigation will help you place objects and cameras more precisely.
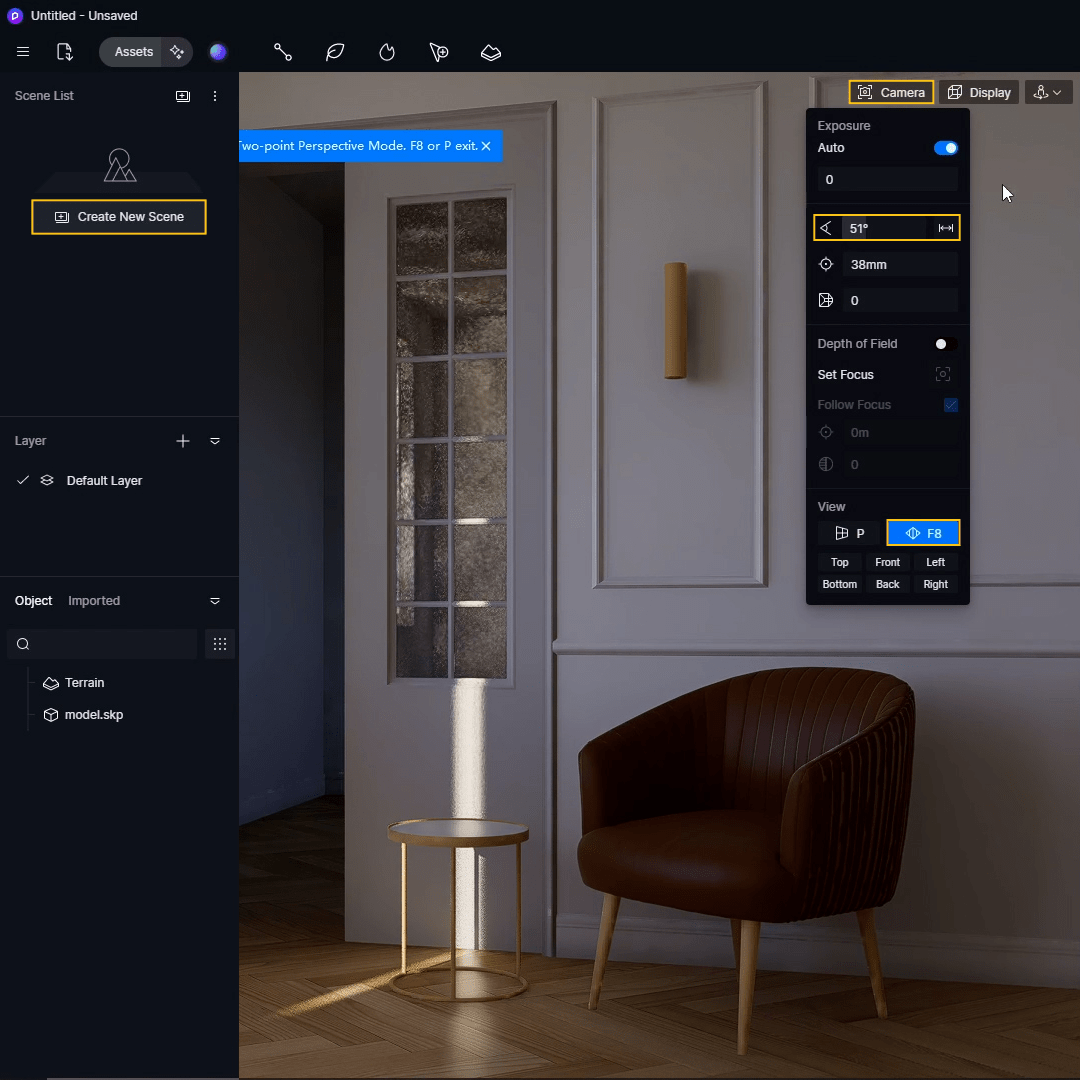
6. Set Up Your Camera View
Creating a good camera view is essential for stunning renders. Here’s how to do it:
- Choose Orbit Mode and move into position.
- Click the Camera icon in the upper right to change properties
- Set the Field of View to about 50°—a good balance between wide and realistic.
- Enable Two-Point Perspective for straight vertical lines, perfect for architectural shots.
- Save the scene with Create New Scene, and if you update the view, use the Update Scene button.
Take time with this step—it defines the entire composition of your render.
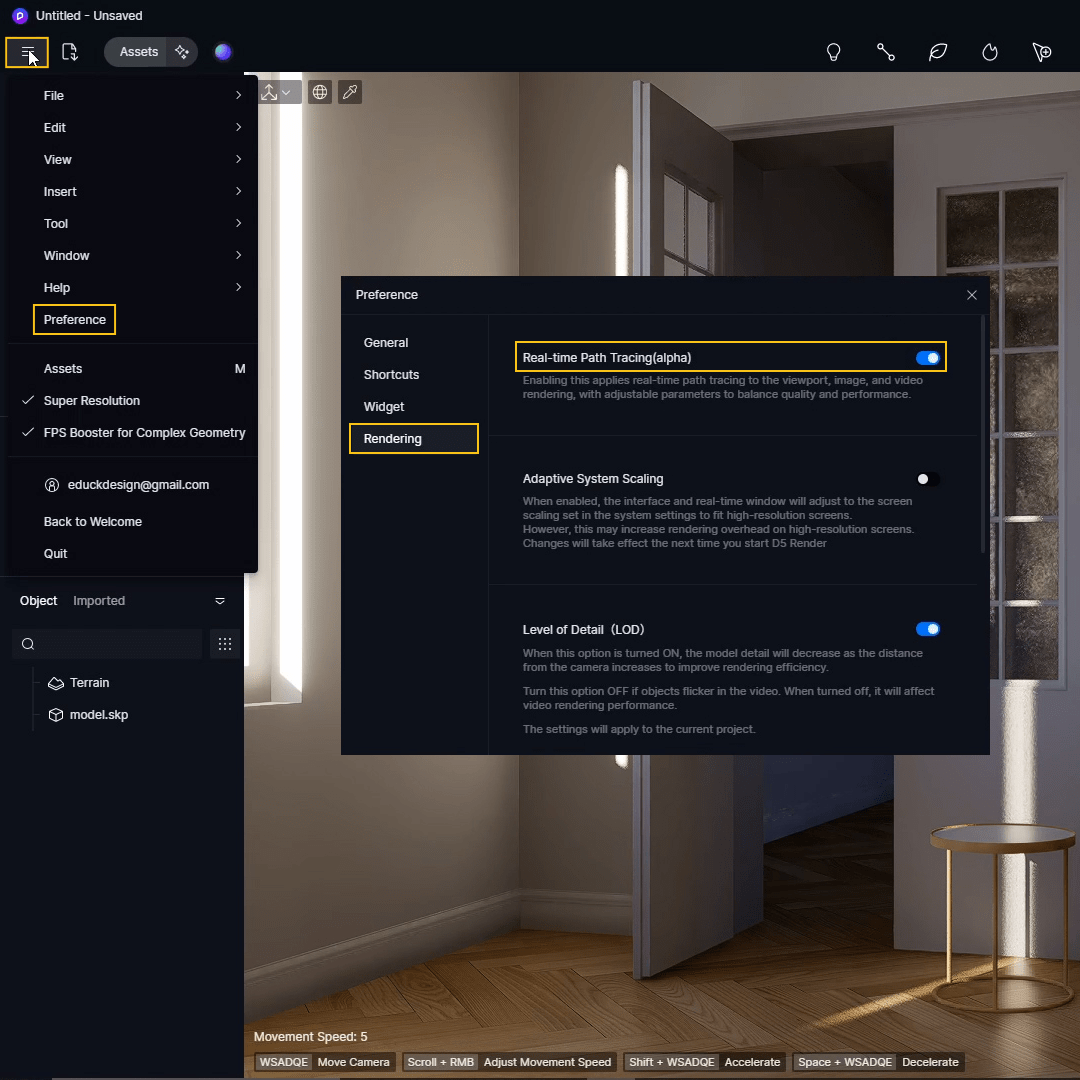
7. Enable Real-Time Path Tracing
In D5 Render version 2.10 and newer, you have the option to use Real-Time Path Tracing. This feature adds:
- Physically accurate lighting and shadows
- Realistic reflections
- Soft transitions between light and dark areas
To enable it:
- Click the three horizontal lines in the top-left menu.
- Go to Preferences > Rendering.
- Toggle Real-Time Path Tracing on or off.
It might add some processing time, but the improvement in quality is worth it.
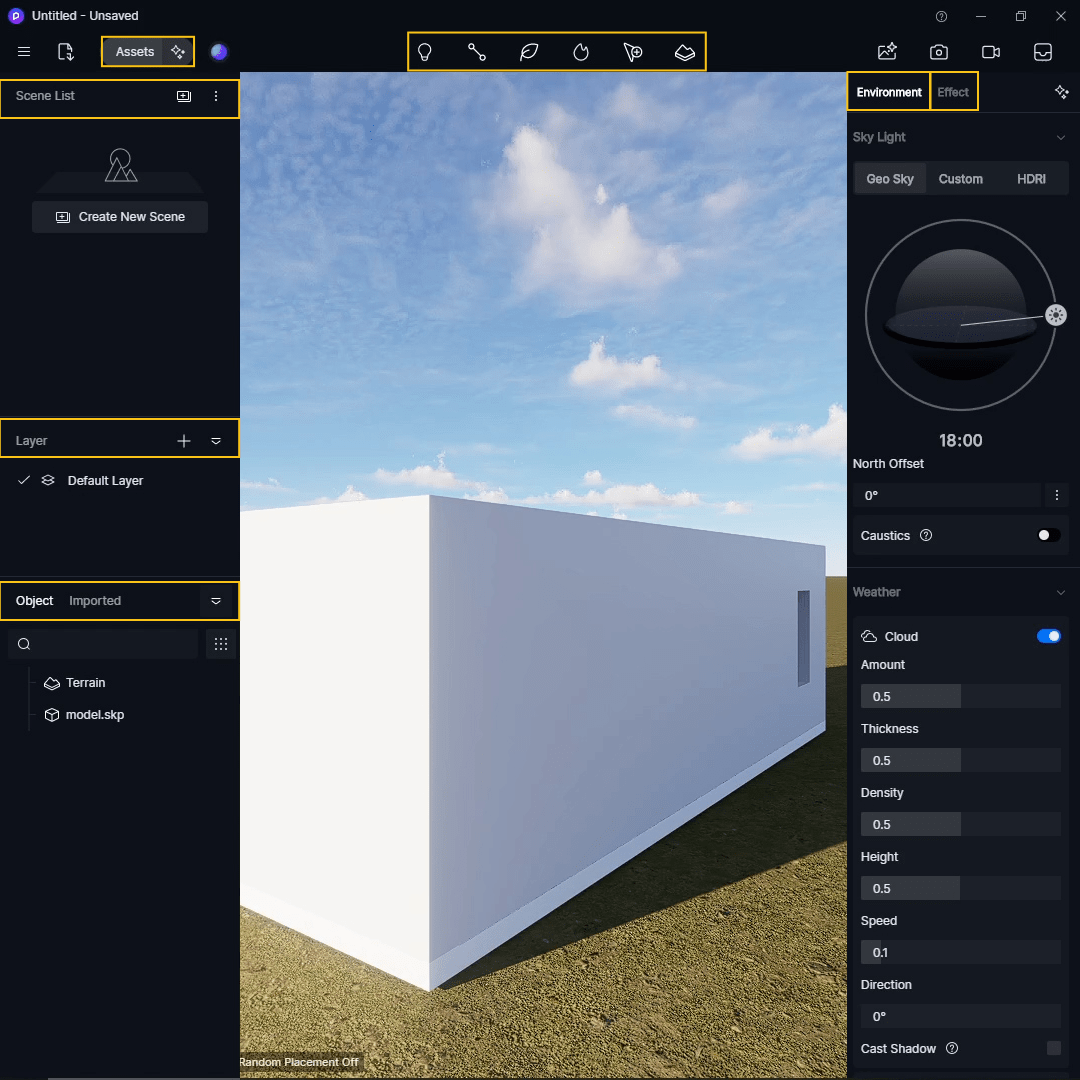
8. Lighting Setup
Lighting can make or break your render. D5 gives you several options:
Natural Lighting
- Geo Sky: Set time of day and sun direction using sliders.
- Custom Sunlight: Manually control sunlight intensity, direction, and shadow softness.
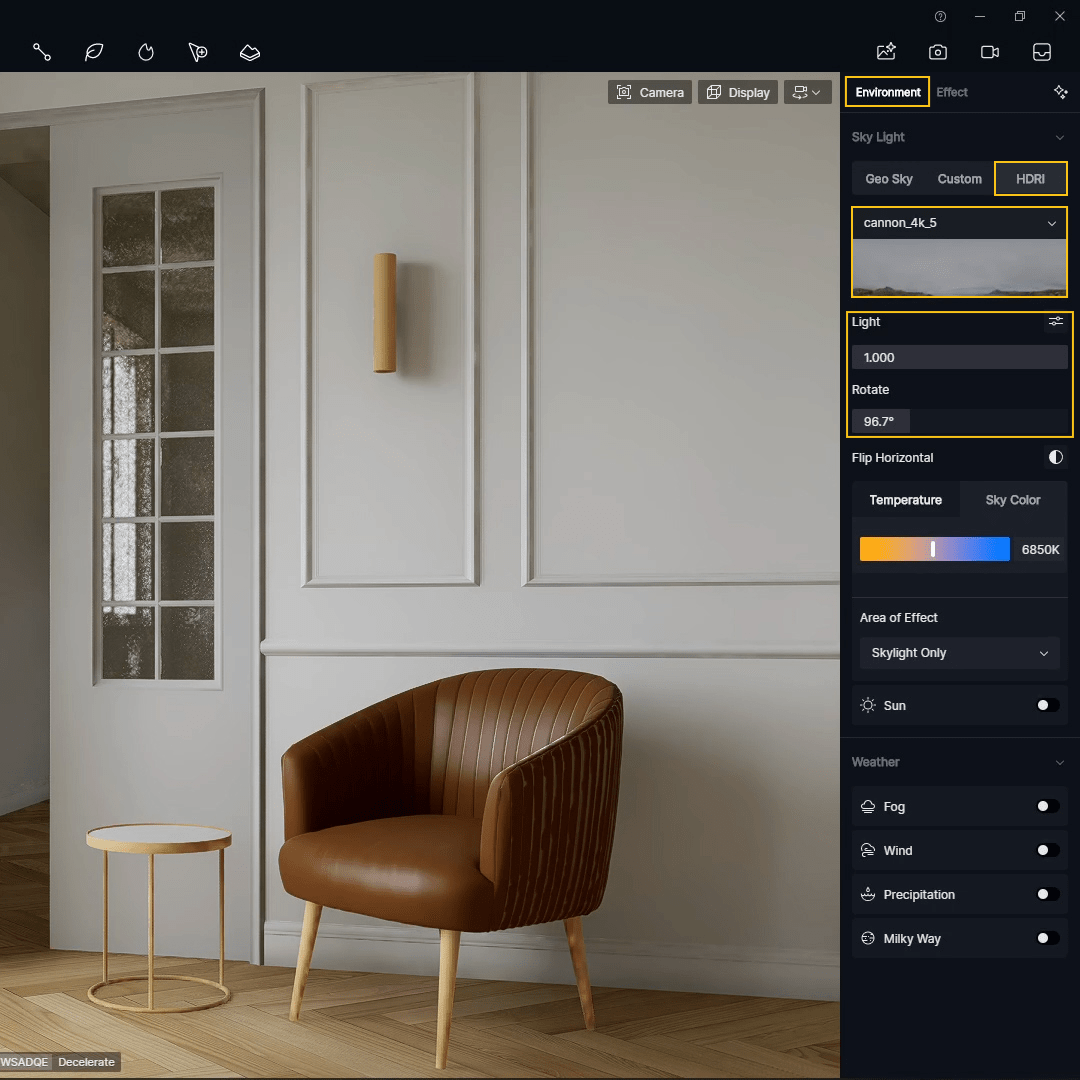
- HDRI Lighting: Use a panoramic HDRI image to create realistic ambient light and reflections.
Try using the built-in Sunset Glow 03 HDRI to add warmth and mood or upload your own HDRI map. You can tweak the rotation, intensity, and temperature for the perfect look.
Artificial Lighting
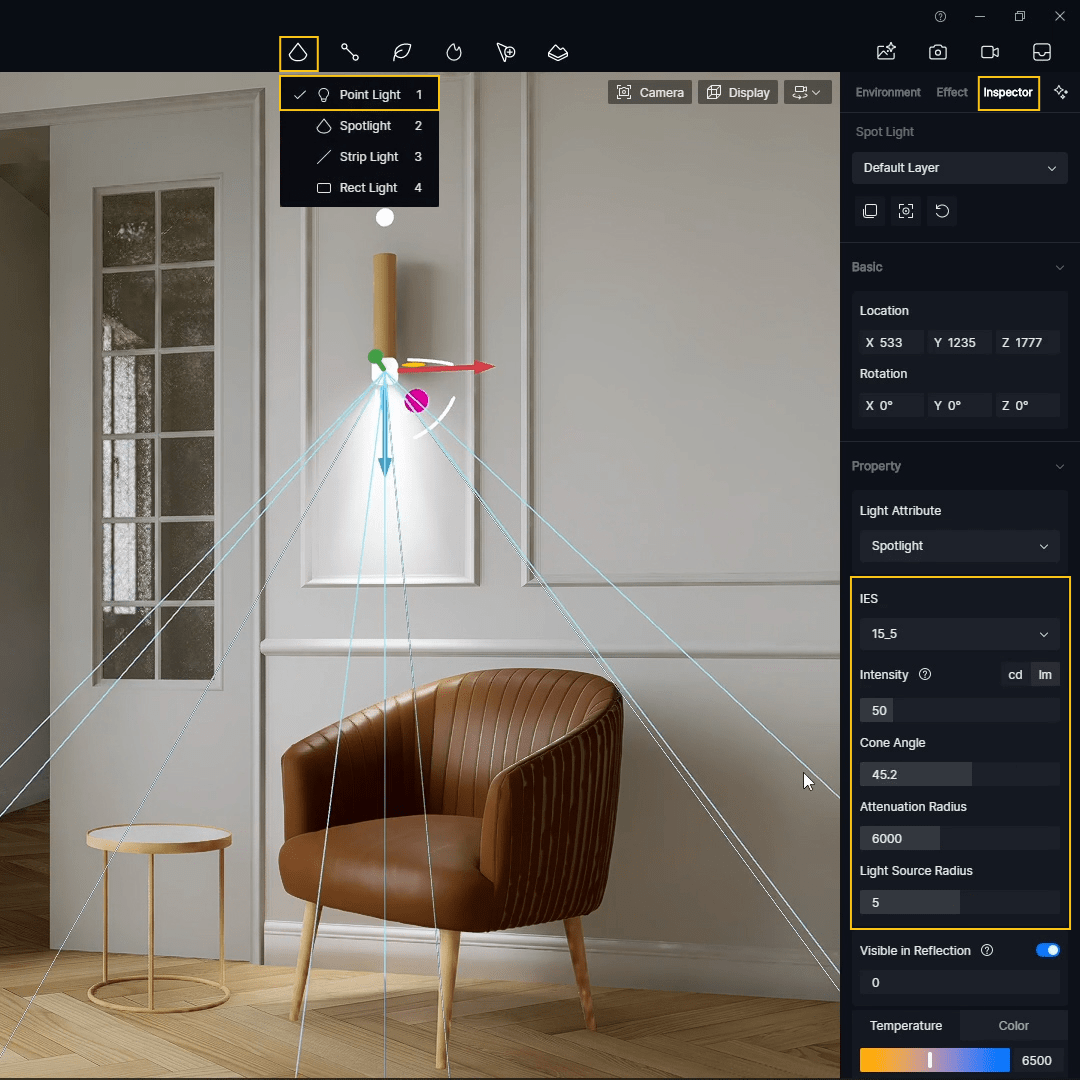
- Click Add Light and choose from spotlight, strip light, or point light.
- Position them on fixtures like wall lamps.
- In the Inspector, load IES files for realistic light patterns, and adjust intensity, cone angle, and temperature.
Combining natural and artificial light adds depth and realism to your scene.
9. Applying and Editing Materials
D5 Render gives you full control over materials, whether you’re using ready-made options or building your own. You can choose from:
- Ready-made materials from the D5 asset library – easy to apply and customizable.
- Custom materials created using texture maps like Diffuse, Specular, Roughness, and Normal.
🎨 Examples:
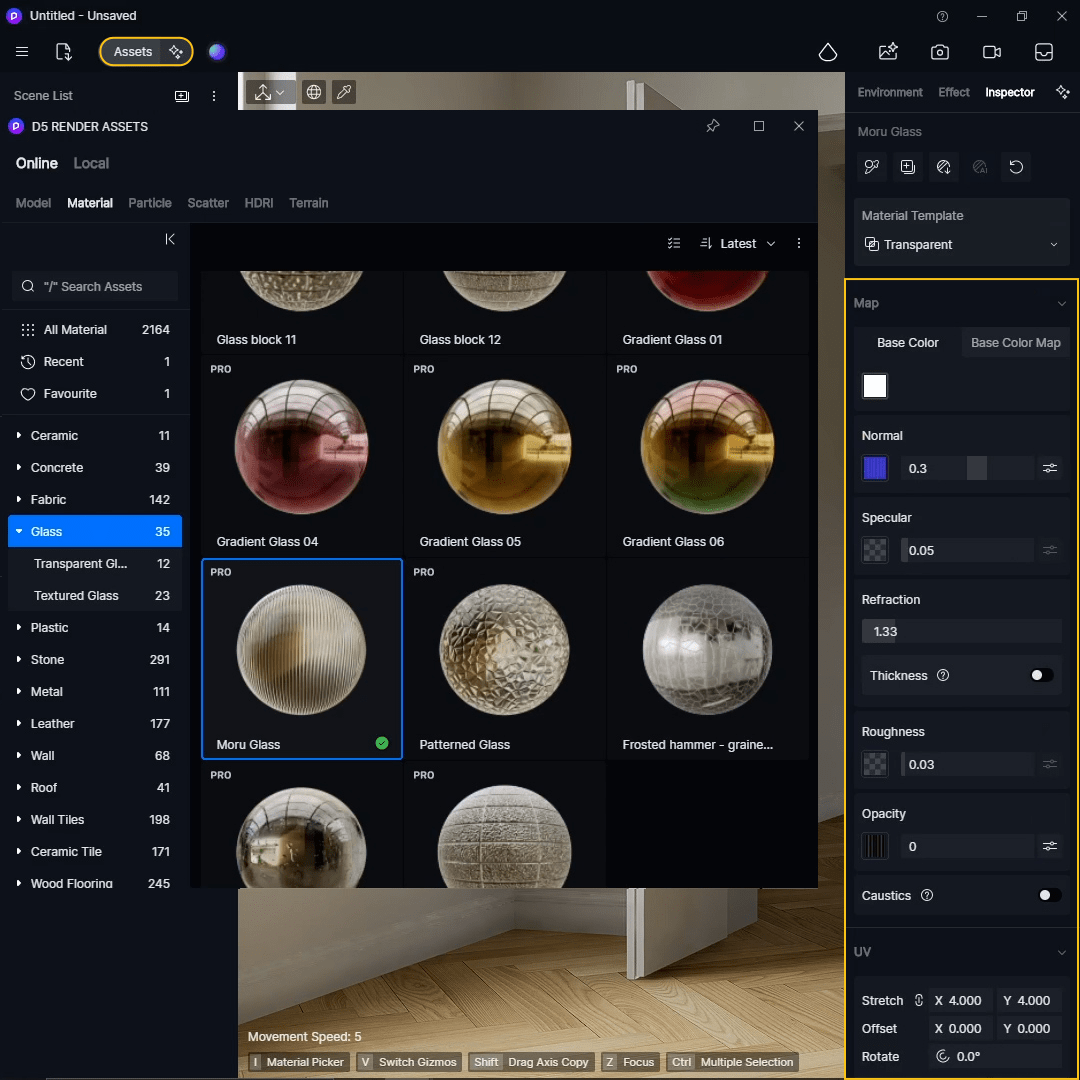
- Use Moru Glass for windows to achieve a frosted or textured glass effect.
- Apply Gold or Plastic materials for metallic accents or baseboards.
- Adjust UV mapping settings (X and Y scale) to fix pattern scale or stretching.
If a material looks too strong or too dark, you can always tweak its:
- Base Color or Base Color Map (for solid colors or textures)
- Normal (to add bump and highlight details)
- Specular Value (controls the strength of reflections)
- Roughness (higher = more matte, lower = shinier)
Want full control? You can also create PBR materials from scratch:
- Add a custom material from the “Others” category.
- Apply it to your object (e.g., coffee table or wall).
- Upload texture maps (Diffuse, Specular, Glossiness, Normal).
- Invert the glossiness map when using it in the roughness slot for correct results.
10. Adding Details to the Scene
Detailing your scene adds realism and personality. Here’s how to do it:
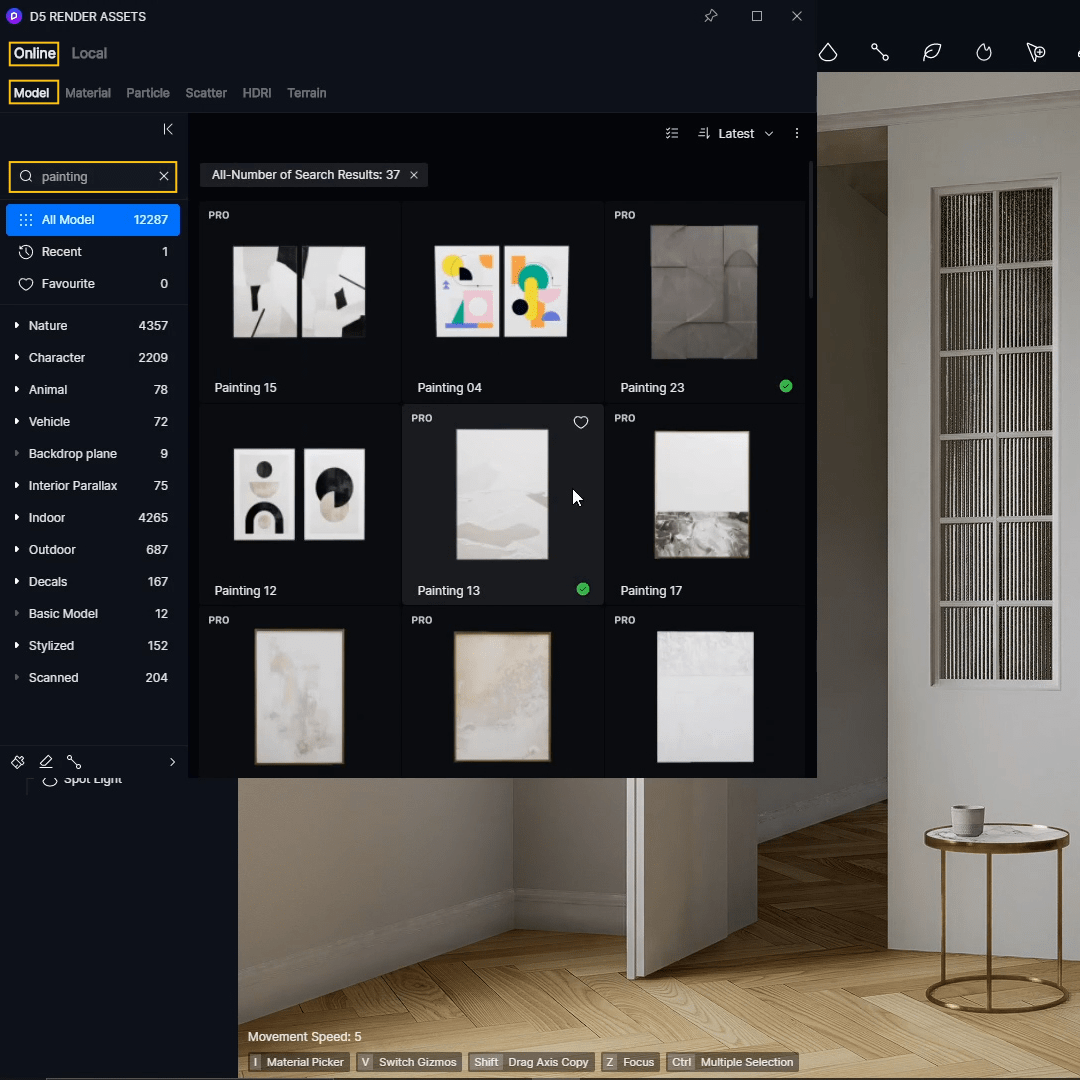
- Use the Asset Library to search for small objects like cups, paintings, plants, or books.
- Drag and drop items into your scene and adjust their position, scale, and rotation to fit naturally.
- Combine decorative elements to create cozy corners or visually rich areas.
These small details are what make a good render truly stand out.
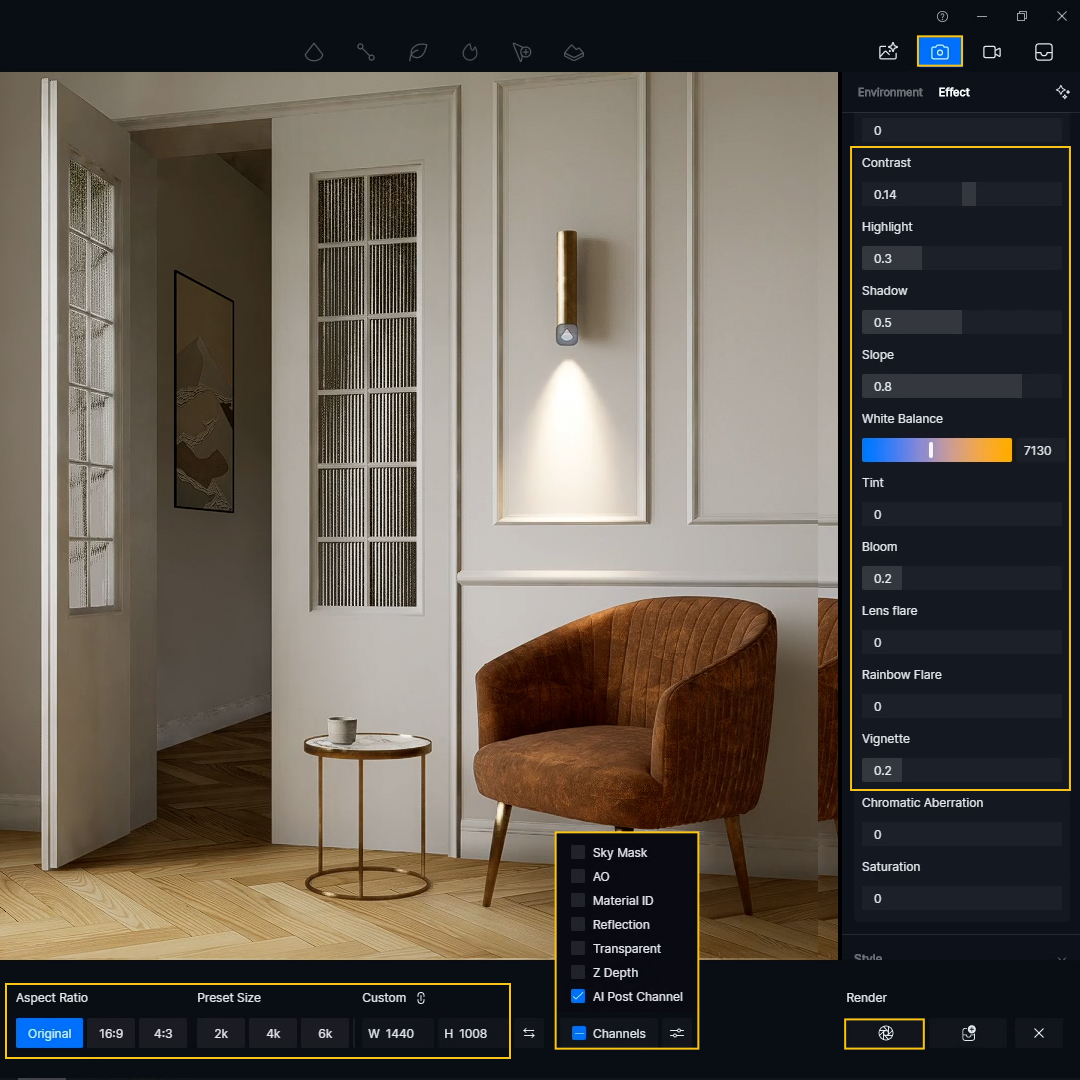
11. Render Settings & Post-Processing
Once everything looks good, it’s time to render:
- Open the Effects tab:
- Adjust Exposure, Contrast, and Temperature for overall tone.
- Add Vignette to subtly darken corners.
- Click the Image icon to open render settings:
- Choose resolution (e.g., 2K, 4K)
- Set aspect ratio (e.g., 1:1, 16:9, 4:5 for Instagram)
- Enable AI Post Channel to enhance your render with AI features
- Start the render and name your image accordingly.
This part only takes a minute, and you’re almost done!
12. Applying and Editing Materials
After rendering, you can take it further with AI Style Transfer:
- Open the AI Post-Processing tab
- Upload a reference image or choose from built-in styles
- Apply the effect and tweak the strength
- Blend it with the original in Photoshop if needed
This is a powerful way to add artistic flair or match a particular visual style for your portfolio.
And that’s it—your interior visualization is complete! With just a few easy steps, you’ve gone from SketchUp model to high-quality render using D5 Render.
Watch the full tutorial on Youtube!