5 Essential Lighting Tips for Stunning Visualizations in V-Ray for SketchUp
Creating realistic and captivating visualizations in V-Ray for SketchUp requires a deep understanding of lighting techniques.
As a key element of 3D rendering, lighting can elevate your designs, adding depth, mood, and realism. In this article, I’ll share five lighting tips to help make your renderings look amazing.
1. Defining Light Roles
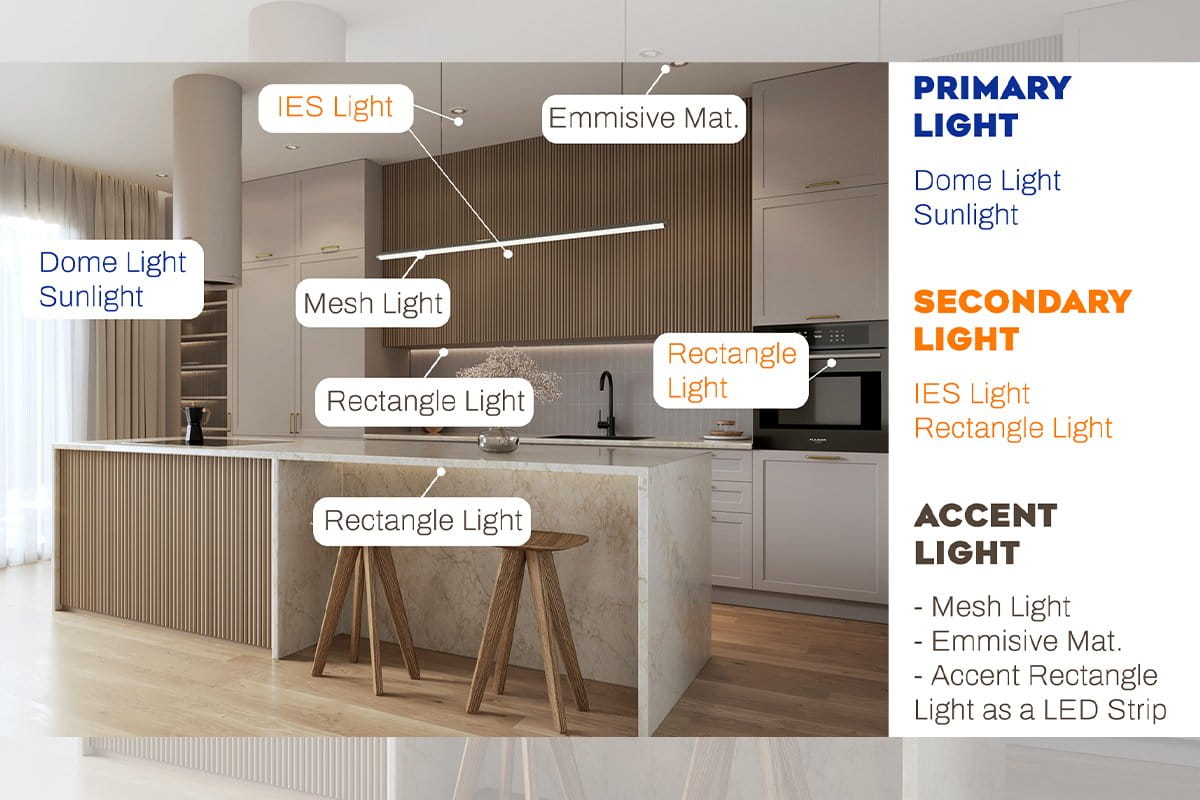
One of the foundational steps to mastering lighting is to understand and define the roles of your light sources. These are categorized into three types: primary, secondary, and accent lights.
- Primary Lights: These are the main lights that set the mood of the scene, like dome lights with HDRI maps or sunlight
- Example: Use a dome light with an HDRI map for natural outdoor illumination, or sunlight to mimic daytime settings.
- Secondary Lights: These support the primary light by reducing shadows and brightening specific areas. Rectangle lights and IES lights are commonly used here.
- Tip: Use IES lights for hanging lamps or ceiling lights to create realistic glow patterns.
- Accent Lights: These add detail, focusing on specific elements in your scene, such as LED strips under cabinets or mesh lights for decorative fixtures.
By blending these three types of lights, you can create visually balanced and dynamic renderings.
2. Blending Natural and Artificial Light
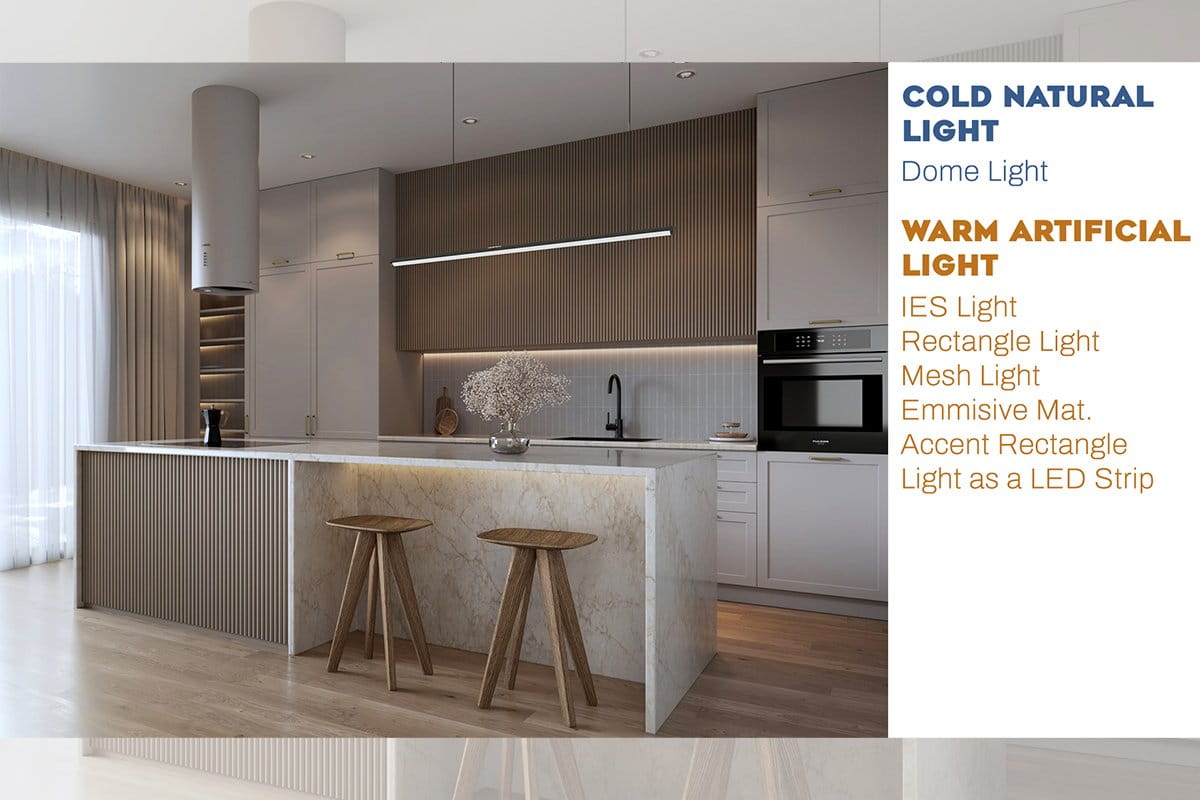
Combining natural and artificial lighting is a powerful technique for creating realistic and inviting visualizations. Natural light provides softness, while artificial light enhances mood and detail.
- Natural Light: Use dome lights with HDRI maps or sunlight for a cold white hue.
- Artificial Light: Add warmth with IES lights or rectangle lights. Set their color temperature between 3000K to 4000K for a cozy feel.
Pro Tip:
Experiment with color contrast by combining cold white natural light and warm yellow artificial lights.
3. Mastering Light Mix
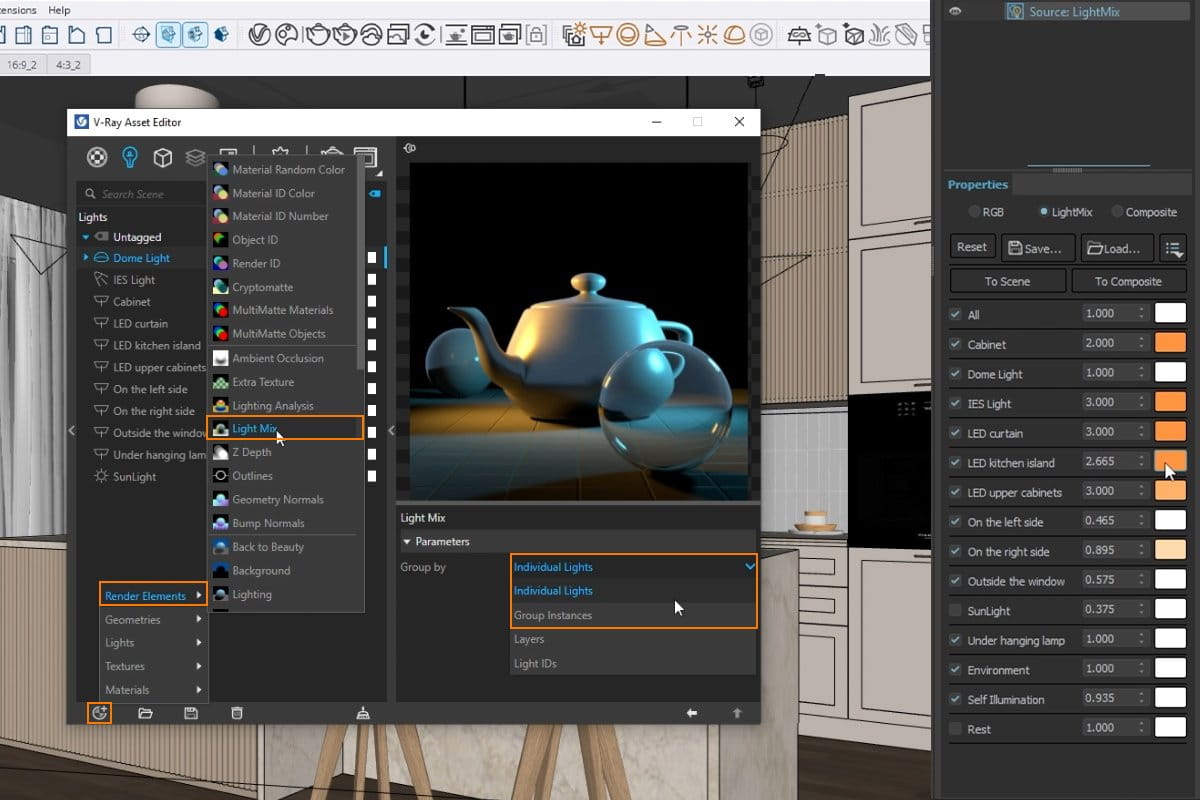
The Light Mix feature, available in V-Ray 5 and later, is a game-changer for fine-tuning your scene’s lighting. This tool allows you to adjust the intensity and color of lights after rendering, saving you time and effort.
Steps to Use Light Mix:
- Open the Asset Editor and create a new render element – LightMix.
- Group lights together or manage them individually in the Light Mix properties.
- Render your scene and adjust the lights intensity and color
Light Mix is perfect for testing different lighting setups without re-rendering the scene.
4. Using Invisible Rectangle Lights
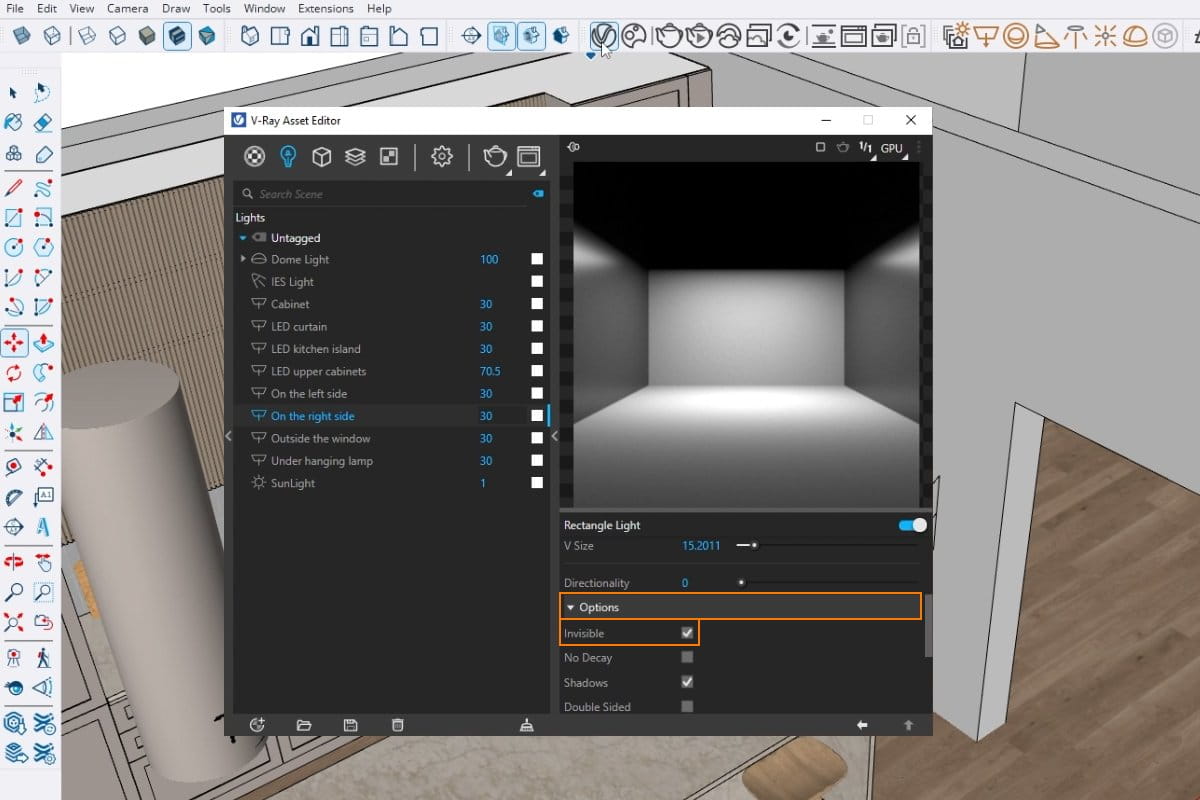
Invisible rectangle lights are excellent for illuminating dark areas without showing the light source in your render.
How to Set It Up:
- Add a rectangle light to your scene and position it in a dark area.
- Rotate the light at an angle to avoid direct illumination perpendicular to the camera.
- In the light’s properties, enable the Invisible option.
This method is particularly useful for adding subtle reflections and brightness to shadowed areas.
5. Enhancing Lighting with Directionality
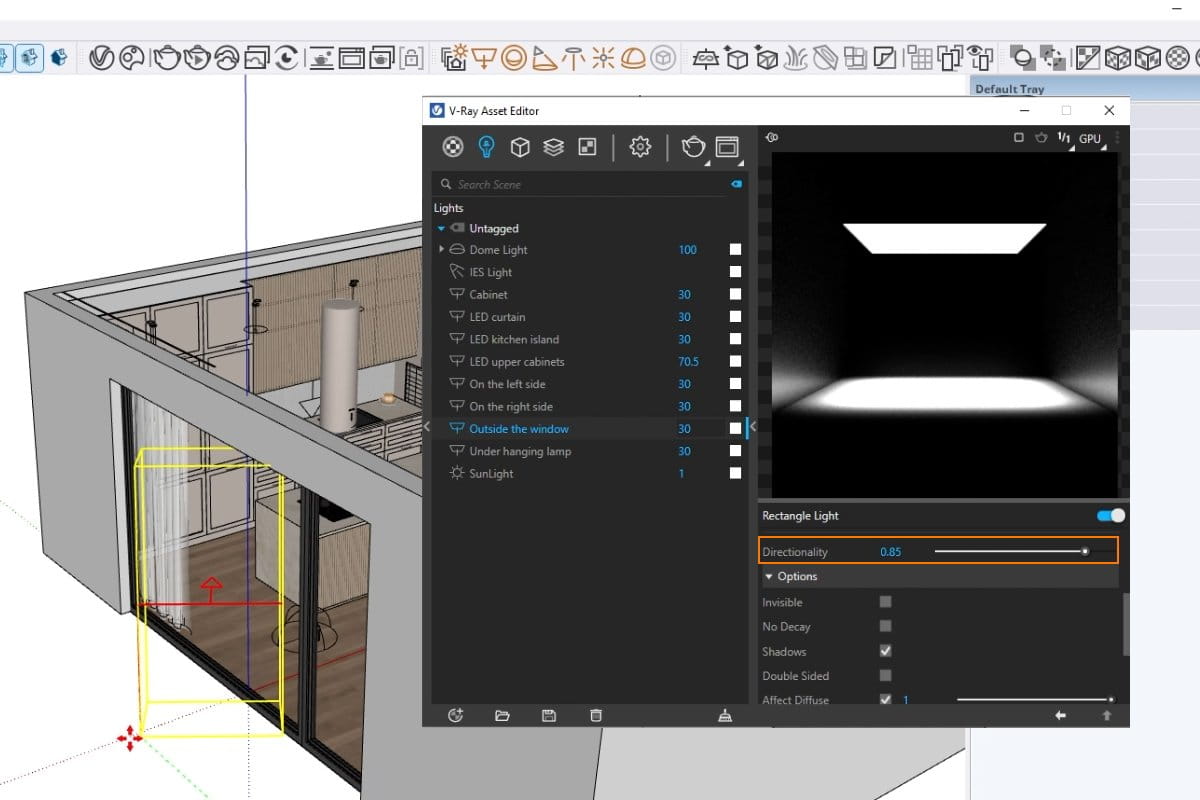
Adjusting the directionality of your lights can significantly improve your renderings. Directionality controls how focused or diffused a light source is.
- Soft Lighting: Set directionality to 0 for evenly spread, diffused lighting.
- Focused Lighting: Increase directionality to 0.7 or 0.8 to create strong contrasts and defined shadows.
Conclusion
Lighting is one of the most crucial aspects of creating professional visualizations in V-Ray for SketchUp. By mastering these five essential tips—defining light roles, blending natural and artificial light, mastering Light Mix, creating invisible rectangle lights, and enhancing directionality—you can elevate the quality of your renders.
