Best Camera Settings for Small Spaces in V-Ray for SketchUp
Getting the right camera settings is crucial for great visualizations.
I’m going to walk you through the most important settings like field of view, perspective, camera height, and more. These settings can really affect your results. Let’s dive in and improve your visualizations together.
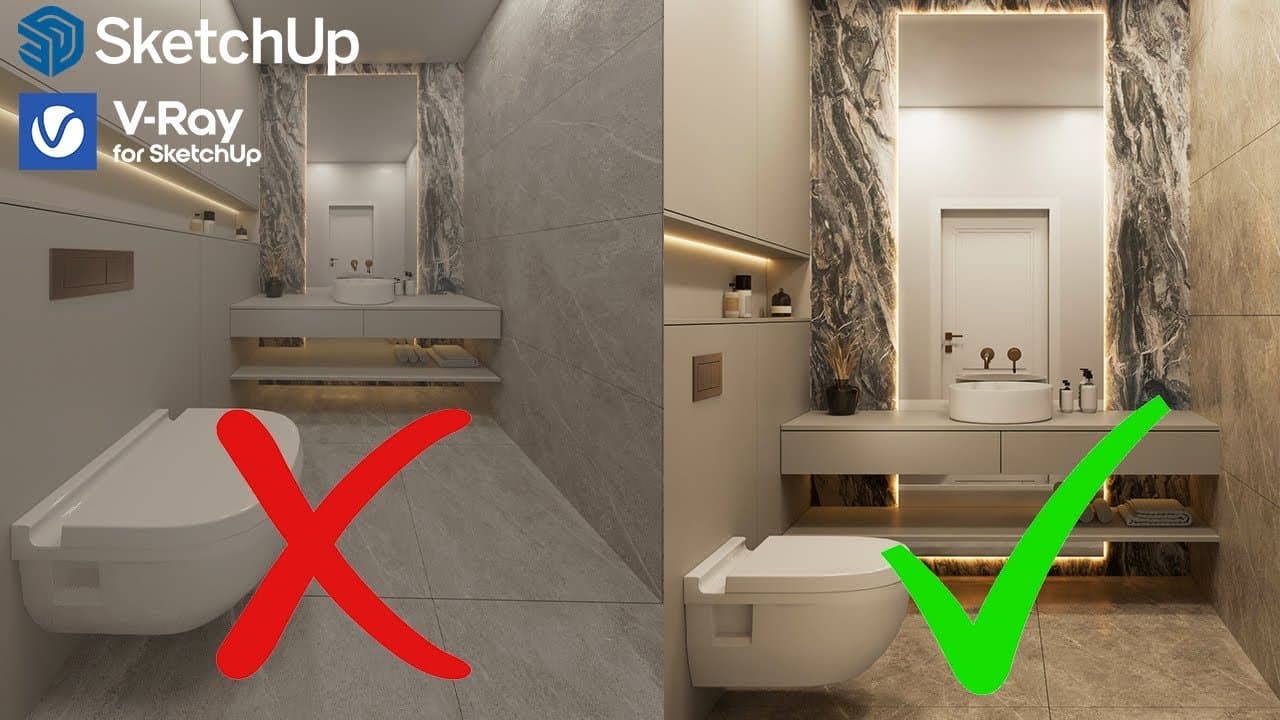
Setting Up the Camera in a Small Bathroom
To start, use Tags to keep your model organized. First, hide the ceiling to get a good look inside the bathroom. Then, create a view. For small spaces like this bathroom, using a section is the best way. Click on the section tool, place it on the wall, confirm, and use the move tool to position the section plane accurately.
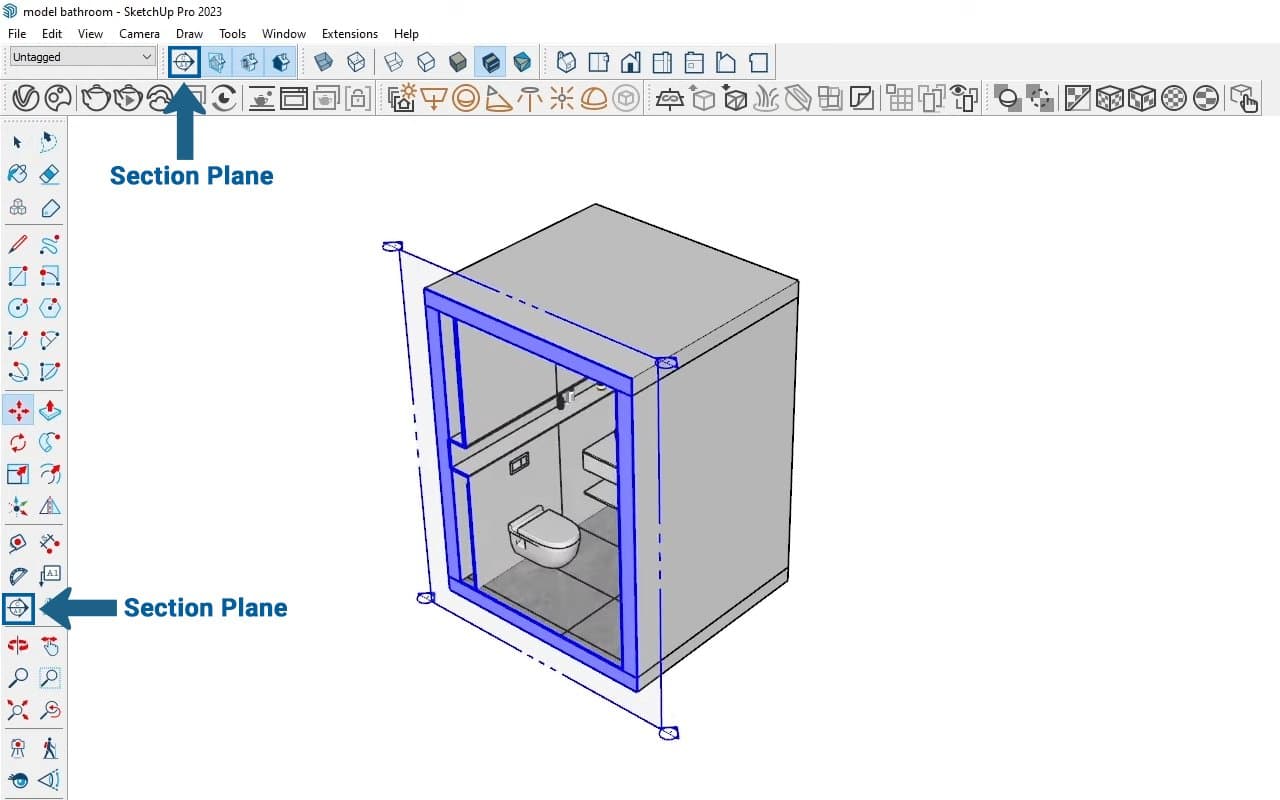
Organizing the View
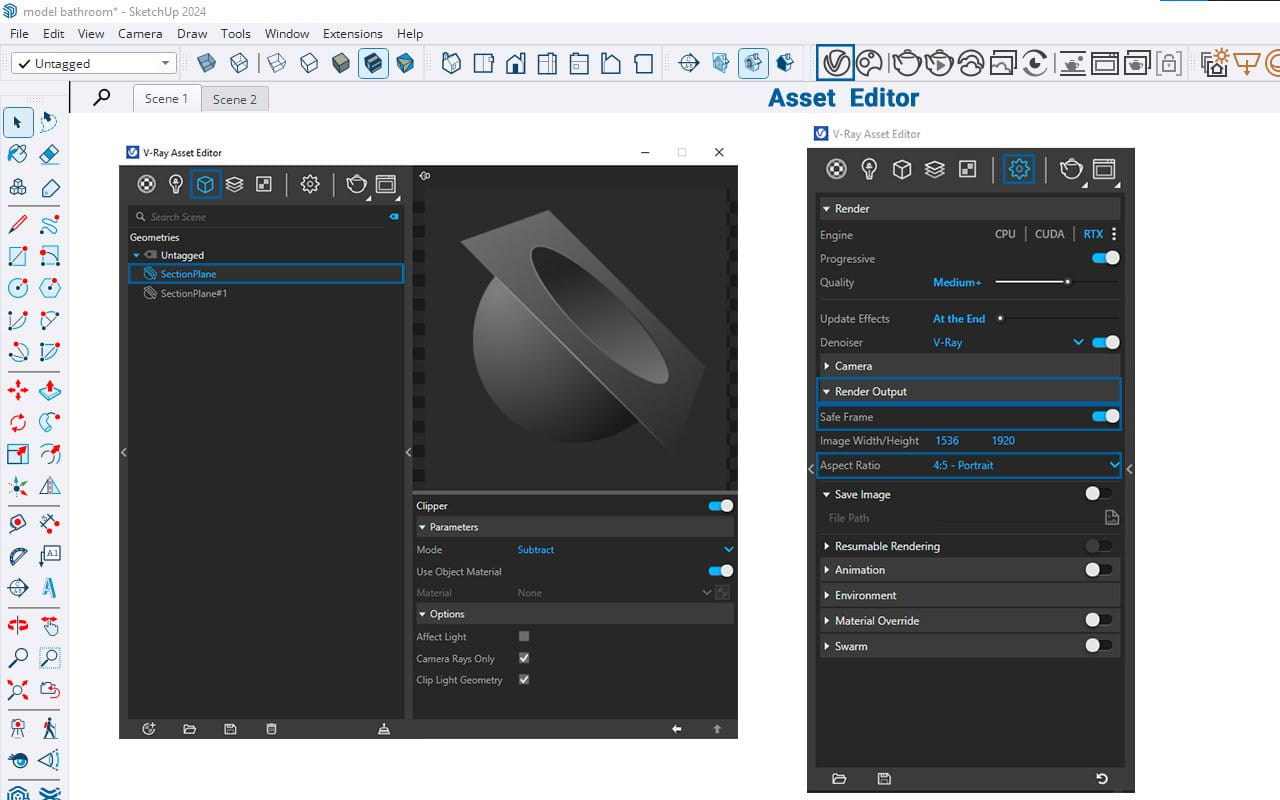
Go to Asset Editor – Geometry Tab – Section settings, uncheck “Affect Light,” and check “Camera Rays Only.” This prevents outside light from interfering and keeps the section hidden in mirror reflections.
Then, go to the Render Output tab and turn on Save Frame. This ensures darker areas won’t appear in the final render. Try different aspect ratios to find the best view. For narrow spaces, go for a square or portrait ratio. A 4:5 ratio works well, so adjust the view accordingly.
Adjusting the Field of View
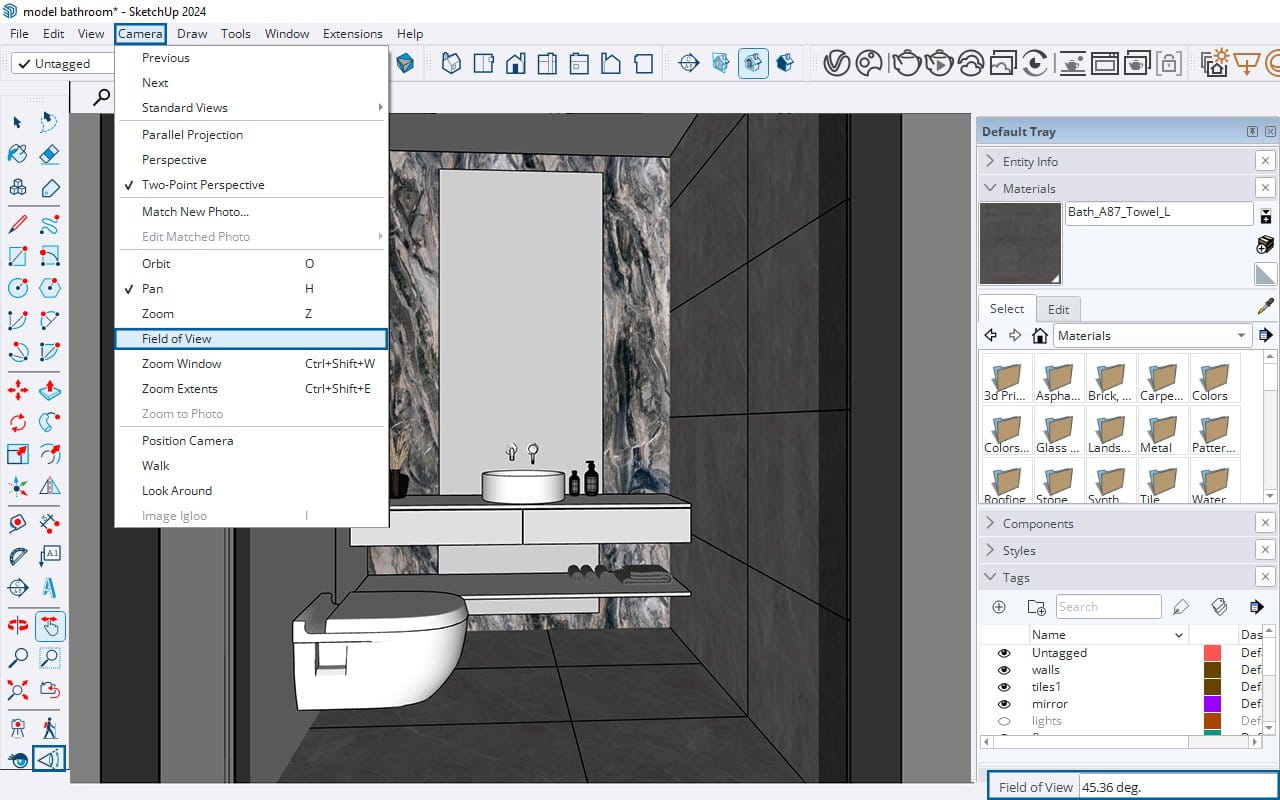
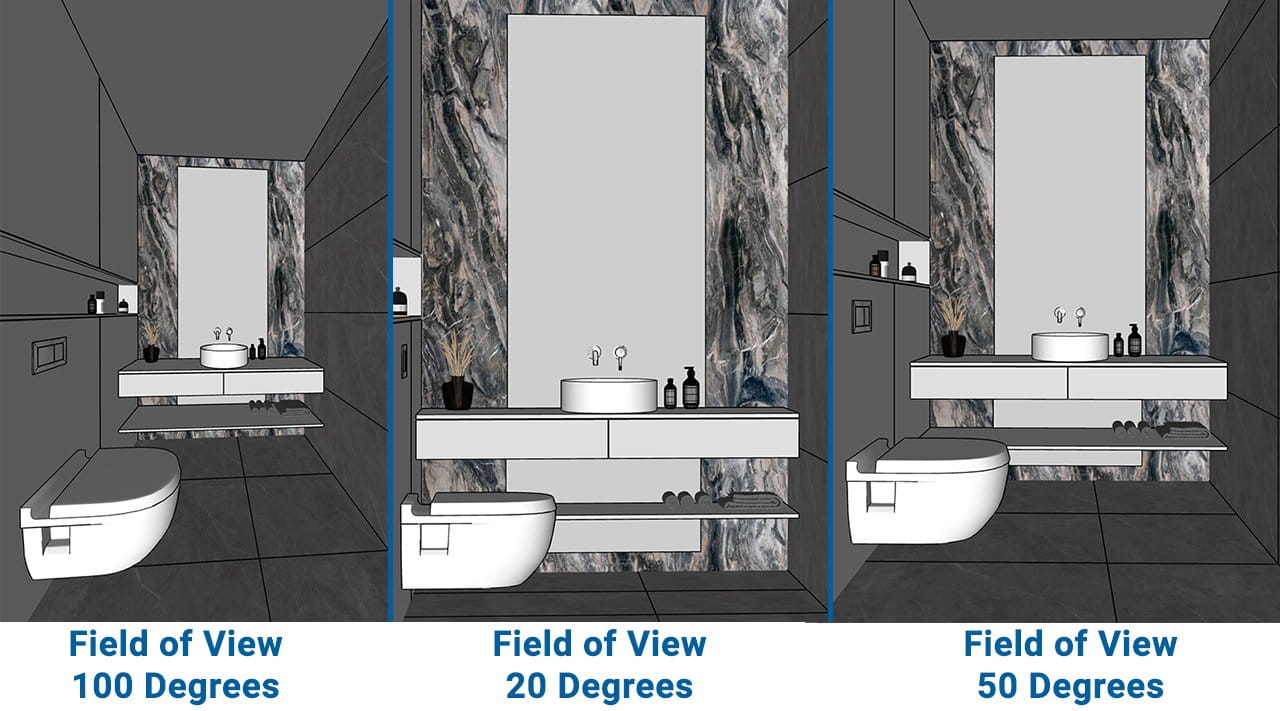
One crucial camera setting is the Field of View. Go to the Camera tab, select Field of View, or click on the icon on the left side.
Avoid extreme values. If the field of view is too high, like 110°, the view gets distorted and the bathroom looks weird. If it’s too low, like 27°, the scene lacks depth. Aim for 40° to 60°. Around 45° works great.
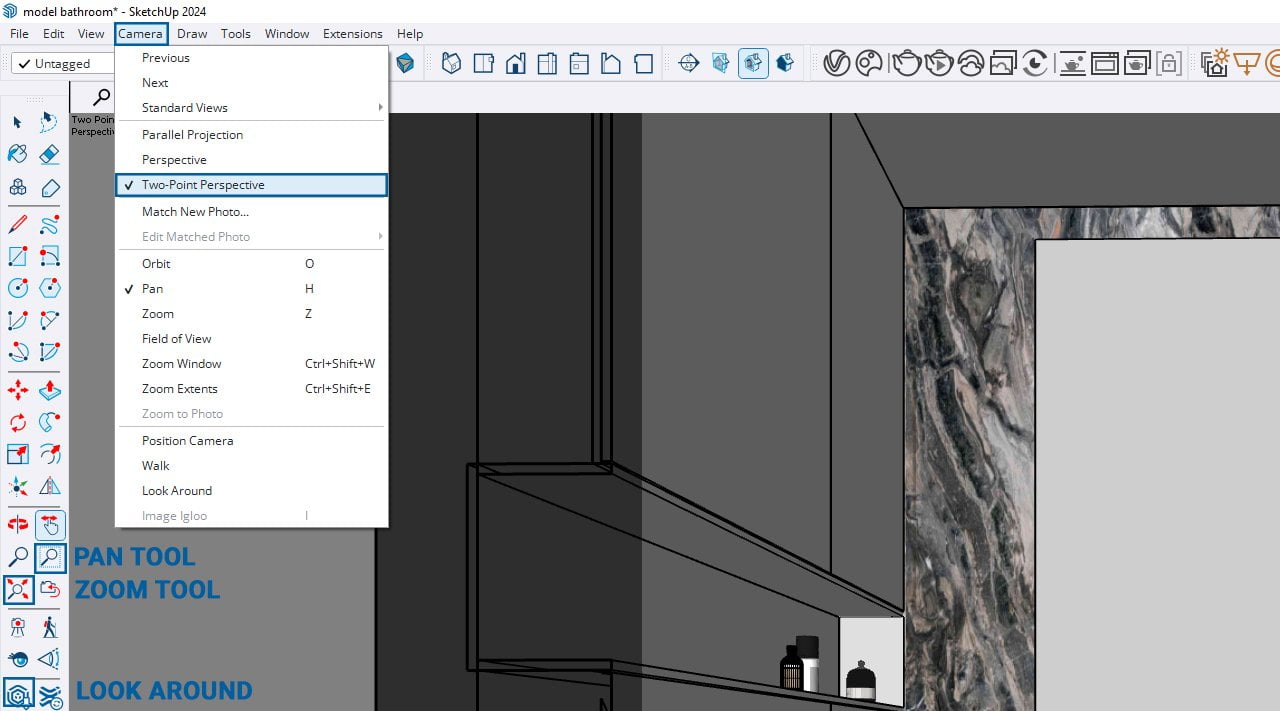
Pan Tool, Zoom Tool, Look Around and Two-Point Perspective
To fine-tune the view, use the zoom and pan tool. Clicking on “Look Around” changes the eye height, giving a different perspective. Position the eye level in front of the main objects for a natural look.
Next, set up two-point perspective to straighten the image and make vertical lines straight, reducing the third-point perspective. Before activating this, make sure your view isn’t too distorted.
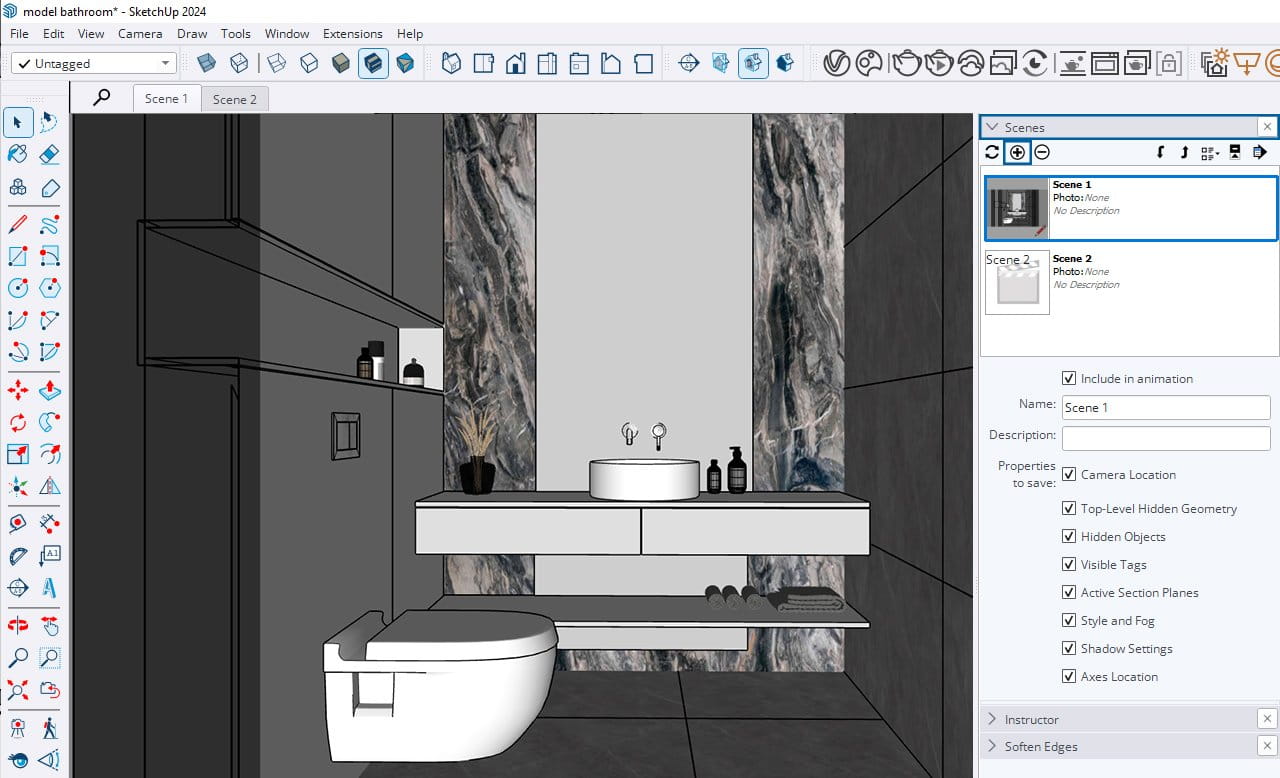
Saving and Rendering the Scene
After adjusting the view, save the scene. Go to the scene window on the right and click the plus icon to create a new view. Proper perspective enhances the visualization, especially in a small, narrow bathroom.
Creating Additional Views
For a second view, you need to create another section.
Select everything in the scene, and create a group. Open the group, click twice on the first section plane to activate it. Close the group. With the first section active, create the second section.
Use the zoom and pan tool to adjust the view, check the field of view, and set two-point perspective. Create a new scene. As I did earlier, go to the Asset Editor, select the Geometry tab, uncheck ‘Affect Light’ in the new section, and check ‘Camera Rays Only. Create a second scene.
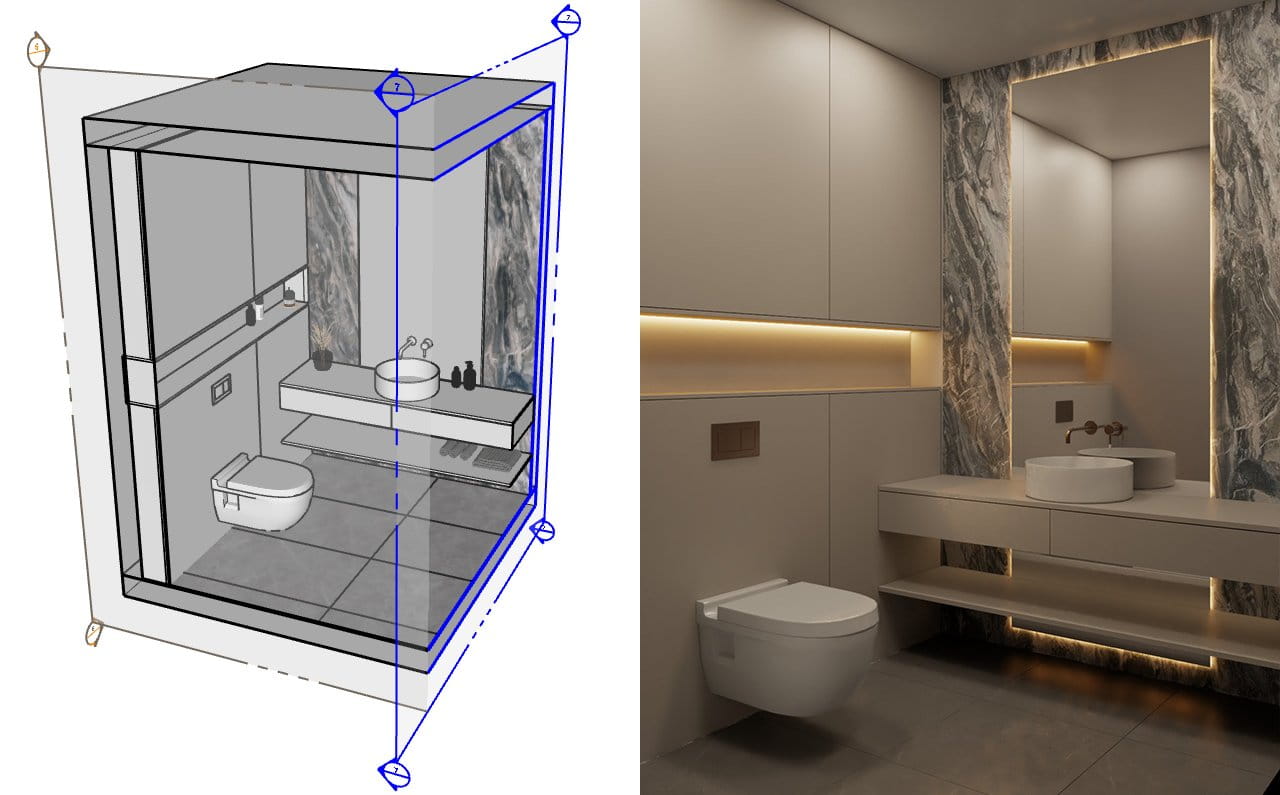
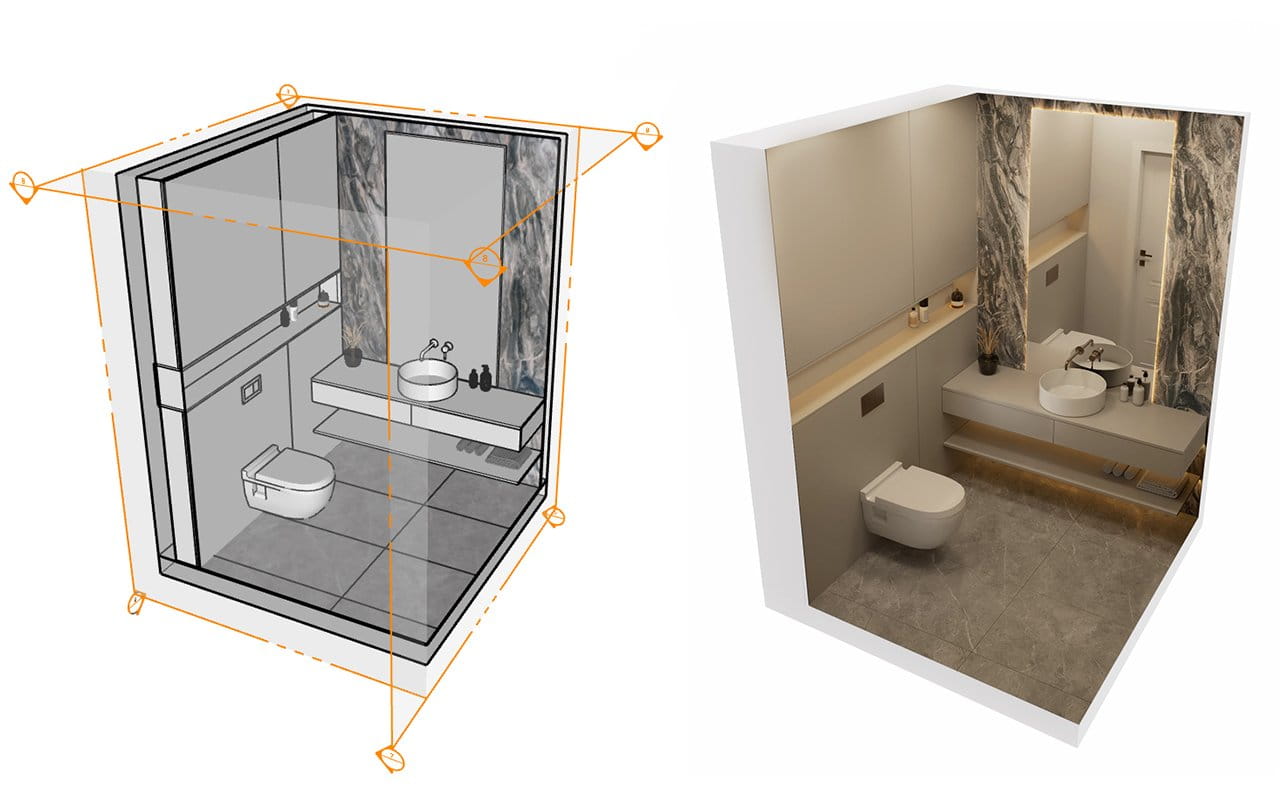
Creating a Third Axonometric View
For the third view, create a third section plane. Once again, select all sections and elements and group them together. Open the group to activate the section planes, then close the group and create the third section.
This will cause all three section planes to be active, making it easy to create an axonometric view.
Conclusion
Mastering camera settings in V-Ray for SketchUp can significantly enhance your visualizations. Properly adjusting the field of view, perspective, and camera height can make a big difference, especially in small spaces.
Don’t be afraid to experiment with different settings and views to find what works best for your scene.


