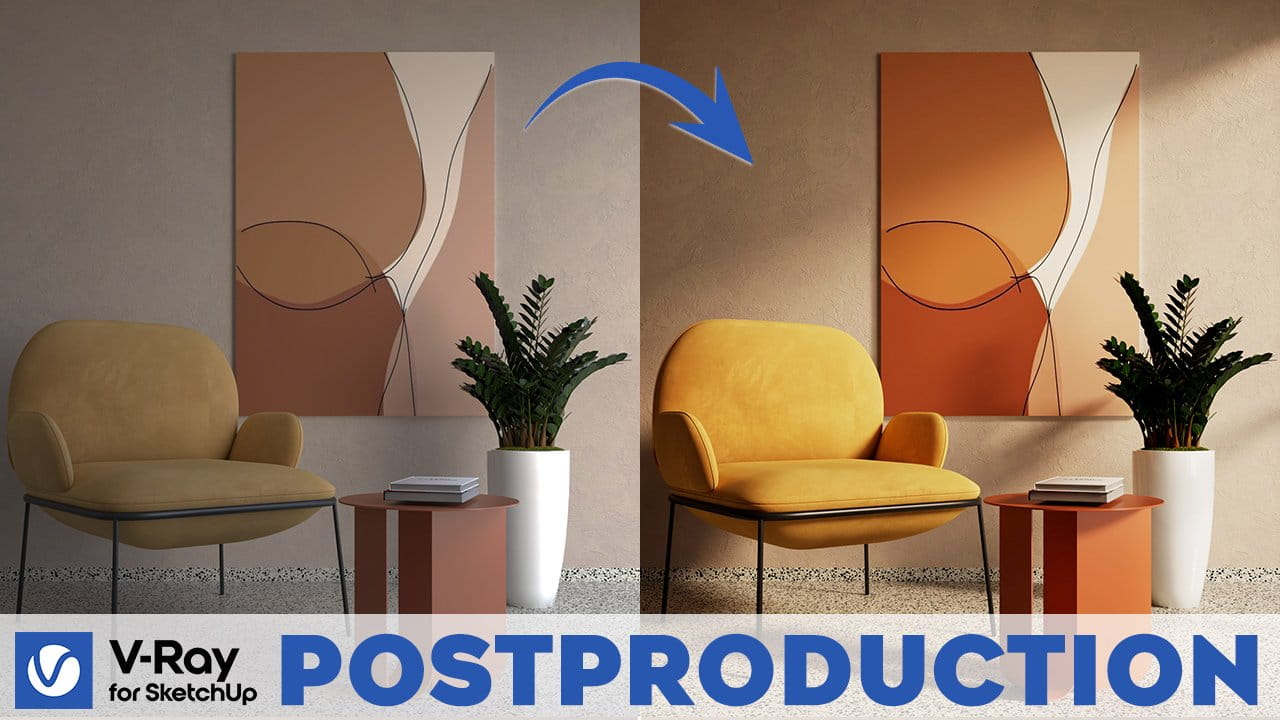
Post-production is a crucial phase in 3D rendering that can significantly enhance the quality of your visualizations.
With V-Ray for SketchUp, the Frame Buffer offers powerful tools to refine your renders. This article will guide you through the essential steps of using V-Ray Frame Buffer to improve your renders.
Setting Up Your Scene for Post-Production
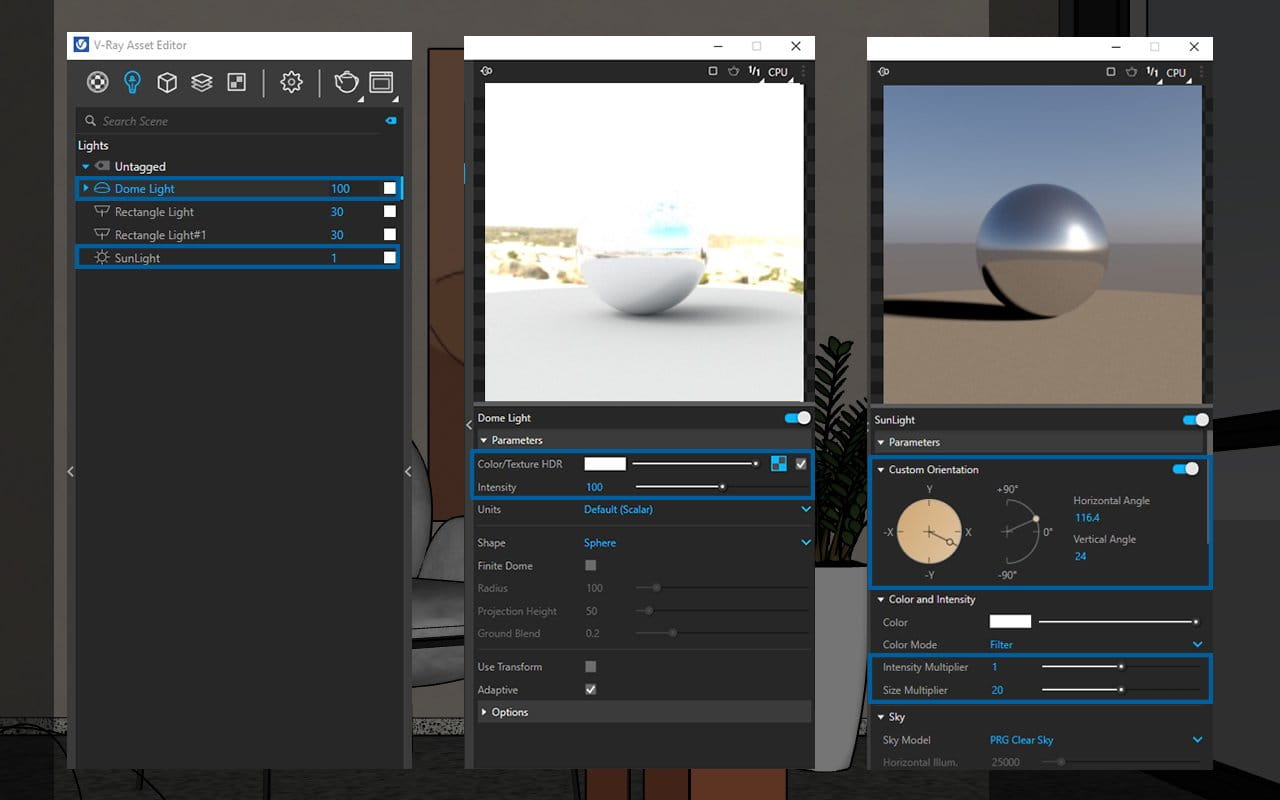
Before diving into post-production, it’s essential to set up your lights properly in the V-Ray Asset Editor.
- Dome Light and Sunlight Setup
- Dome Light: Set with an intensity of 100 and upload an HDRI map for realistic lighting.
- Sunlight: Use custom orientation to achieve natural lighting effects. Position the sun above the horizon and ensure it shines through the windows. Set the intensity multiplier to 1 and the size multiplier to 20 for softer shadows.
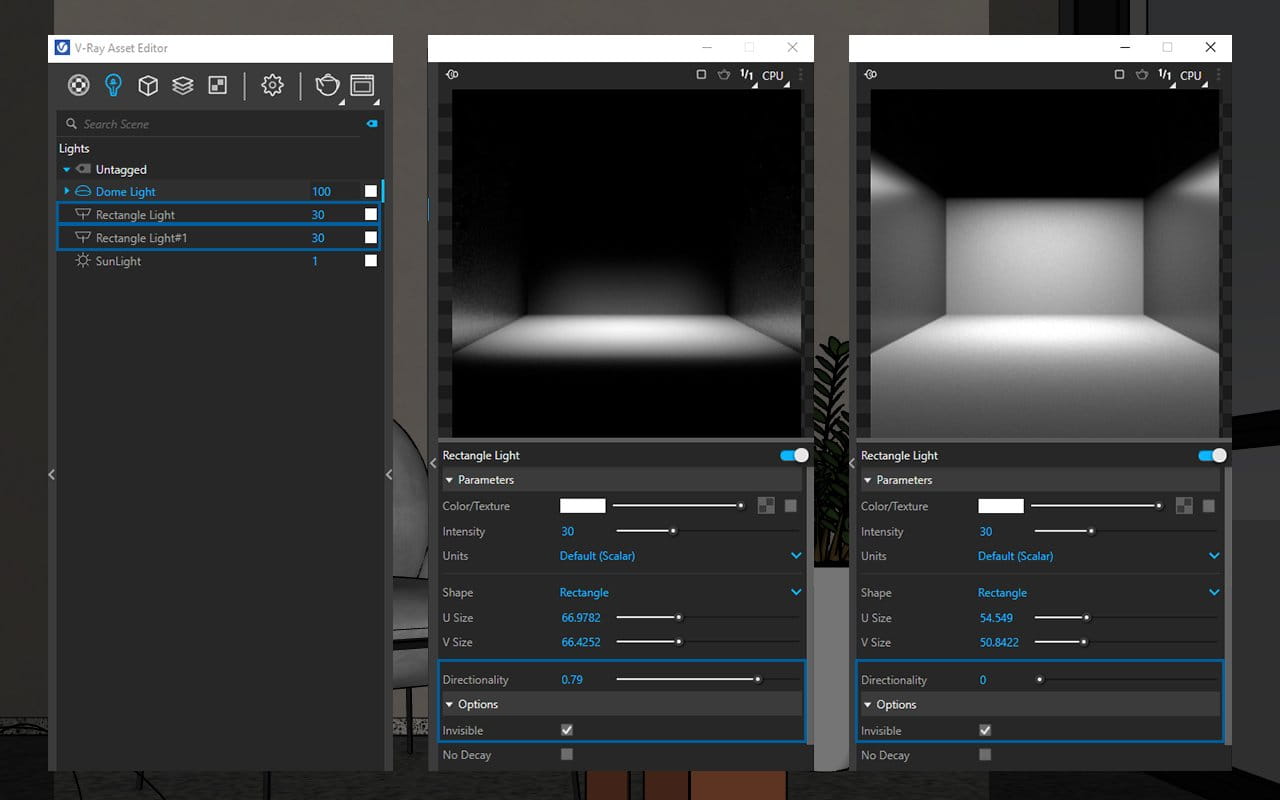
2. Rectangle Lights
- Rectangle Light 1: Positioned with a white color and intensity of 30. Set the directionality to 0.8 for sharp shadows and intense light.
- Rectangle Light 2: Located on the left side with low intensity. Directionality is set to zero for smooth shadows. Set this light as invisible to hide the light plane.
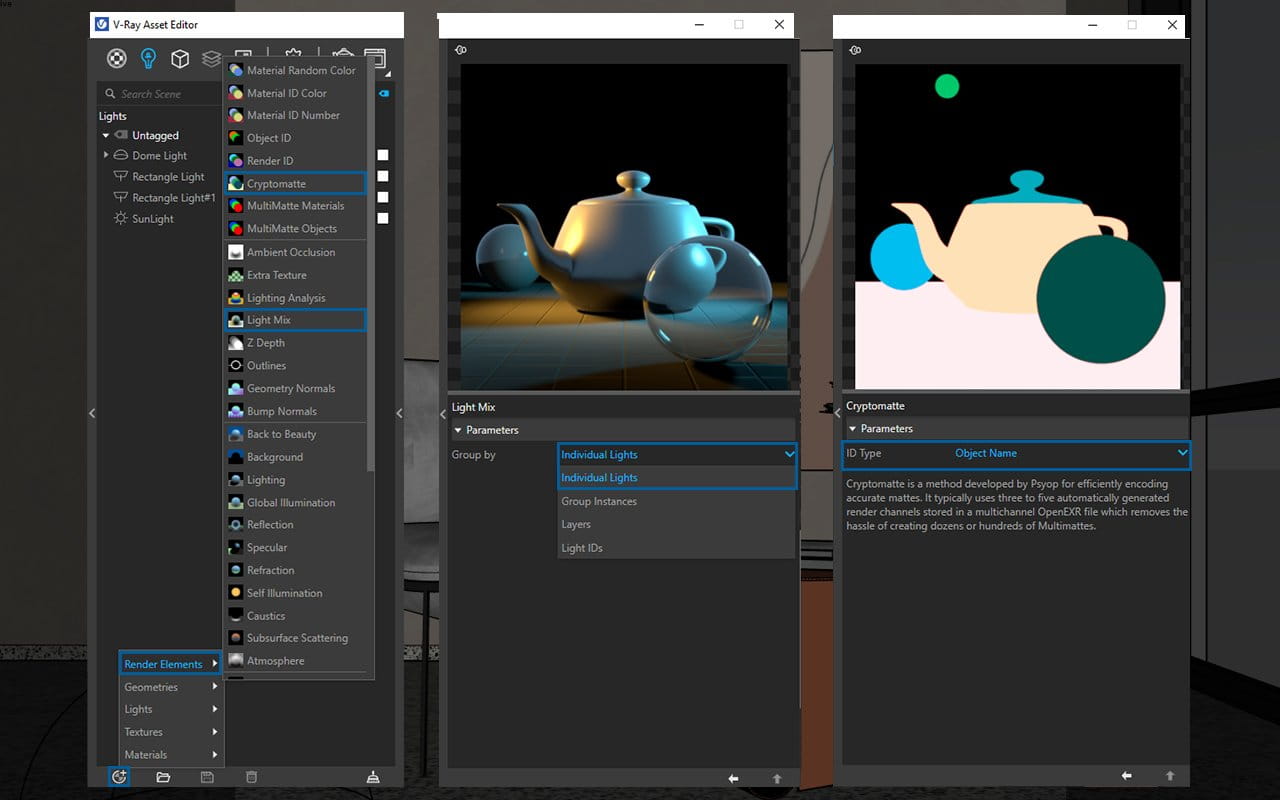
Creating and Using Render Elements
Render elements are essential for effective post-production adjustments. Here’s how to create and use LightMix and Cryptomatte:
LightMix
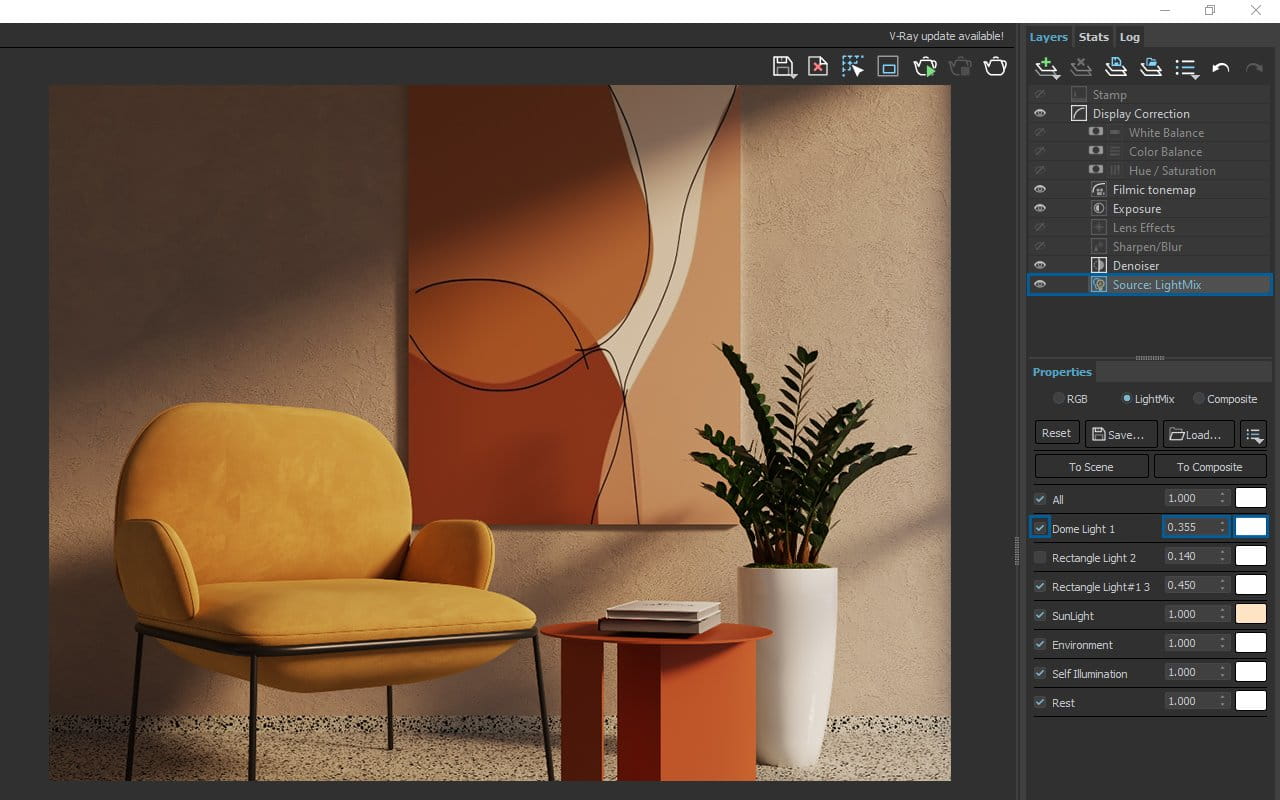
Click on the Create Asset icon, select Render Element, and enable LightMix. In the LightMix properties, choose the parameter Group By. For a scene with a few lights, use the Individual Lights option. For multiple similar lights, consider Group Instances.
Cryptomatte
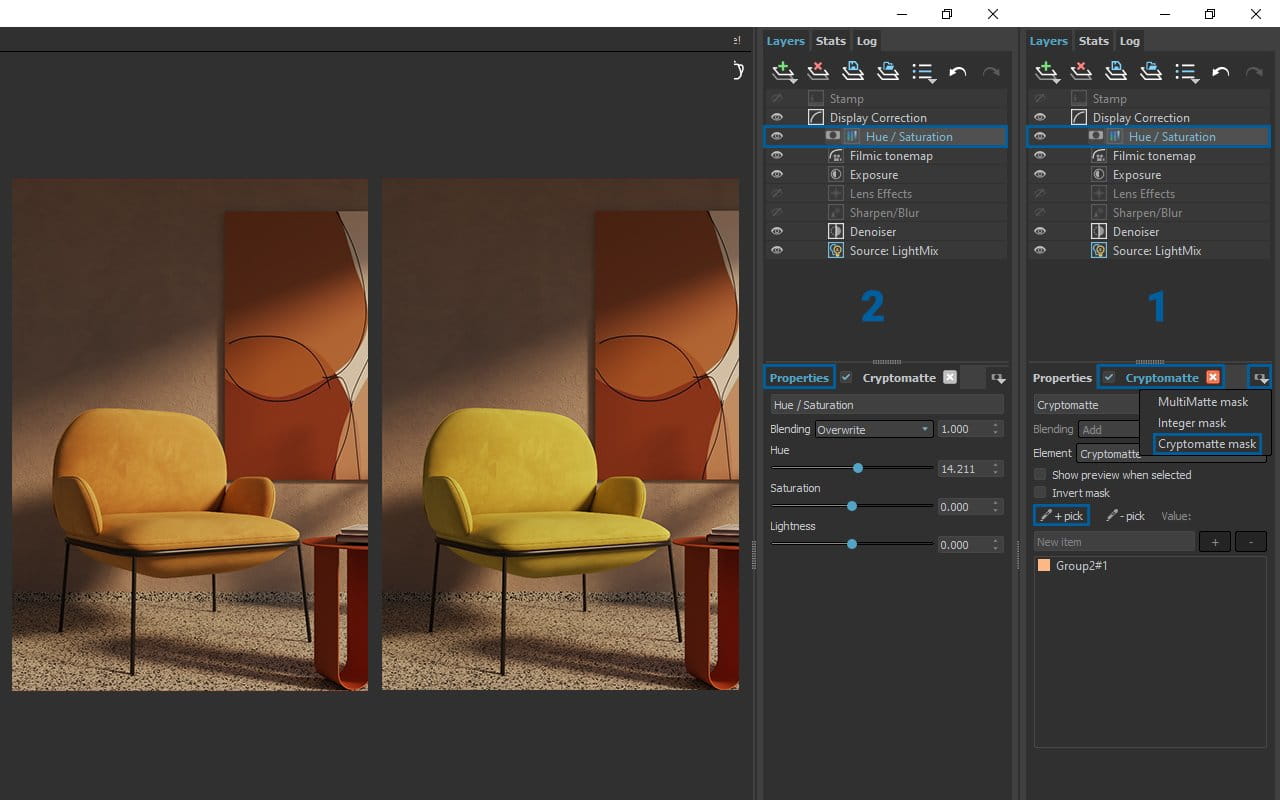
Create a Cryptomatte render element to change the color of certain parts of your scene, like the armchair or walls. This allows you to adjust colors and saturation of individual models.
Adjusting Lights with LightMix
With the LightMix render element created, you can fine-tune the lighting of your scene during post-production in the V-Ray Frame Buffer. Use the LightMix options to:
- Turn Lights On/Off: Toggle individual lights to see their impact on the scene.
- Change Intensity and Color: Adjust the intensity and color of lights.
Exposure Layer
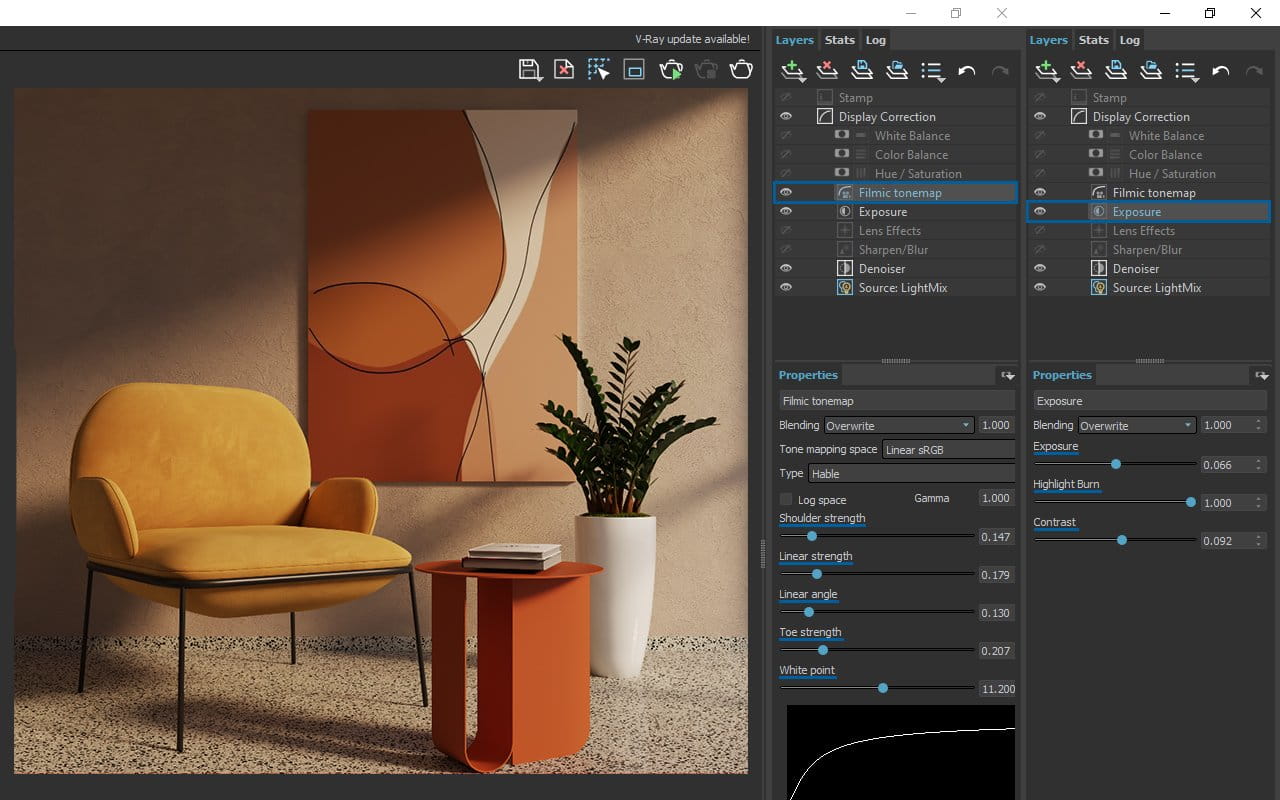
Create an Exposure layer to modify the brightness and contrast of your scene. Increasing the exposure slightly can brighten the image, while boosting contrast enhances visual depth.
The Highlight Burn parameter reduces overexposed areas in the scene. Be cautious with the Highlight Burn setting—setting it to 0 can eliminate contrast and result in a flat image.
Using Filmic Tone Map
The Filmic Tone Map layer is a crucial tool for enhancing the contrast, shadows, and highlights in your renders. In V-Ray, the Hable type of Filmic Tone Map is highly recommended for its effectiveness. Here’s a brief overview of the key settings and their impact:
- Shoulder Strength: Higher values make the overall image brighter.
- Linear Strength: Controls how strong the effect of the linear angle is.
- Linear Angle: Increasing this value makes midtones brighter.
- Toe Strength: Higher values make the shadows and midtones darker.
- White Point: Adjusts the brightness of the entire image evenly.
The goal with these adjustments is to find a balance between highlights and shadows to enhance both contrast and lighting.
Cryptomatte Render Element for Hue and Saturation Adjustments
Applying Hue/Saturation
Create a new Hue/Saturation layer to adjust the color and saturation of particular elements in your scene. Use Cryptomatte masks to selectively modify colors for different objects, such as an armchair or walls.
Click the arrow to ‘Add New Mask Layer’ and choose ‘Cryptomatte Mask.’ Select the element you want to modify, like the armchair model. Go to the Properties tab and adjust the hue and saturation. The color of the selected model will change accordingly
Saving and Loading Presets
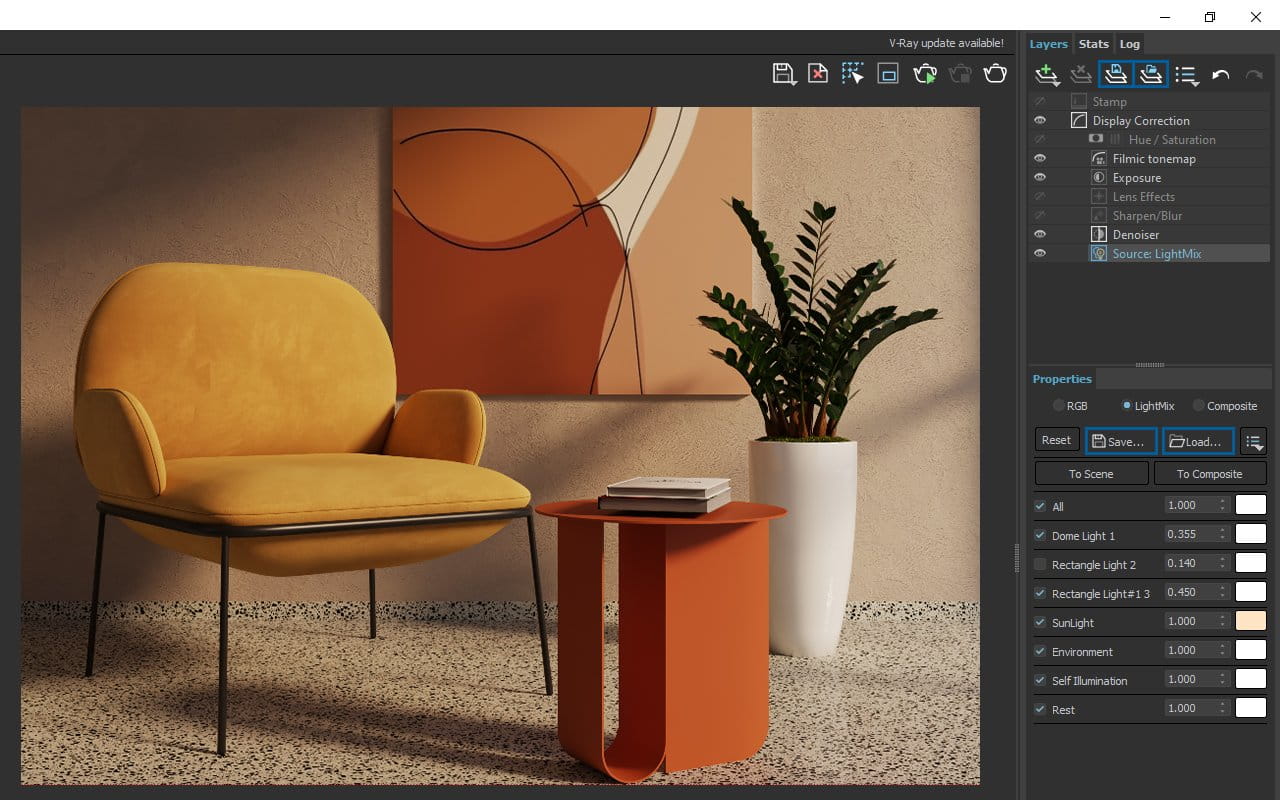
Save your post-production settings for future use by clicking the “Save Layer Tree Preset” icon. This allows you to reuse settings across different projects. You can also save various LightMix scenarios and load them as needed.
Conclusion
Using V-Ray Frame Buffer’s LightMix, Exposure, Filmic Tone Map, and Cryptomatte tools helps you easily enhance your renders and achieve high-quality results. These tools give you control over lighting, contrast, and colors, letting you fine-tune your scenes with precision.
By applying these techniques, you can improve your visualizations and make your 3D scenes look more realistic and vibrant.
