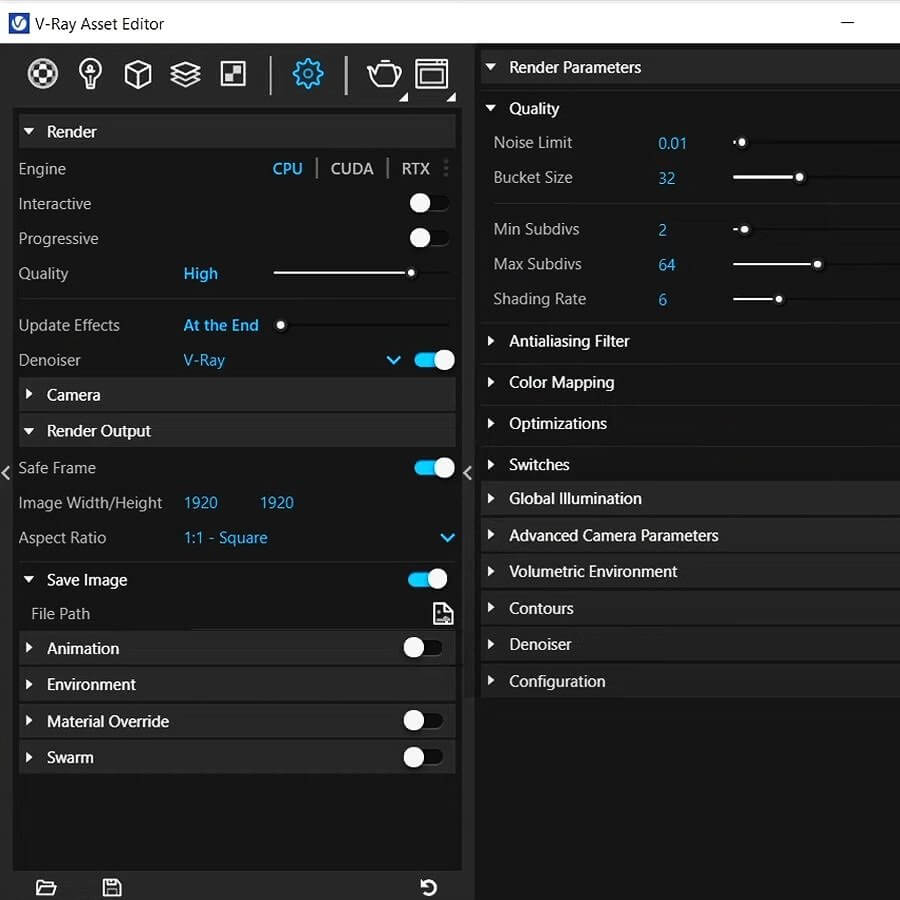
Render settings tab is one of the most important panel when creating visualizations. This is a place, where you change the rendering engine, quality and resolution of the visualization.
In this article, I will explain the most important settings. This will help you to create better renders in a faster time.
Render Engine
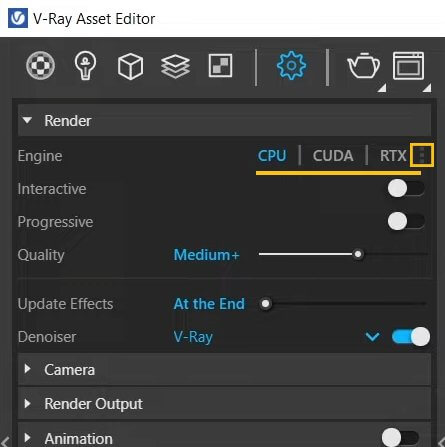
Firstly, we need to choose the render engine. We have 3 options: CPU, CUDA, and RTX.
CPU – Main Processor. You can choose this option if you have a powerful, efficient processor.
CUDA – Choose this option if you have a powerful graphic card
RTX – If your graphic card has RTX in its name, you should choose this option.
Sometimes, it isn’t easy to know what is better. Your graphic card or processor. You can use this website and check if your computer has a better processor or graphics card.
Types of Visualization
We can divide visualizations into two categories:
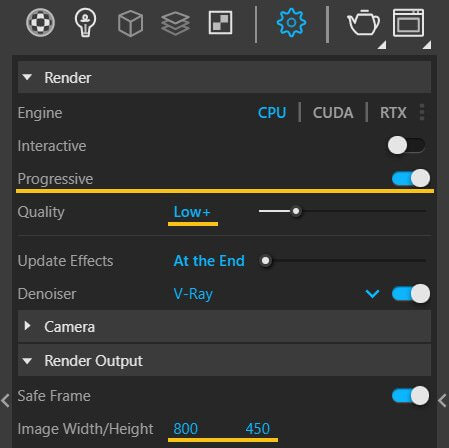
1. Preview Visualizations – When you are creating a visualization, you need to check the result many times. You are changing lights and materials. It’s important to get a fast outcome.
In this case, you render interactively or progressive. Set the quality of the render as low+ or medium.
The resolution in the render output tab should be set to low values. For example, 800×450 px.
2. Final Visualizations – When light, materials, and views are set properly, it’s time to create the final visualization. This time, the quality and resolution should be higher. Set the quality as medium +, high or high+.
Resolution should be set to for example 1920x1080px (for web page) or even more – 3500×2500 when you want to print your render.
Render settings for preview render
Denoiser
This feature smooths out the noise from the render. This option should be turned on. I always choose V-Ray Denoiser. It can be a little bit slower than NVIDIA Denoiser, but it works better.
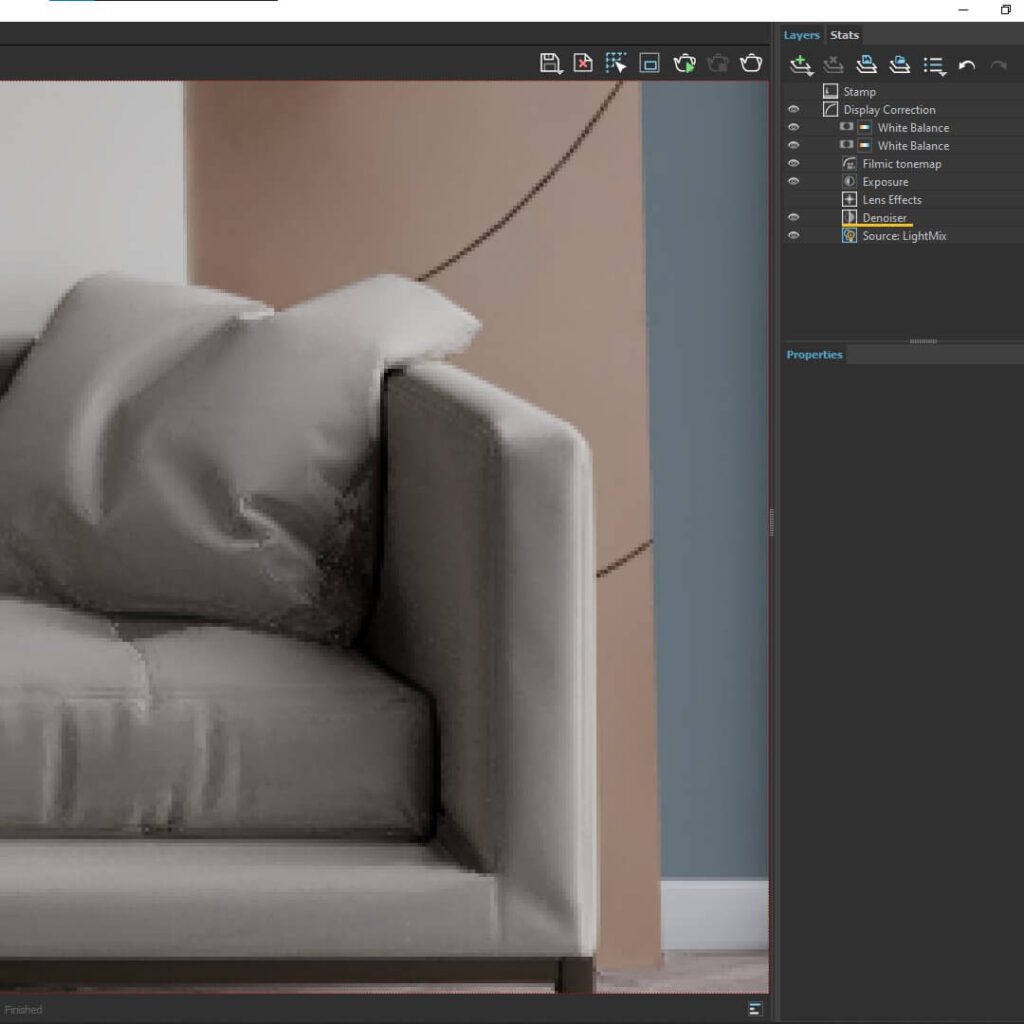
When you are using a low render setting, denoiser will smooth out the noise forcefully. You can notice some strange artifacts. In this case, the render without denoiser will work better. You can turn it off in V-Ray Frame Buffer Window on the right side
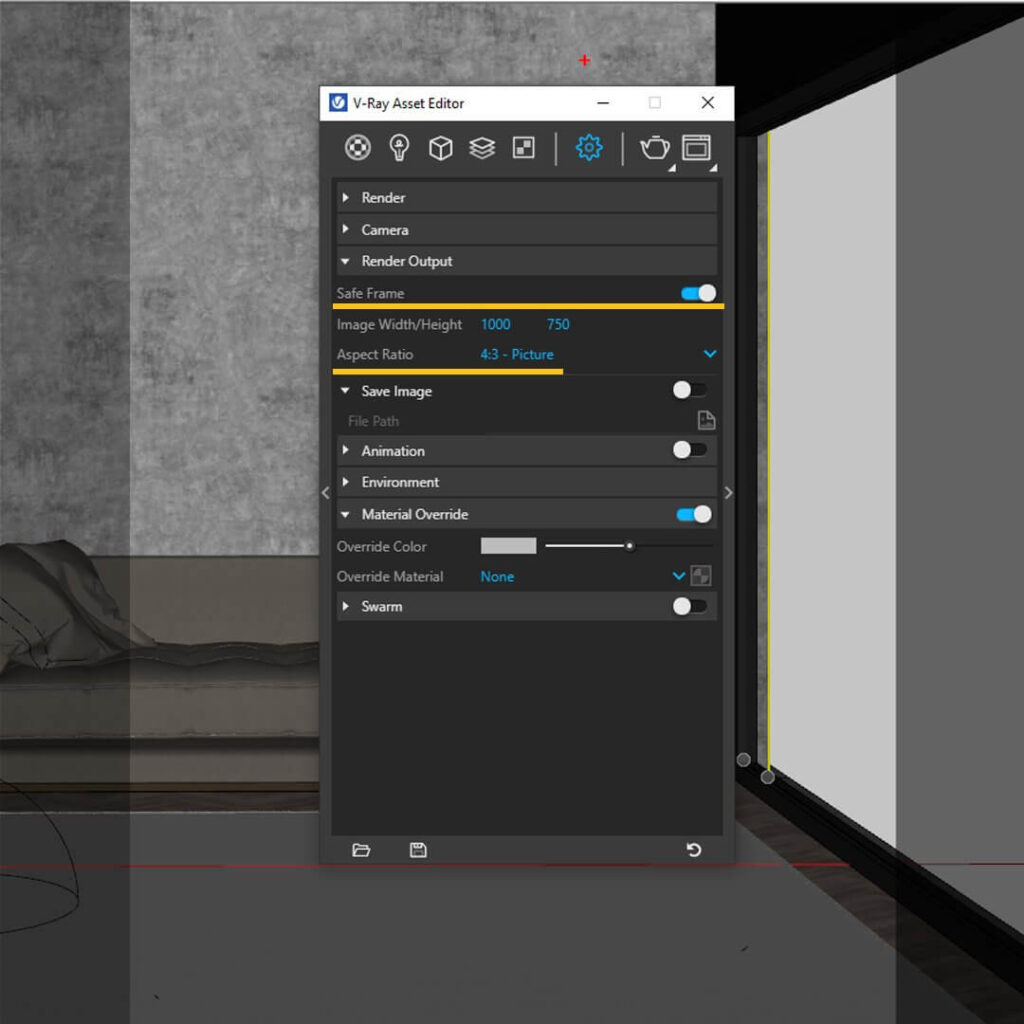
Safe Frame and Aspect Ratio
Safe frame shows the expected output. This option should be always turned on. Darker areas in SketchUp show the regions will not be visible on the render. By changing the aspect ratio, you can adjust the render size. Typically I choose 16:9 Ratio. For narrow interiors I change it to 4:3 or 1:1
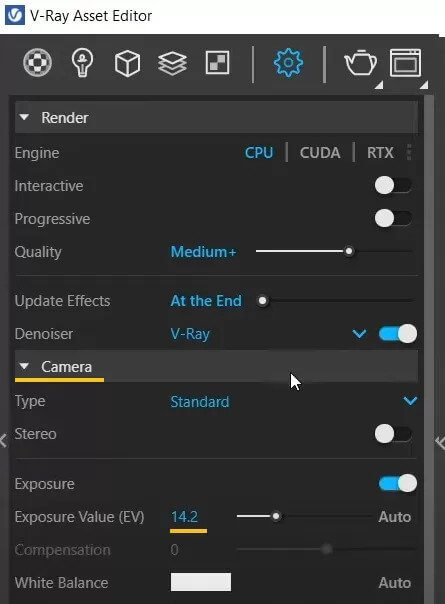
Exposure Value
Exposure is like how much light you let into your camera. By default exposure value is set to 14.2. This value can be adjusted. If I increase this value, say to 15, my rendered image will appear darker. Opposite, If I decrease it to 12, the scene will appear brighter.
I usually don’t change this setting, except when I’m making a visualization of a small bathroom with no windows. In that case, it’s better to make the exposure 11 or 12. This adjustment results in a brighter scene, making it easier to configure artificial lighting within the interior.
Save Image
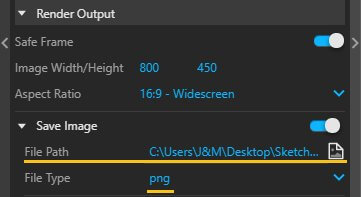
The ‘Save Image’ options enable automatic saving of each rendered image. To use this, simply activate ‘Save Frame’ and select the desired file format (such as PNG or JPG). Additionally, you should specify the destination folder where you wish to store all the rendered images.
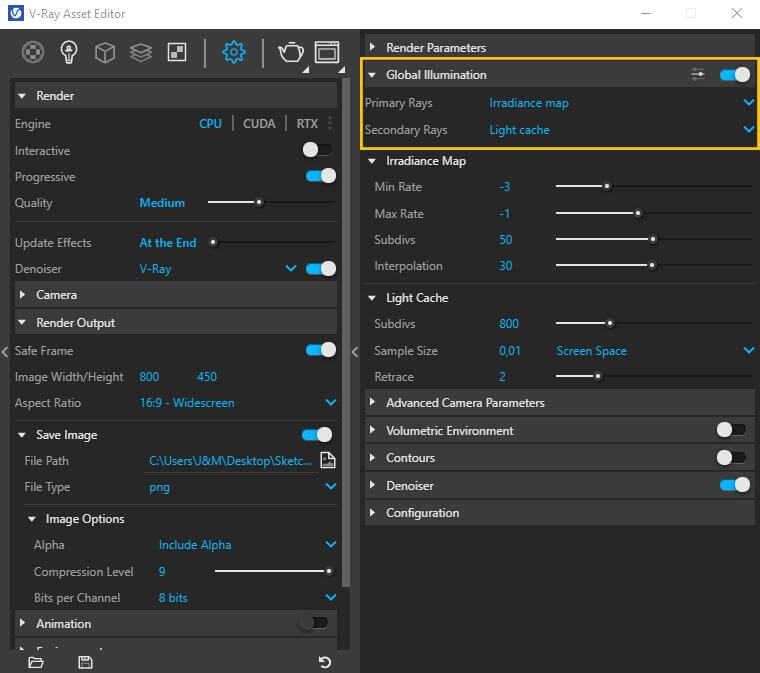
Global Illumination
Global Illumination is like showing how light bounces off things and makes everything look bright, not just the light that comes straight from a lamp.
In the ‘Primary Rays‘ option, you can select ‘Brute Force.’ I recommend choosing this option because it provides more accurate rendering and better lighting.”
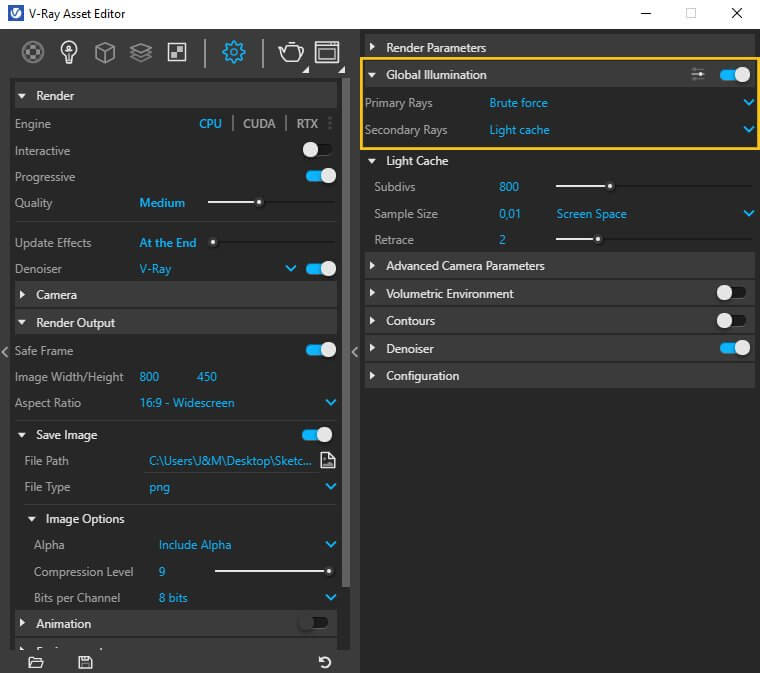
You can also choose the ‘Irradiance Map’ option in the ‘Primary Rays’ settings. This will make your render finish more quickly, but it might not give you the right lighting in your scene.
If your scene is too dark or doesn’t have much natural light, you might see dark spots in your picture. Remember that you can choose Irradiance Map only when you render engine is CPU
Summary
These are the most important render setting. I’m sure that now your renders will be better. If you want to learn more about render setting, watch my tutorial below.
Check out my online course “Visualizations for Beginners. V-Ray for SketchUp Course.”
