SketchUp Styles
SketchUp Styles are essential for making your designs clear and easy to understand. They allow you to control how your model looks, highlight important features, and effectively communicate your ideas. This guide will walk you through creating two styles:
- Perspective Views – making your design look attractive with soft edges and natural light.
- Technical Drawings – perfect for detailed plans like electrical or lighting layouts.
Creating an Attractive Perspective View
First things first, we need to set up an attractive view. I’ll create a perspective view from inside the building to make it visually appealing. Here are a few key steps:
- Field of View: Set between 40 and 60 degrees, with 50 degrees preferred for a balanced view.
- Two-Point Perspective: Keeps vertical lines parallel, making the model look more realistic and visually appealing.
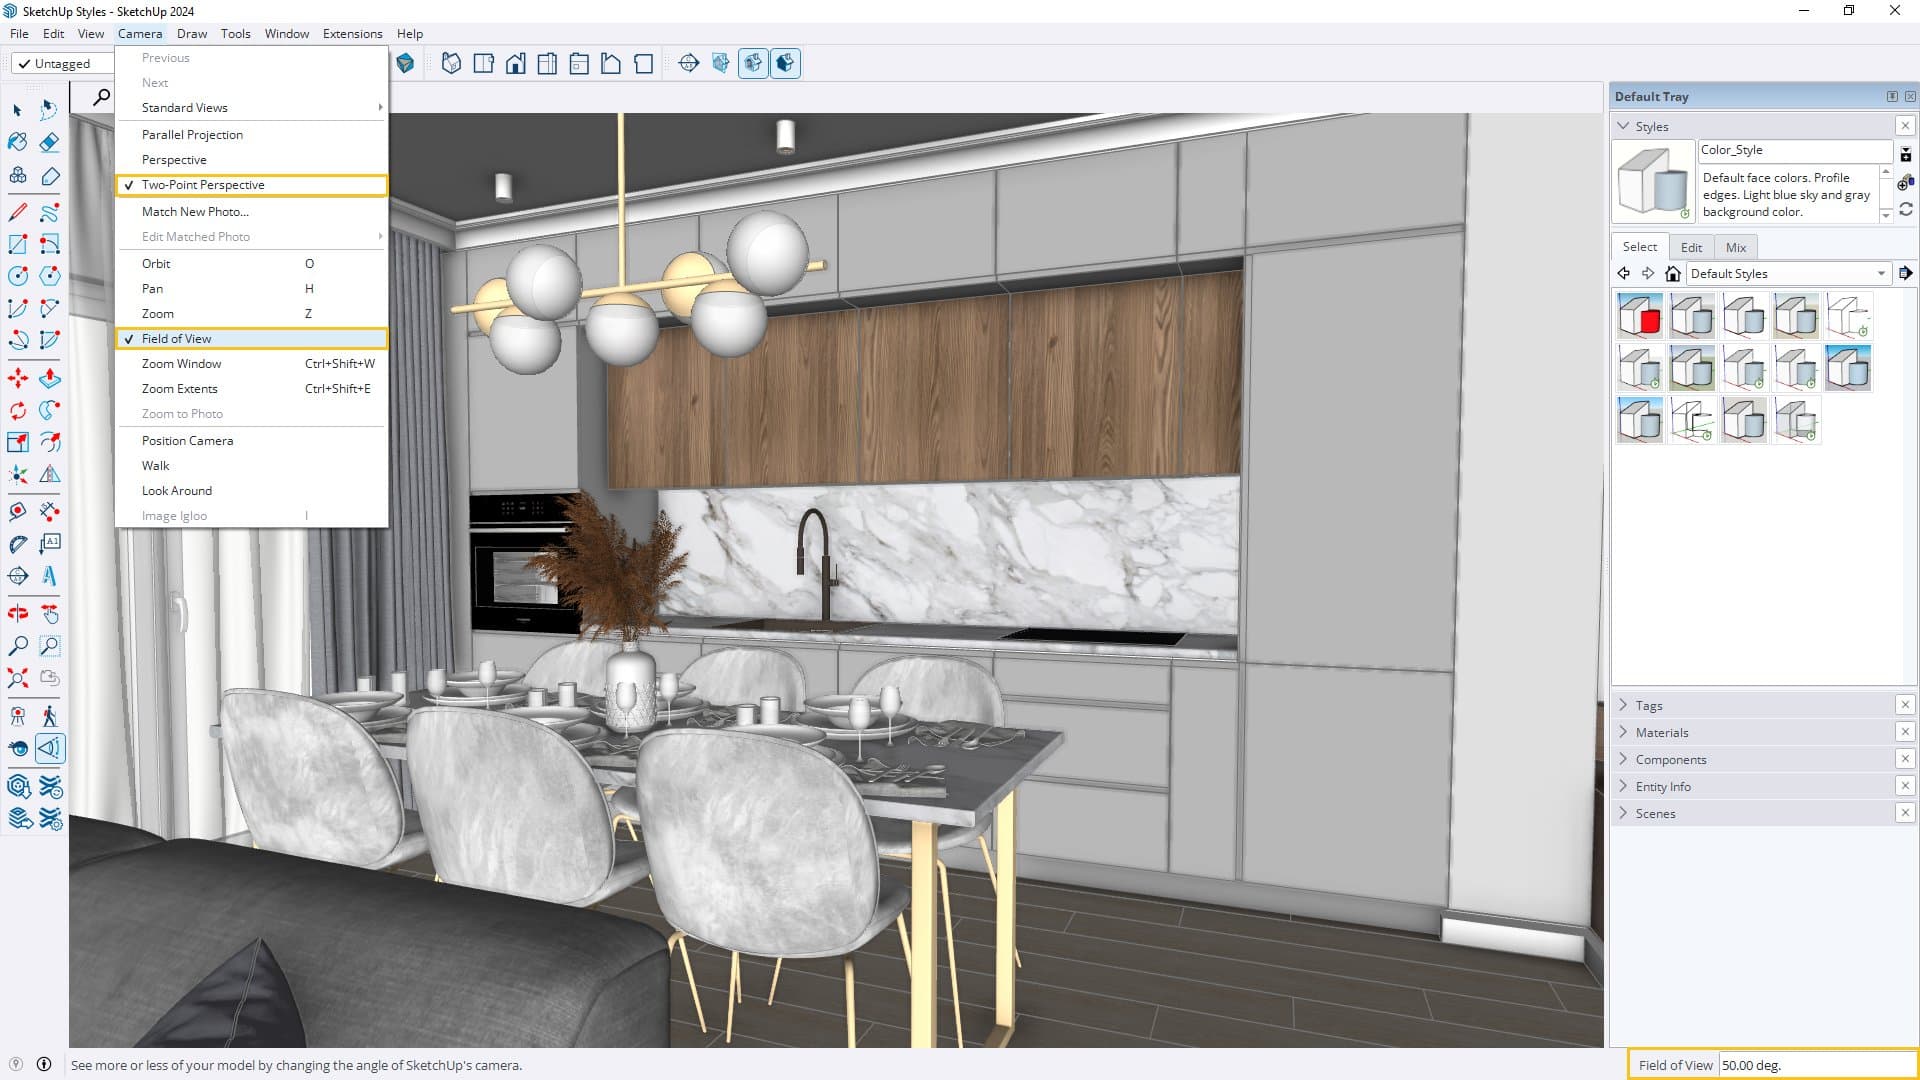
Setting Up SketchUp Styles
On the right side of the default tray, you’ll find ‘Styles’. If you don’t see it, toggle windows on and off by going to the ‘Window’ tab and selecting ‘Default Tray’.
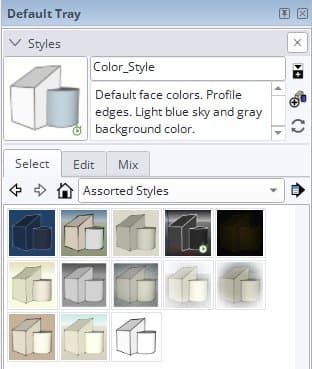
Creating the Color Style for Perspective Views
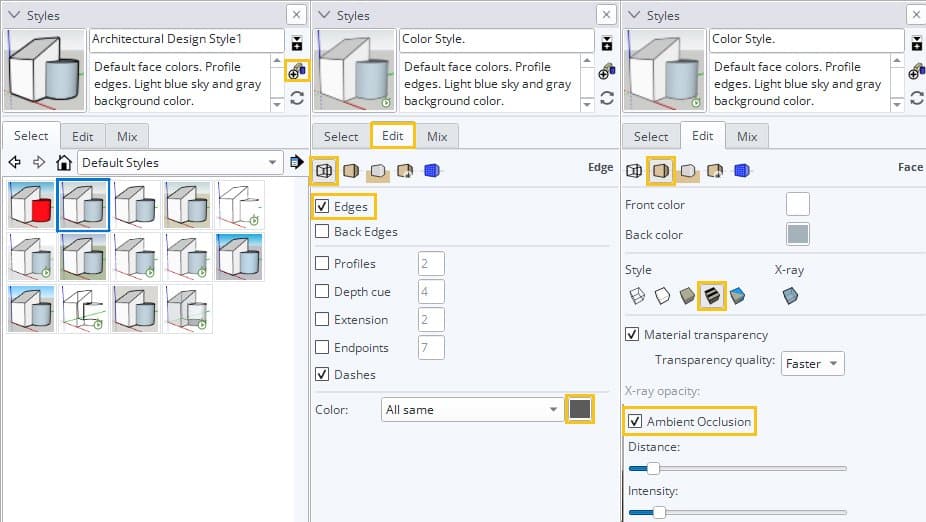
Architectural Design Style is our starting point. Click to create a new style and rename it, for example, to ‘Color Style’. Remember to save any changes.
Edit Tab:
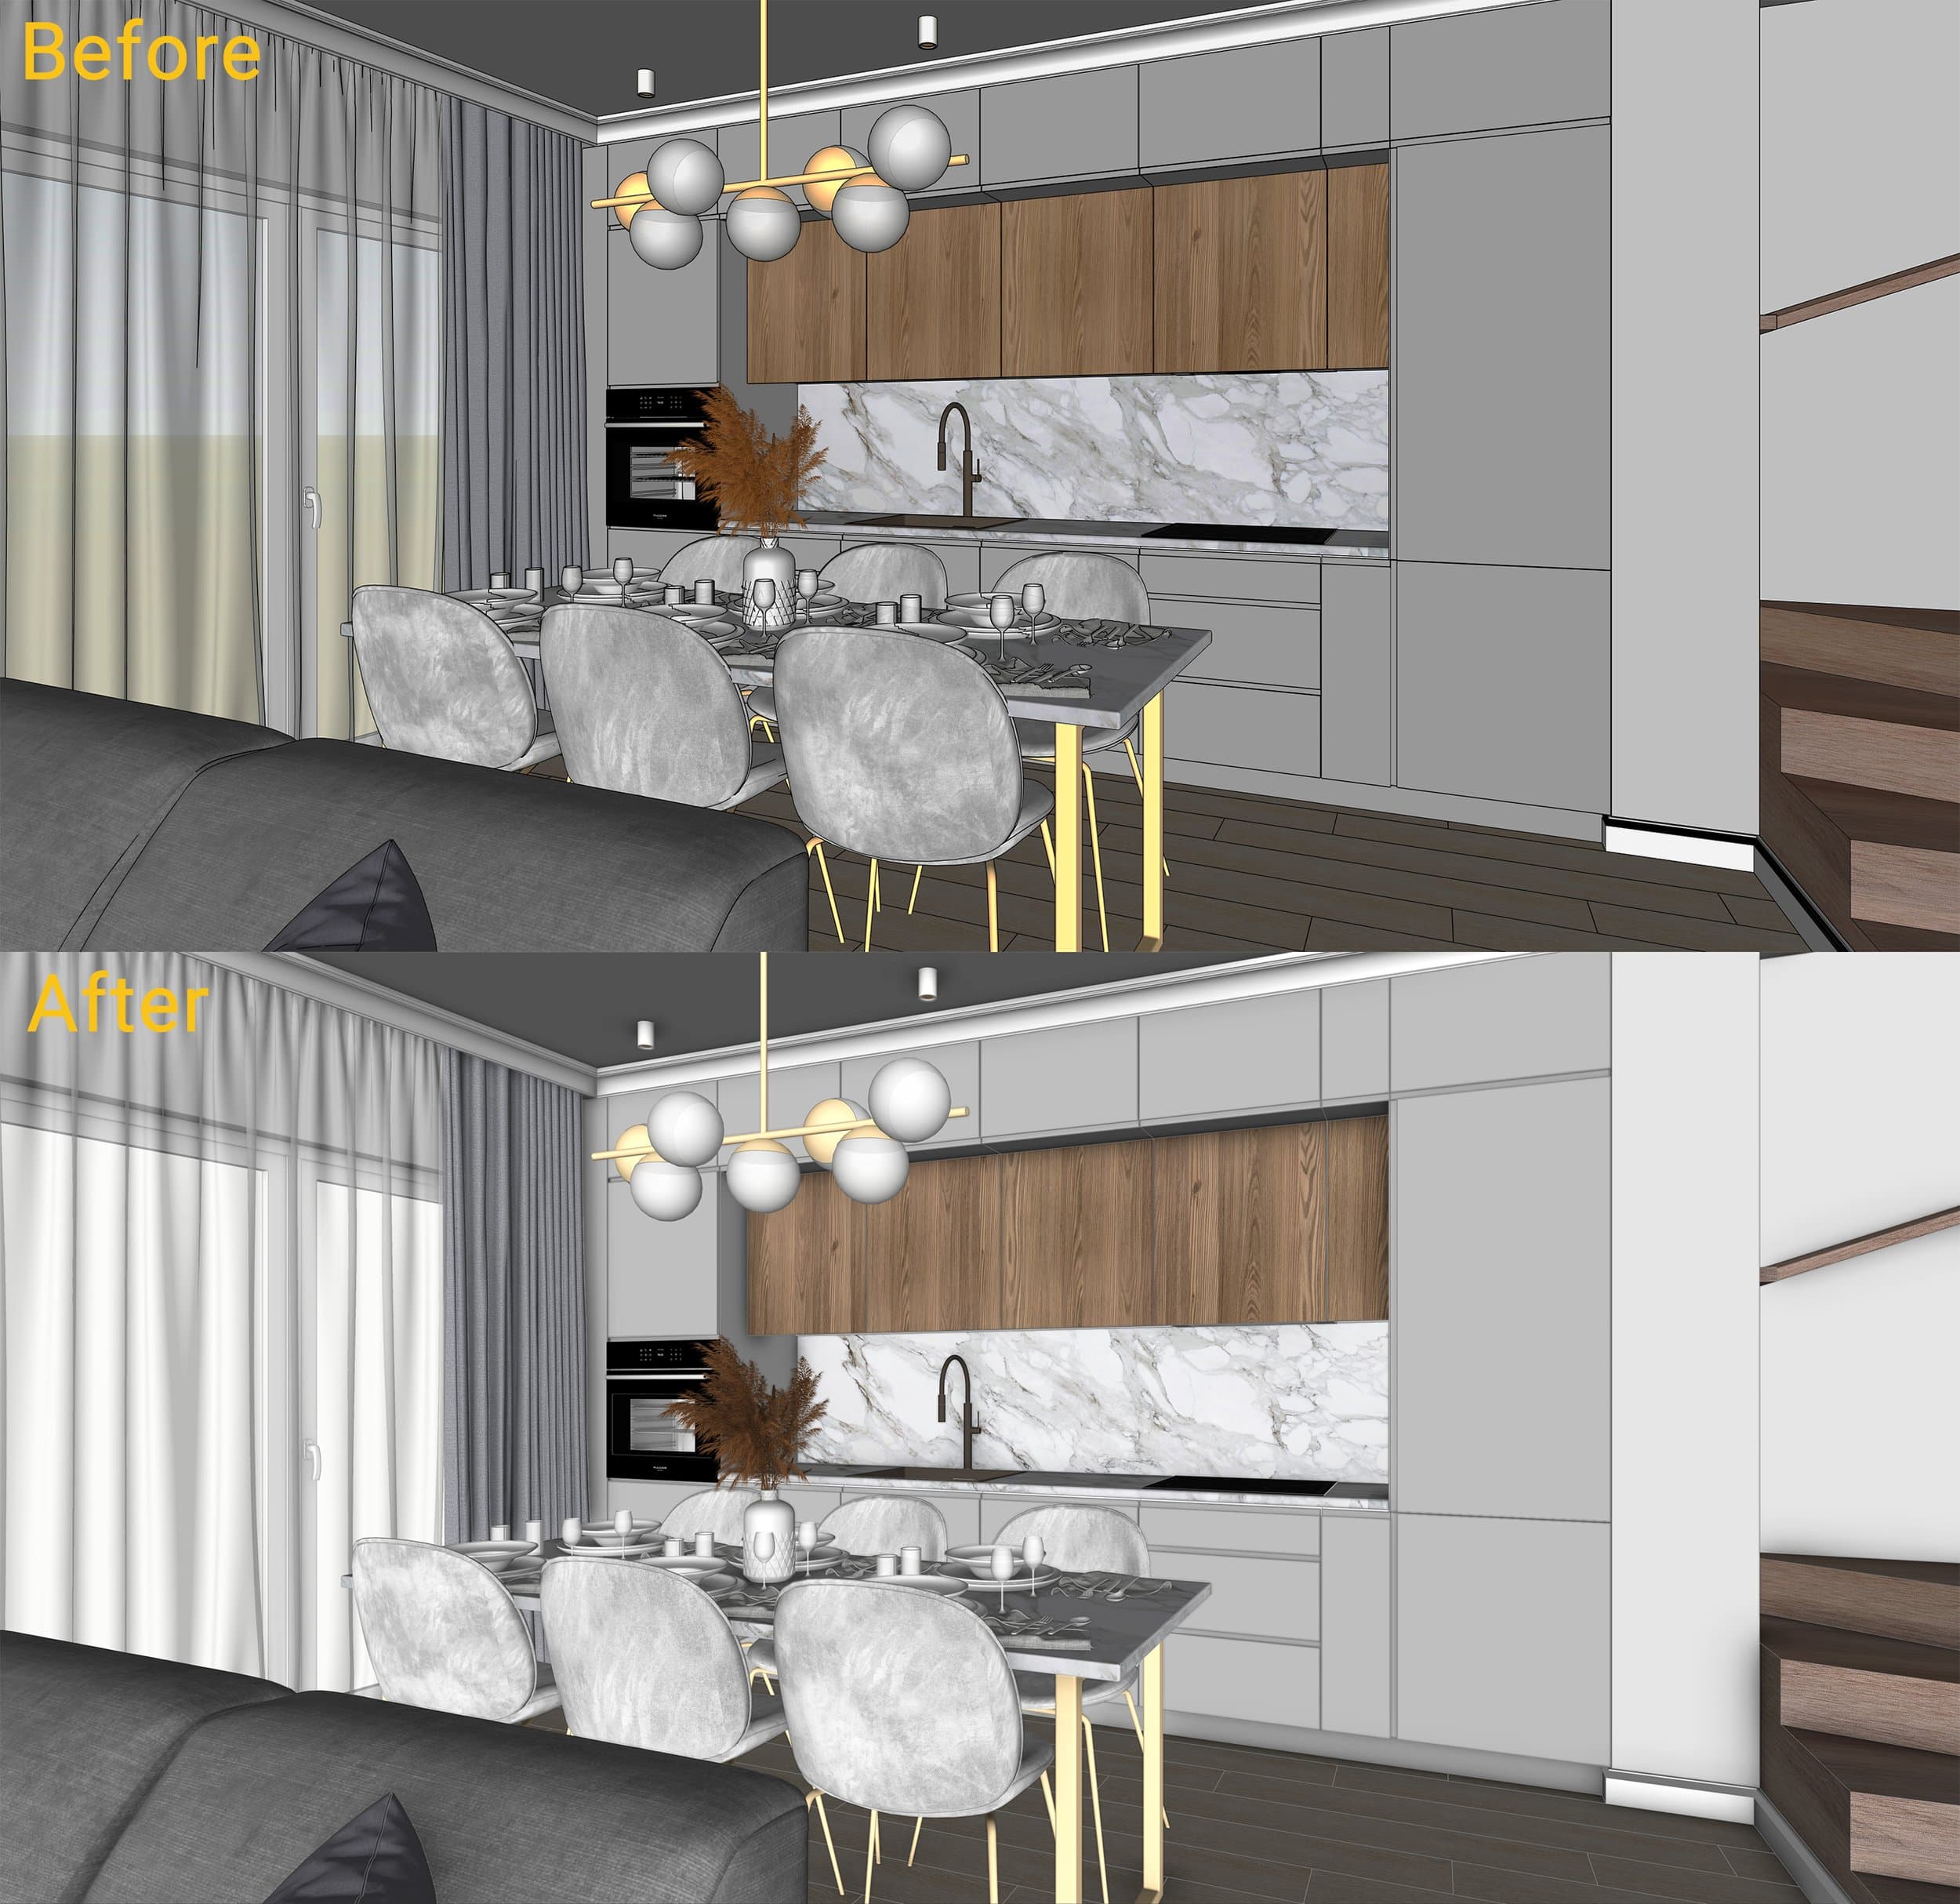
- Edge Settings: Select edges, turn off profiles for smoother edges.
- Edge Color: Set to dark gray for a softer appearance.
- Face Settings: Set to ‘Shaded with Textures’. ‘Ambient Occlusion’ is a new feature in SketchUp 2024, adding soft shadows.
Background and Modeling Settings
- Background Color: Set to white, turn off Sky and Ground options.
- Modeling Settings: Turn off visibility of guides, and model axes.
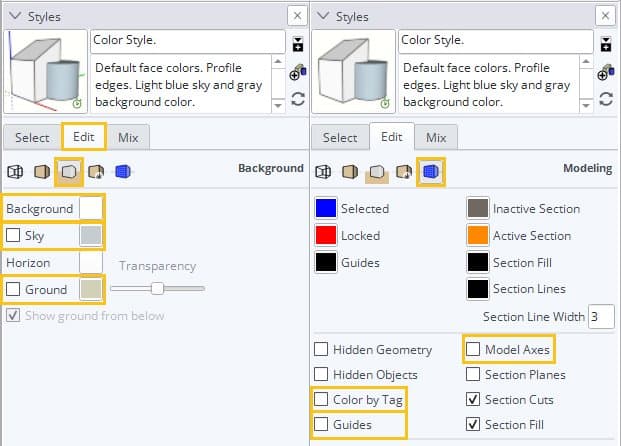
SketchUp Style for perspective views is created
Creating the Black and White Style for Technical Drawings
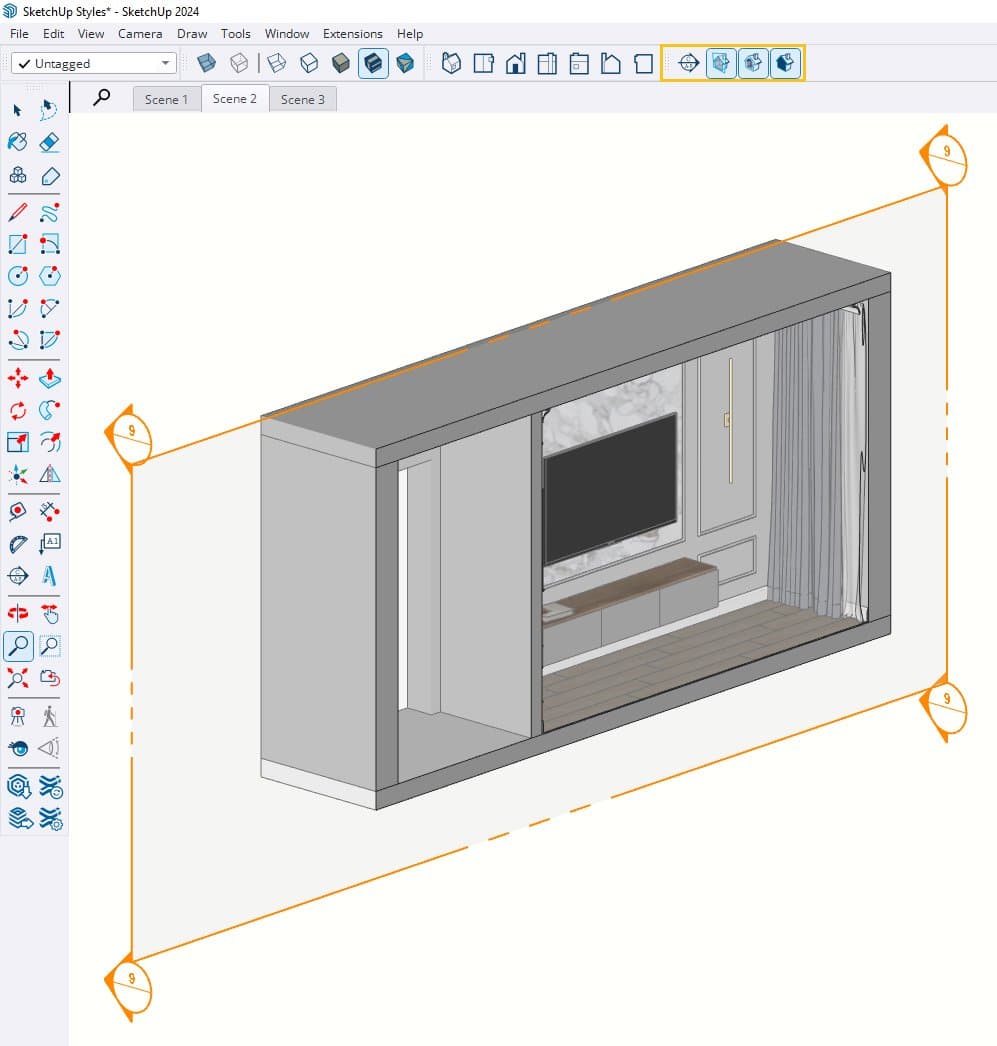
- Create a Section View: Use the section plane, align the view, turn off display section planes, and turn on display section cuts and section fill. Change the camera to Parallel Projection.
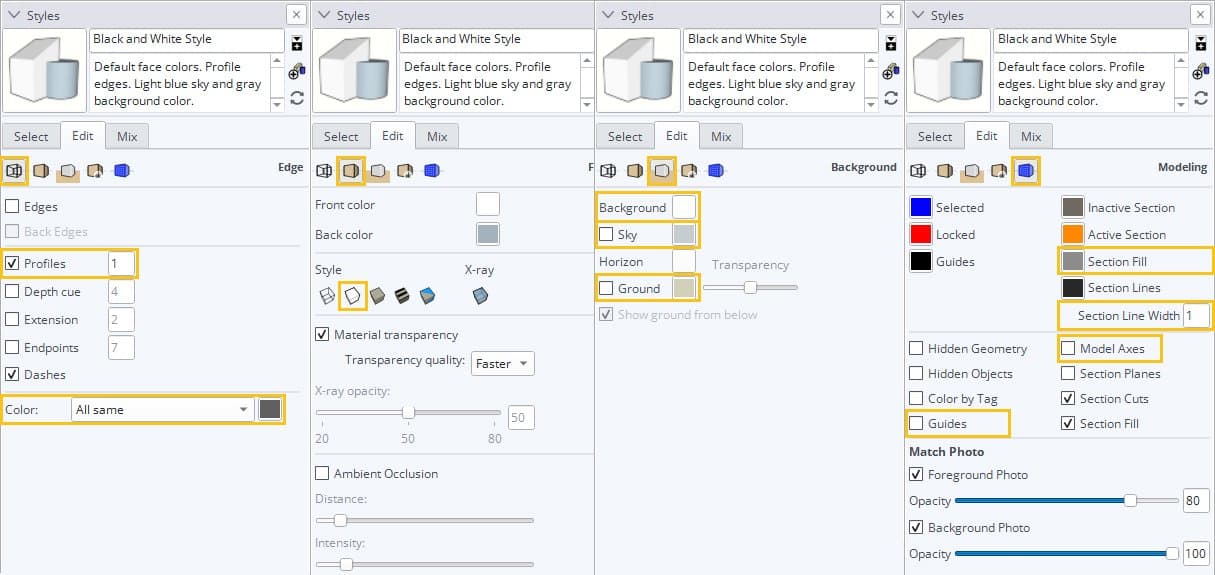
- Edge Settings: Turn off edges, turn on profiles with a thickness value of 1, and set edges to dark gray.
- Face Settings: Turn on hidden line style, turn off ambient occlusion.
- Background and Modeling Settings: Same as the Color Style, but also reduce section line width to 1 and change section fill color to gray.
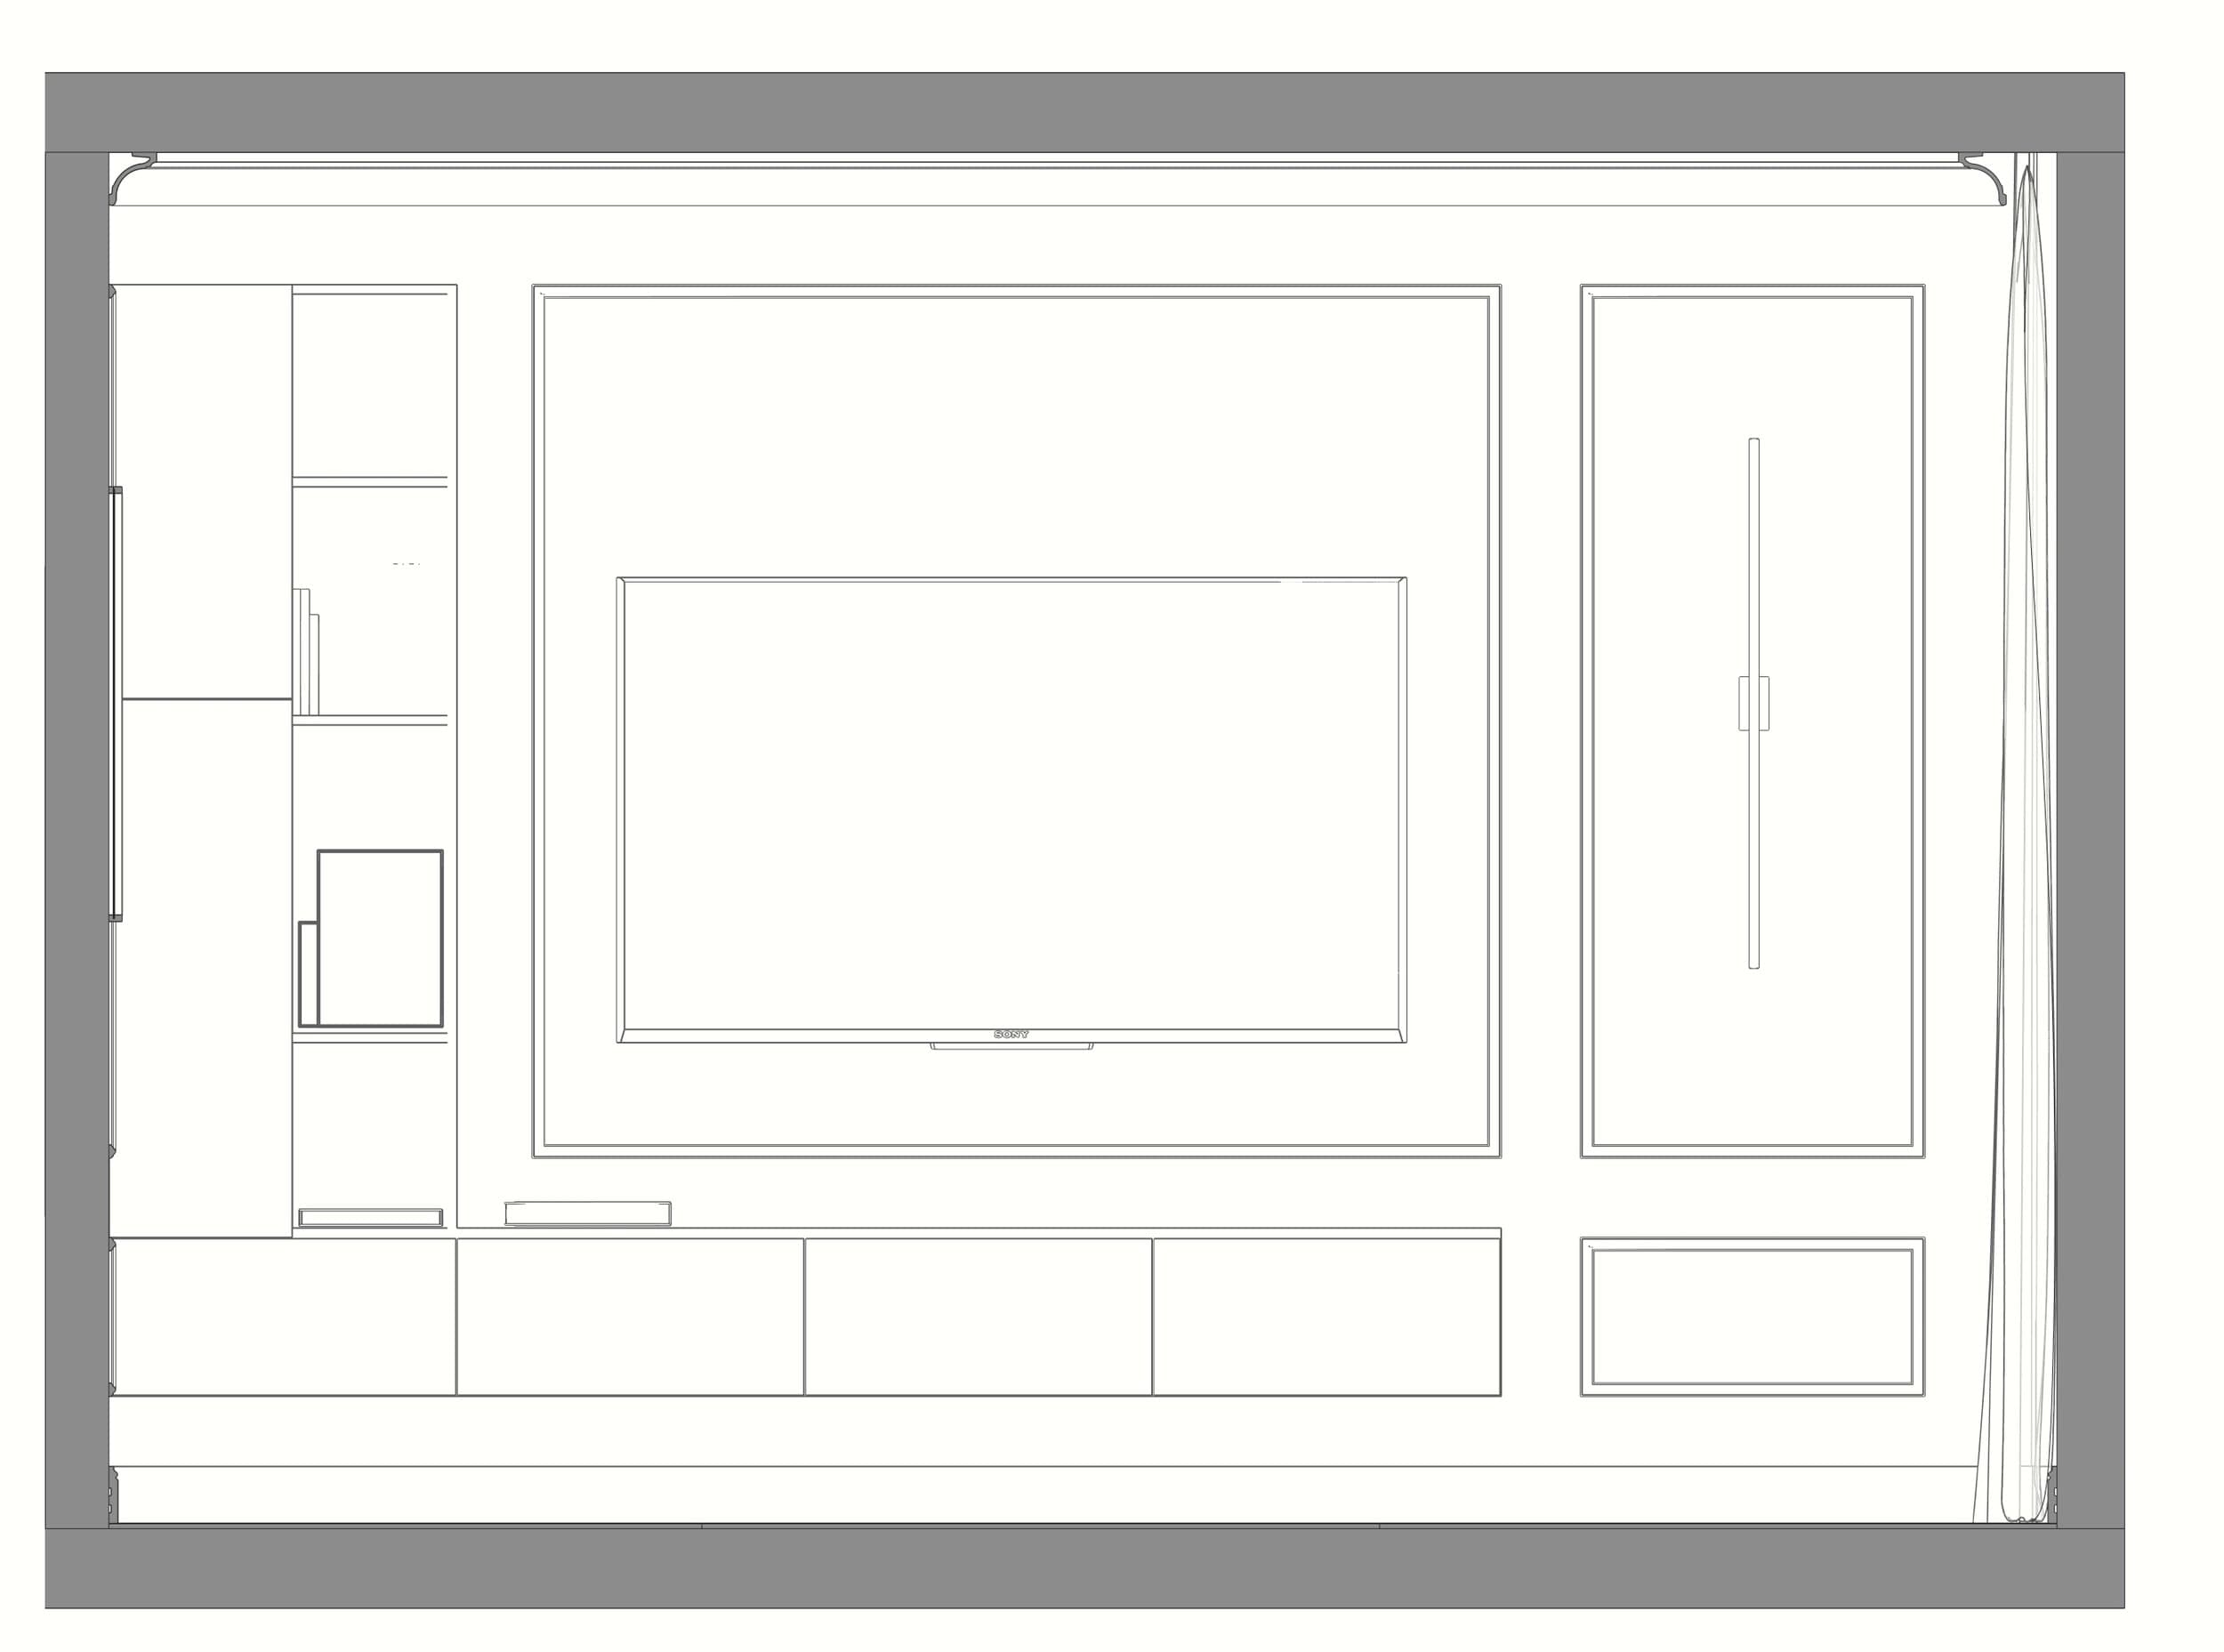
SketchUp Style for 2D drawings is created
Additional Tips
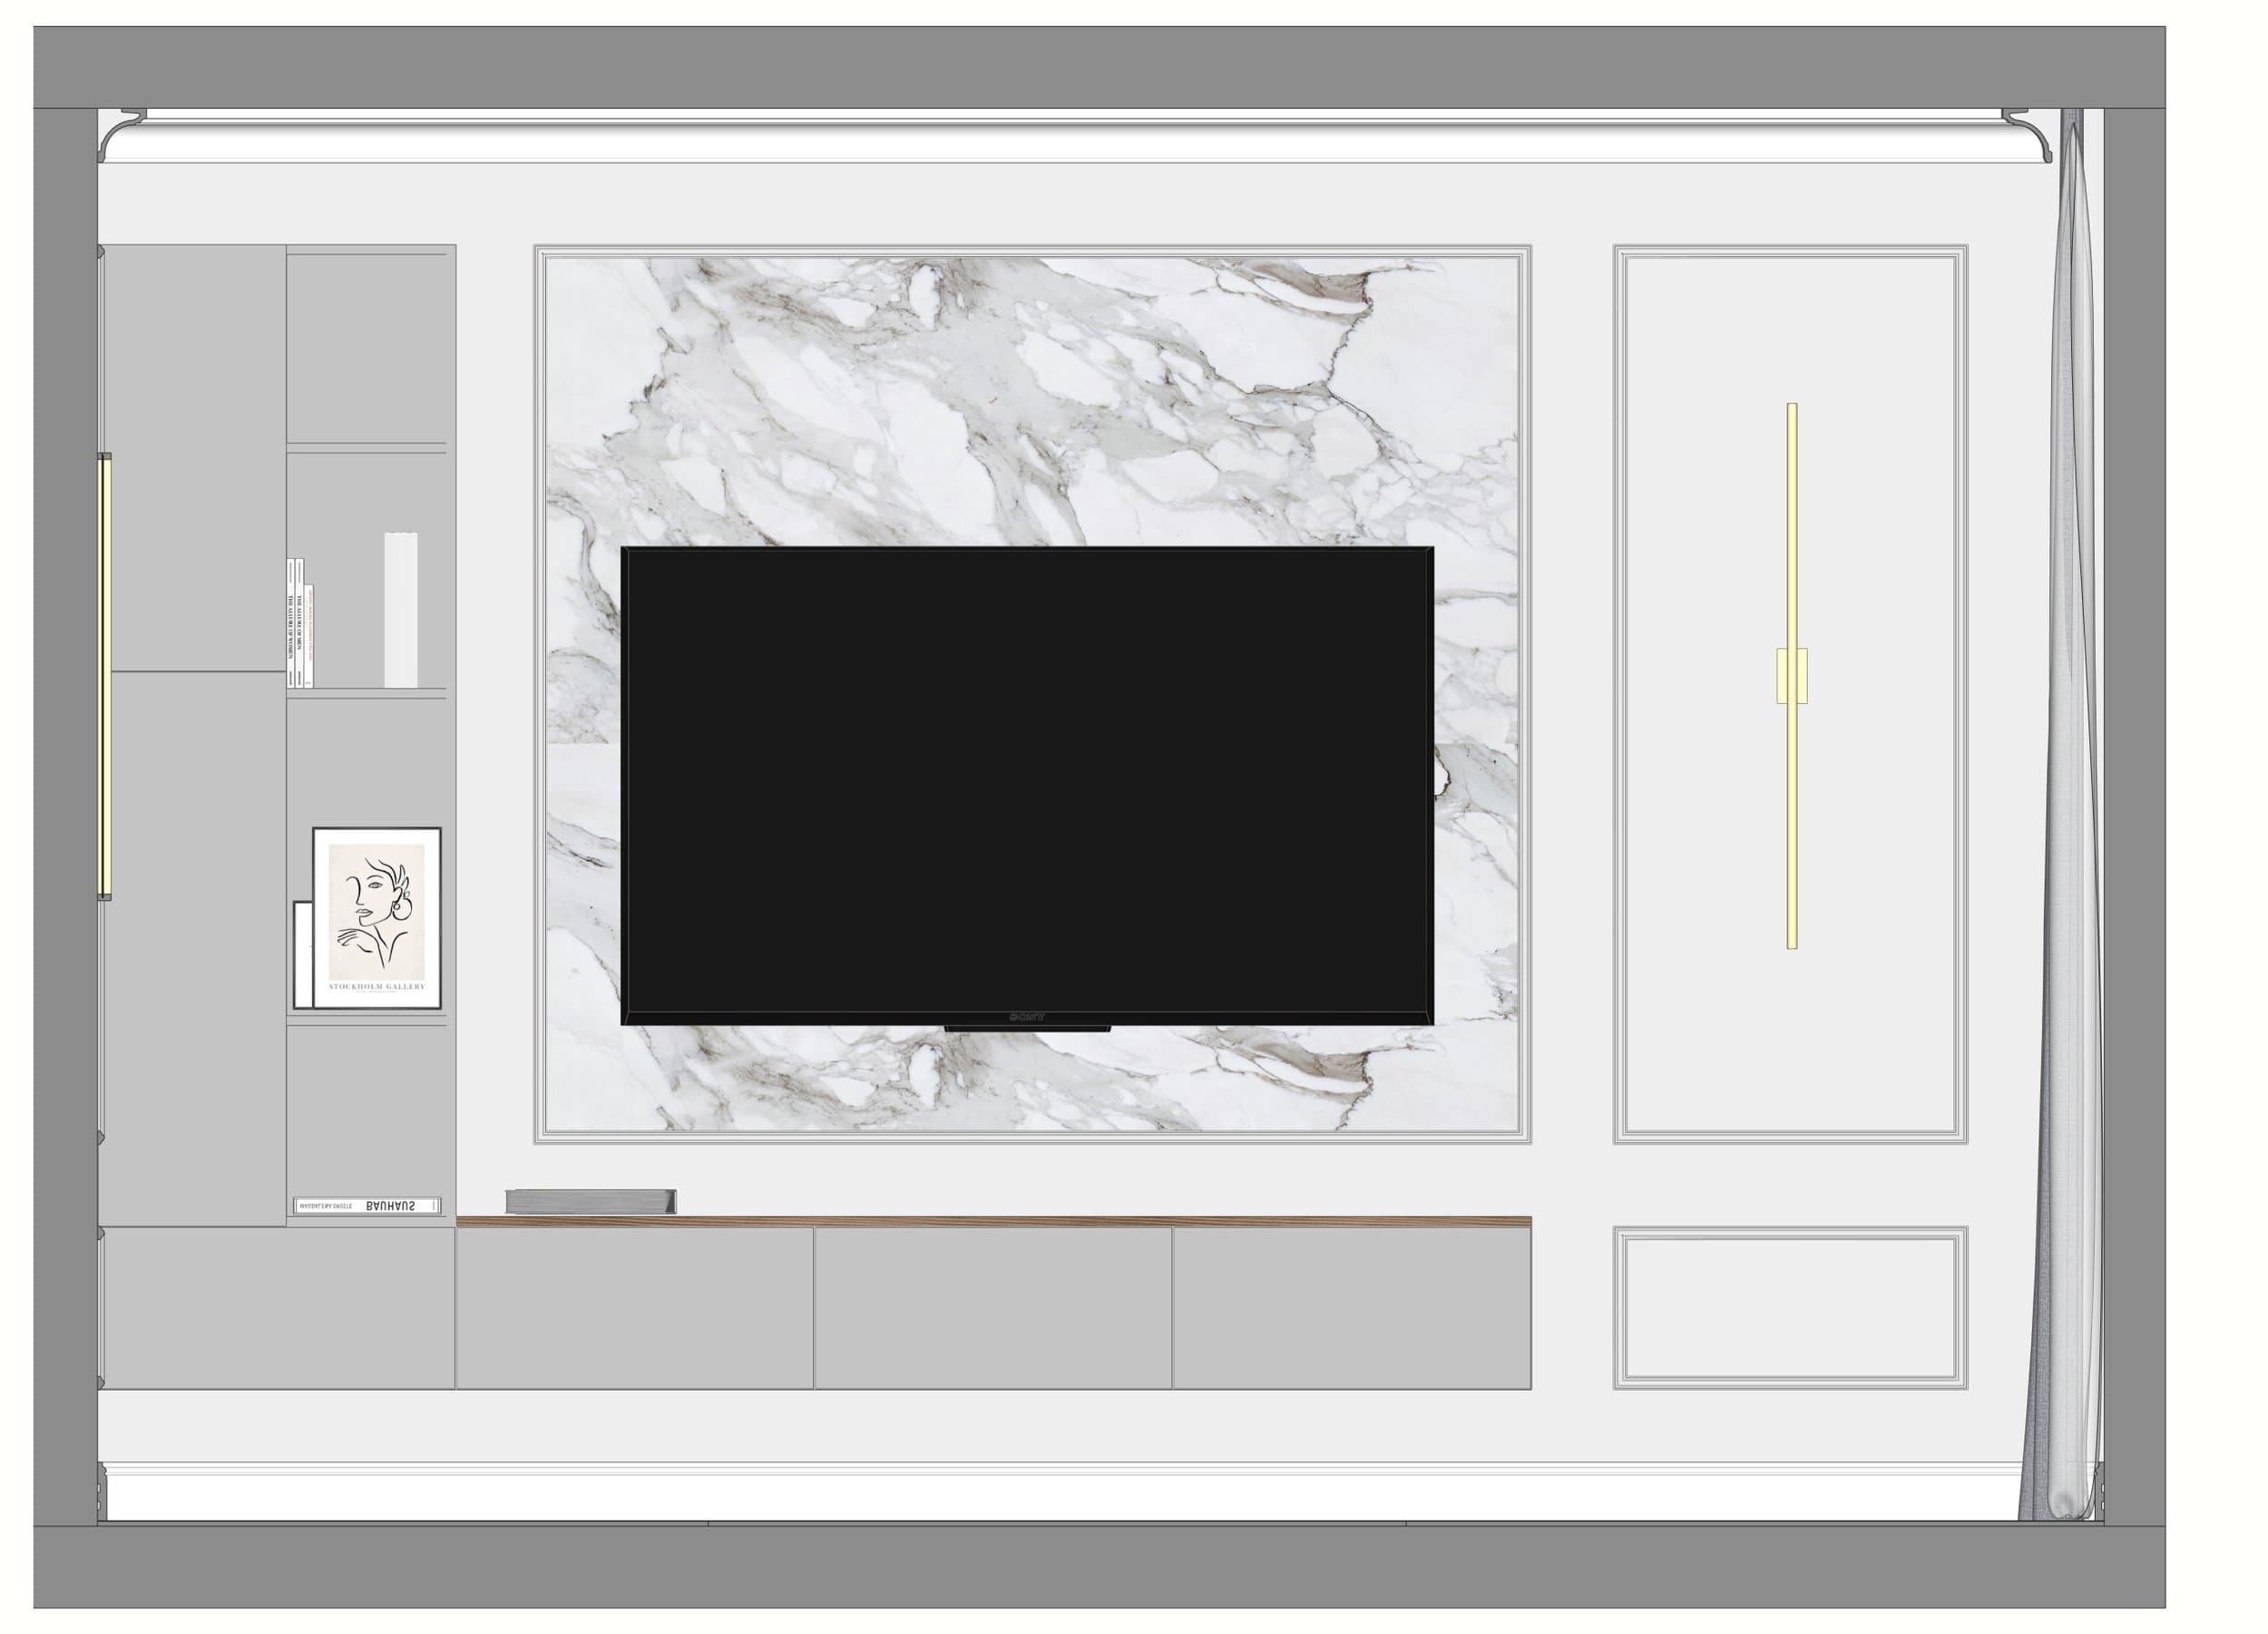
Colored 2D Drawings: Create a new style with the settings of the Black and White style, and in the face settings, choose ‘Display Shaded Using Textures’.
Conclusion
Feel free to play around with the styles. Adjust the settings and explore different combinations to find your favorite one.
With these styles, you can create attractive presentations for your clients with perspectives, floor plans, and 2D views. Use SketchUp Layout to add dimensions, symbols, and labels to fully complete your presentations.
Download ebook
5 Steps to Beautiful Visualizations
Get your free PDF guide and start creating better visualizations today.
Success! Your Free E-Book Is On Its Way To Your Inbox!
Check your spam folder—just in case
