Incorrectly mapped textures can undermine your visualization. Repetitive small textures can damage the appearance of your materials, but there are multiple solutions to fix this issue. Let’s learn how to map textures easily in SketchUp.
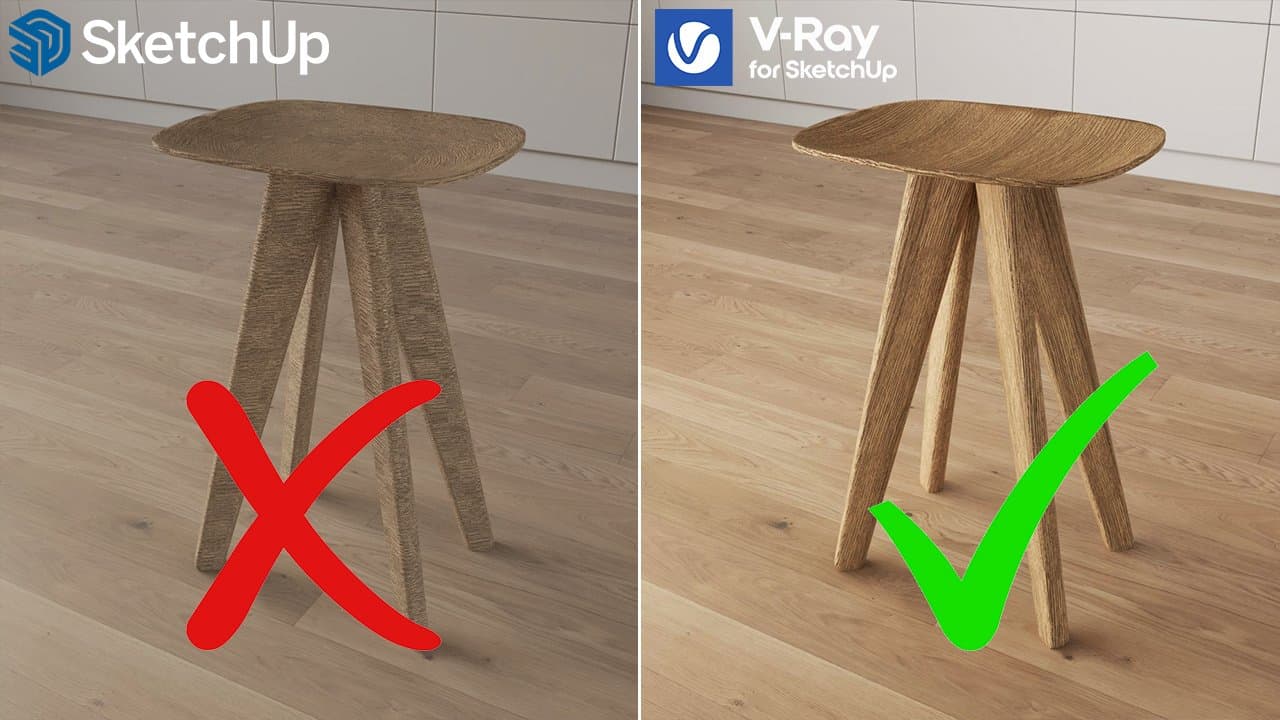
Basics of Texture Mapping in SketchUp
Applying Materials and Adjusting Dimensions
When you apply materials to a selection in SketchUp, you can adjust the texture’s dimensions in the Materials window on the right side of the Default Tray.
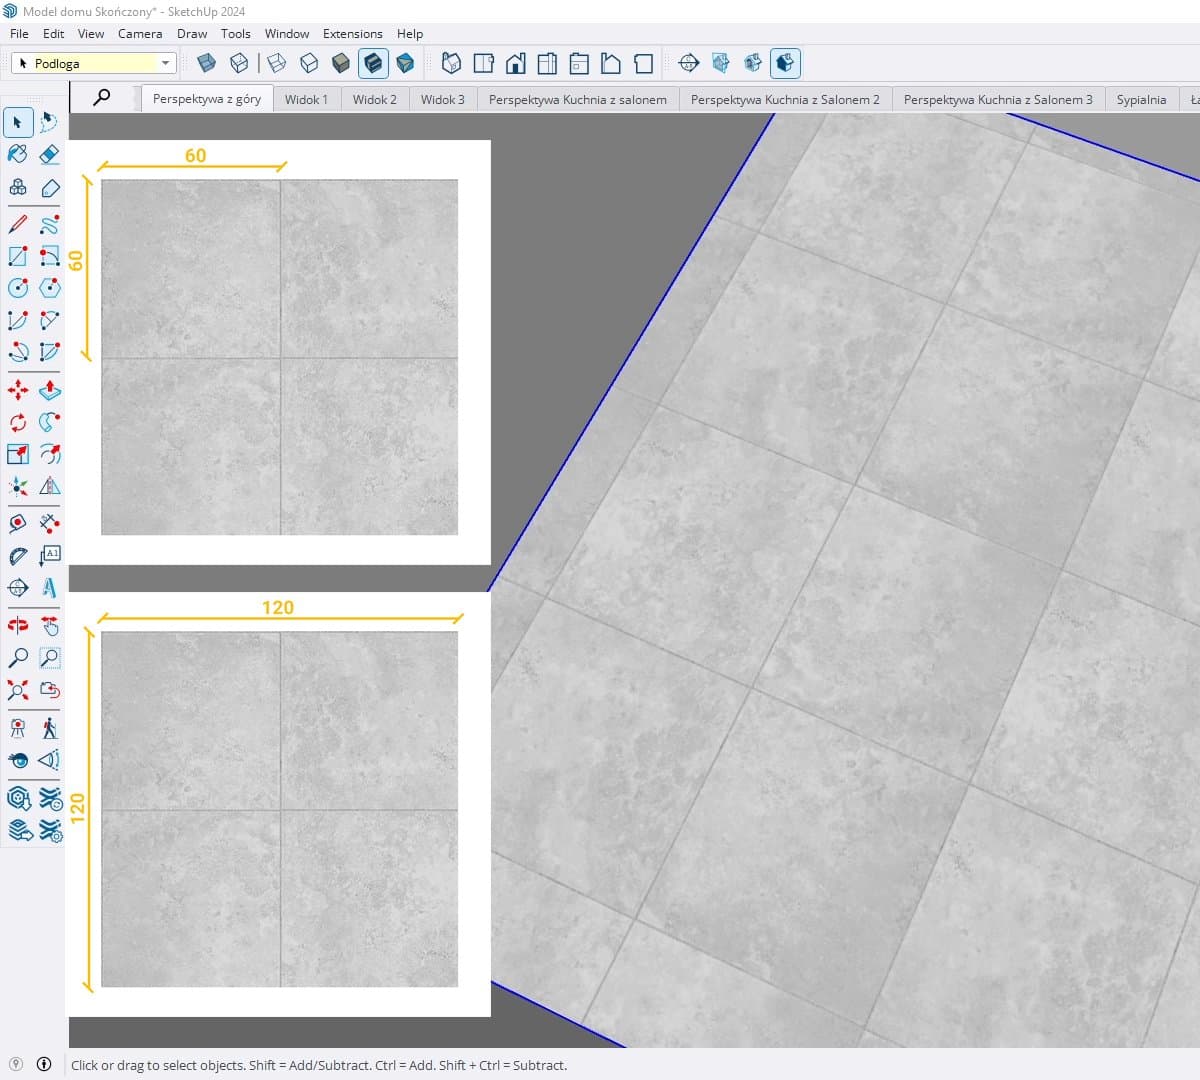
In the Edit tab, you can specify the size of the texture. For my tile texture, I want each tile to be 60 cm, so the entire texture should have dimensions of 120×120 cm.
Depending on the texture, you can adjust its size to achieve the exact dimensions you need for tiles or panels
Proper Placement of Textures
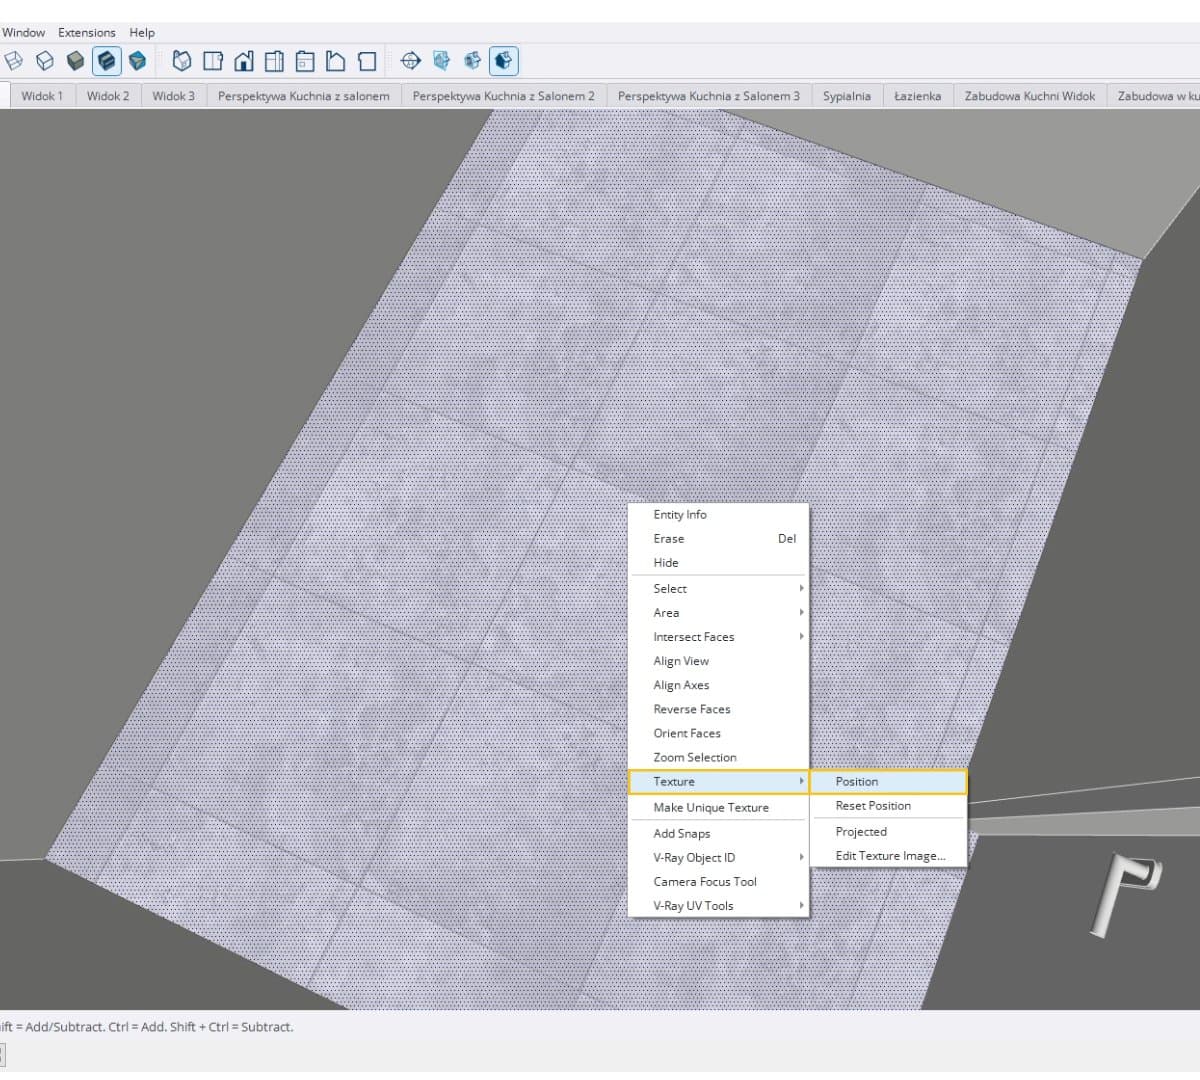
Apply Materials to Faces, Not to Groups
It’s crucial to apply materials to faces, not to groups. This is important because if you apply materials to a group, you won’t be able to adjust the position of the texture. By applying materials to faces, you can select a face, right-click on it, and choose Texture > Position.
Dragging to Change Texture Placement:
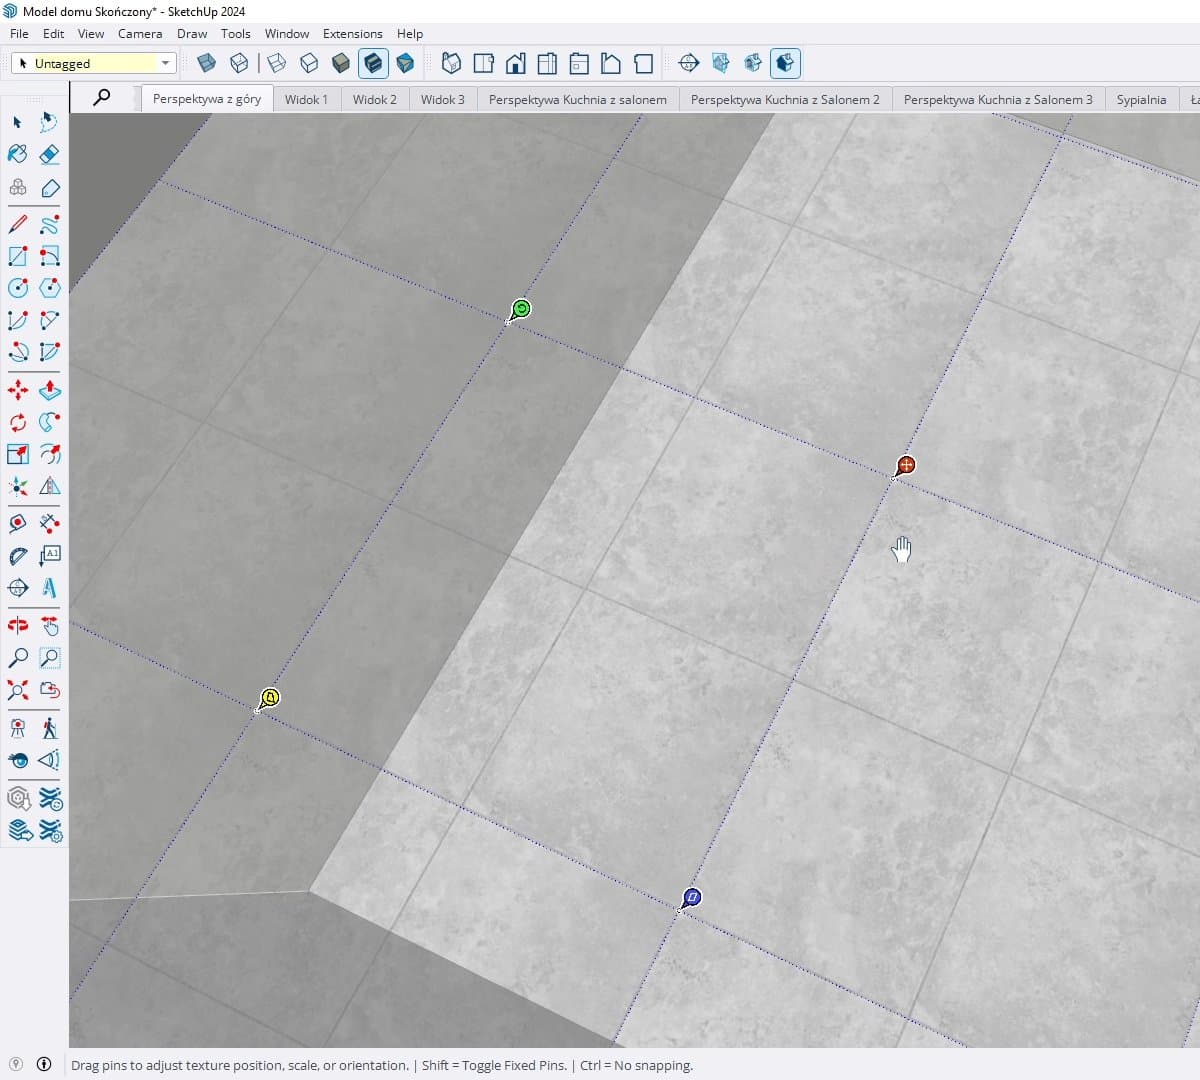
- Drag to Change: Now, you can drag to change the placement of the texture, which is very useful for accurately positioning the texture.
- Using the Green Pin Icon: With the green pin icon, you can rotate or scale the texture. I mostly use this pin to rotate the texture. To scale the texture, I always use the Materials window in the Default Tray.
Using SketchUV Plugin for Complex Objects
Sometimes, simple steps do not work because the texture placement option only works for flat surfaces.
Solution: SketchUV Plugin
This plugin is essential among SketchUp plugins and is very easy to install and use.
How to Install SketchUV:
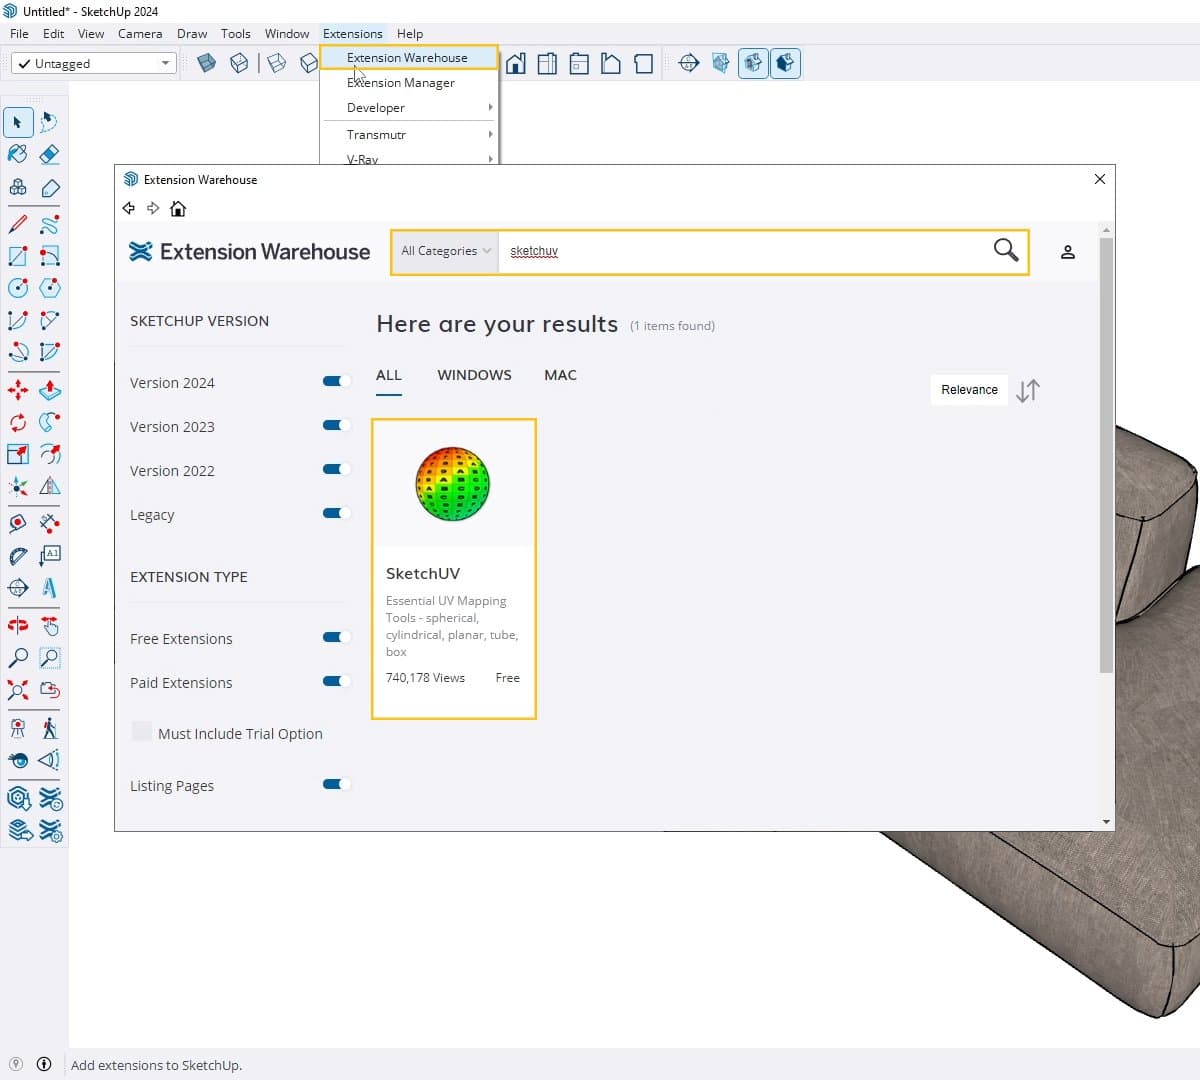
- Go to the Extension Warehouse: Go to the Extension tab and select Extension Warehouse.
- Search and Install: Search for the SketchUV plugin and install it for free.
- Activate the Toolbar: If the SketchUV toolbar does not appear automatically after installation, right-click on the top bar and select the SketchUV plugin from the menu.
Fixing Texture Mapping on a Couch
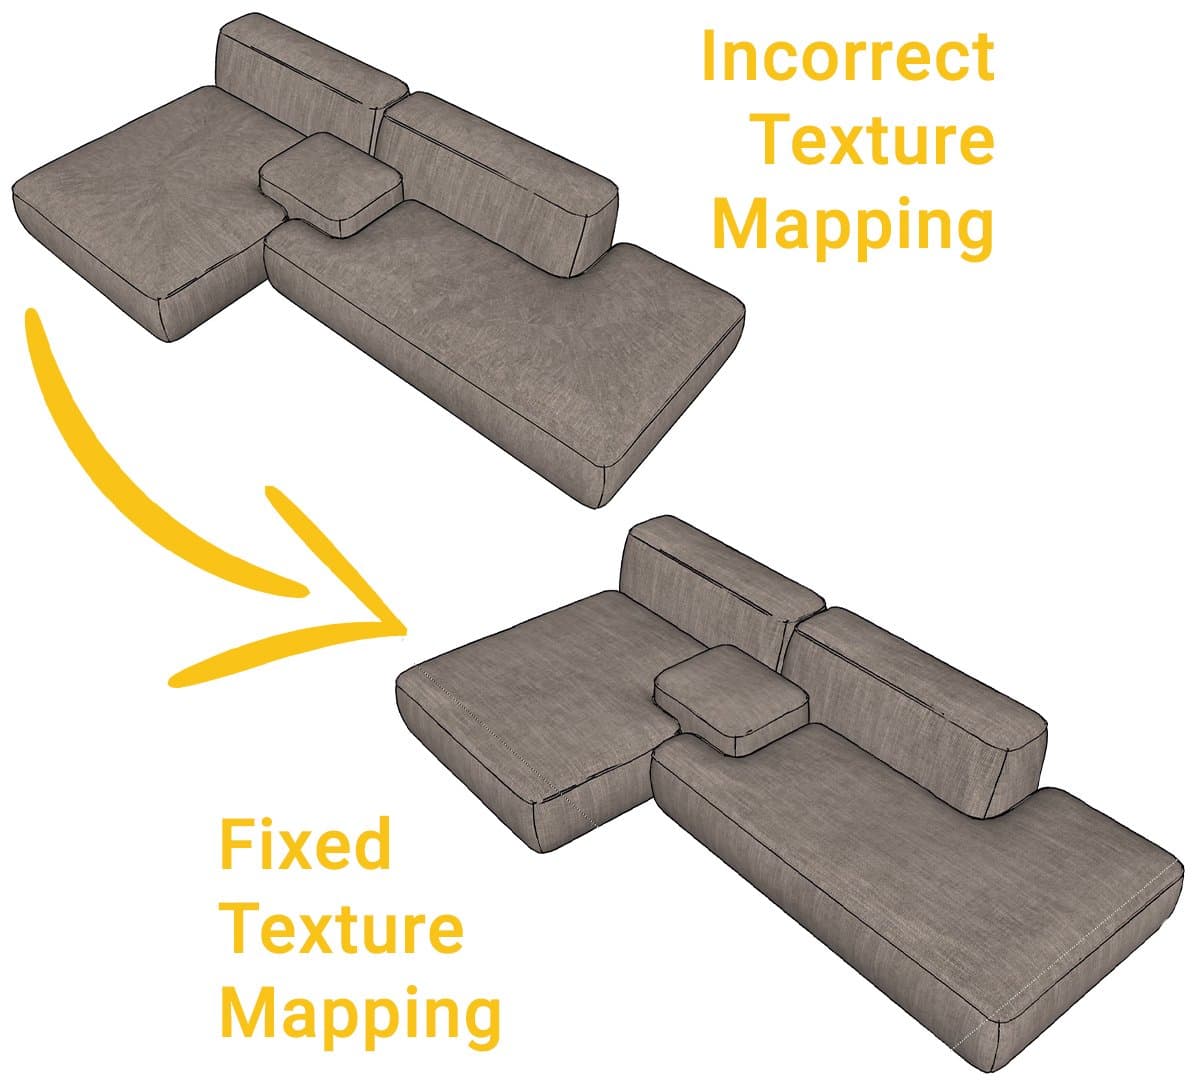
The texture mapping needs improvement. Currently, the texture is mapped in multiple directions, which does not look realistic.
Steps to Fix with SketchUV:
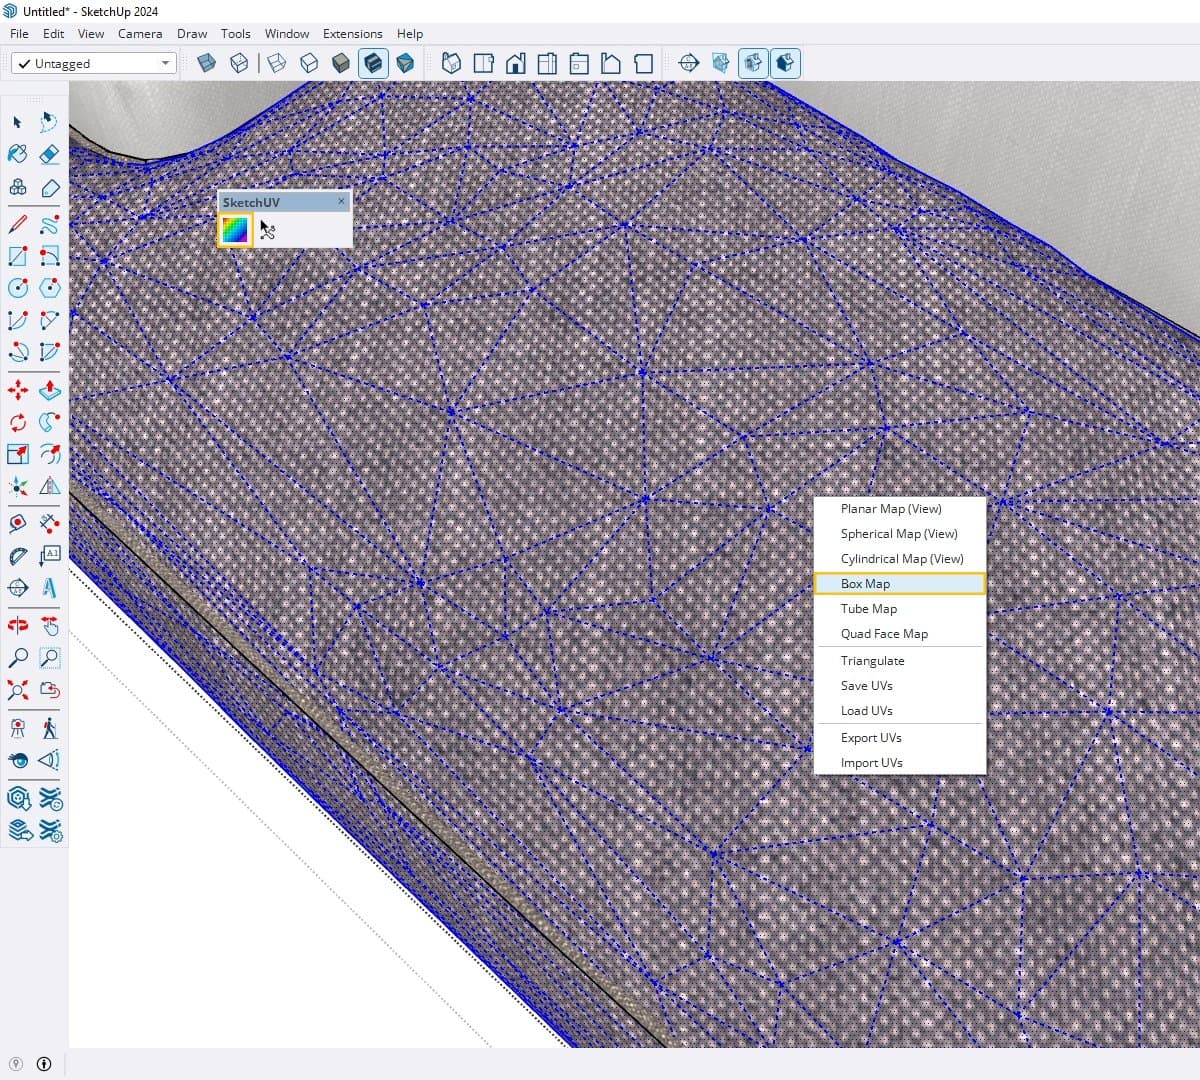
- Open the Group: Open the group of the couch object by double-clicking on it.
- Select Faces: Select the faces you want to remap.
- Use SketchUV Mapping Tools: Click on the SketchUV Mapping Tools icon in the toolbar.
- Choose Box Map: You can choose different types of mapping, but I mostly use Box Map. This makes the mapping look realistic and places the texture in one consistent direction.
Avoid Issues With Texture Mapping
To avoid issues with mapping, once the texture mapping is done correctly, try not to lose this effect by changing the material of the object improperly.
Example: Barstools
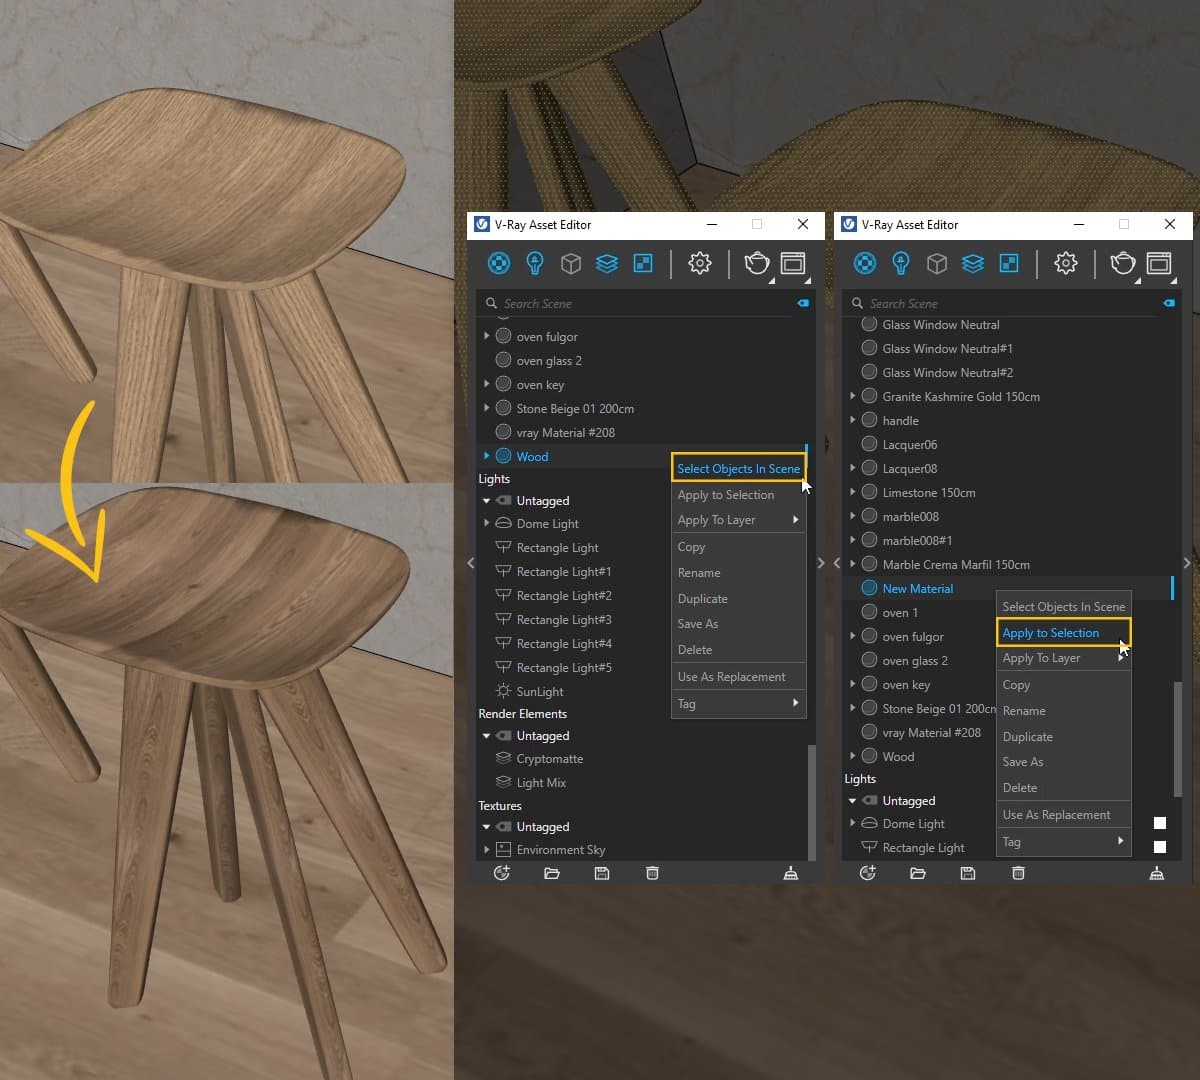
- Select Objects in Scene: Go to V-Ray Asset Editor and Right-click on the current material and choose “Select Objects in Scene.” This will select all the faces using that texture.
- Apply New Material: Right-click on the new material you want to apply and choose “Apply to Selection.” Adjust the size of the texture in the Materials window.
Special Options in V-Ray
Using V-Ray Utilities
If the mapping is incorrect from the beginning, we can use special options in V-Ray to fix it.
Steps:
- Select V-Ray Utilities: Right-click on the top bar and select V-Ray Utilities.
- Use Tri-Planar Projection: I mostly use World Projection, as it is independent of object scaling and provides more consistent results.
- Adjust Dimensions: Open the group, select the faces, and click on the Tri-Planar Projection World icon. Adjust the dimensions of the texture if necessary.
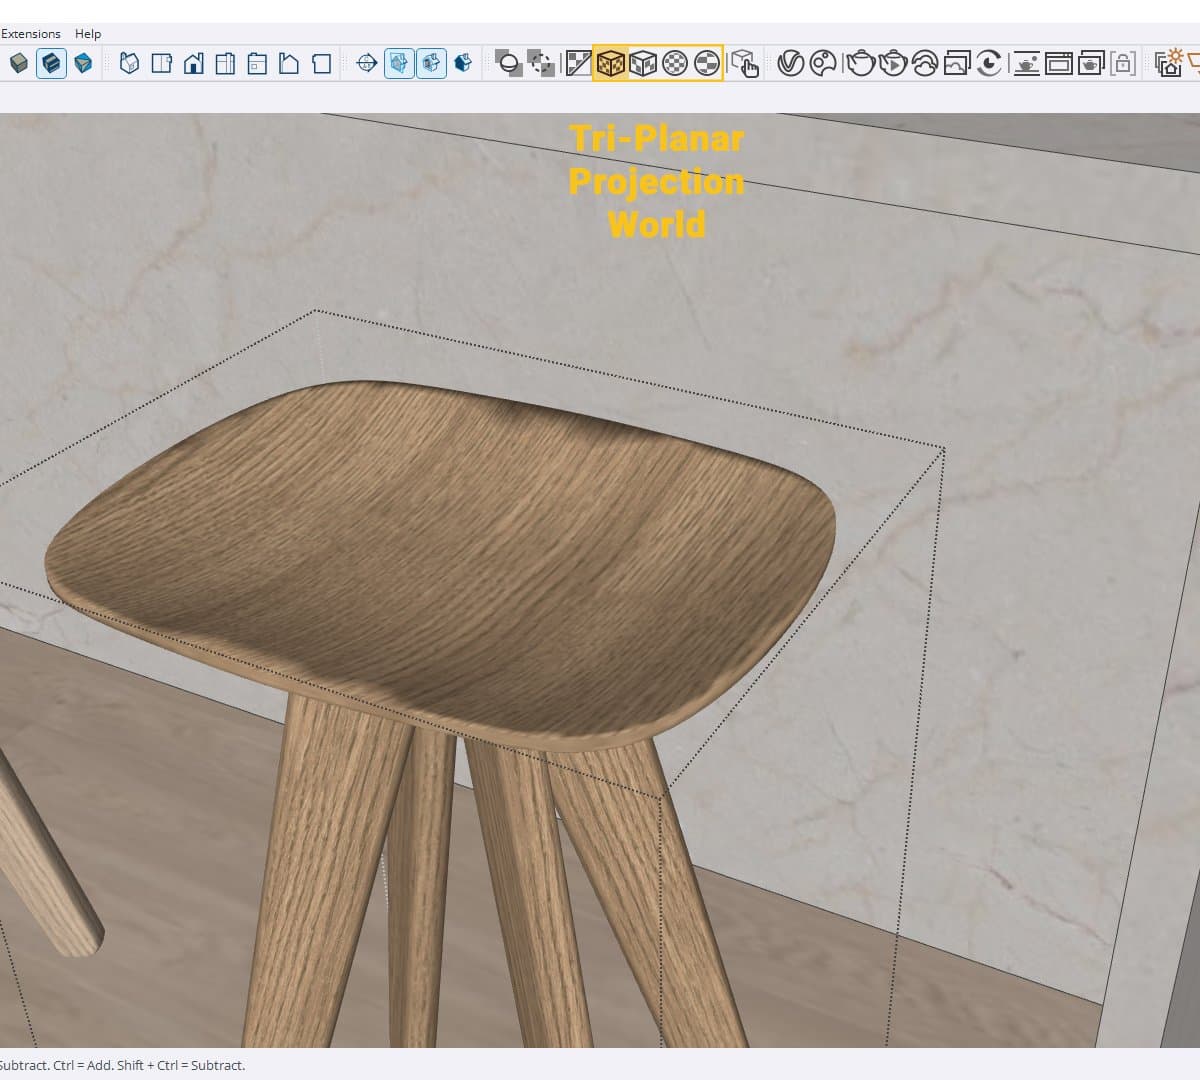
Image Suggestion: Include a screenshot of the V-Ray Utilities with the Tri-Planar Projection World icon highlighted.
Conclusion
By following these steps, you can ensure that your textures are mapped correctly and look realistic. Proper texture mapping can significantly enhance the visual appeal of your 3D models in SketchUp.
