The Best Render Settings for V-Ray 7 Explained
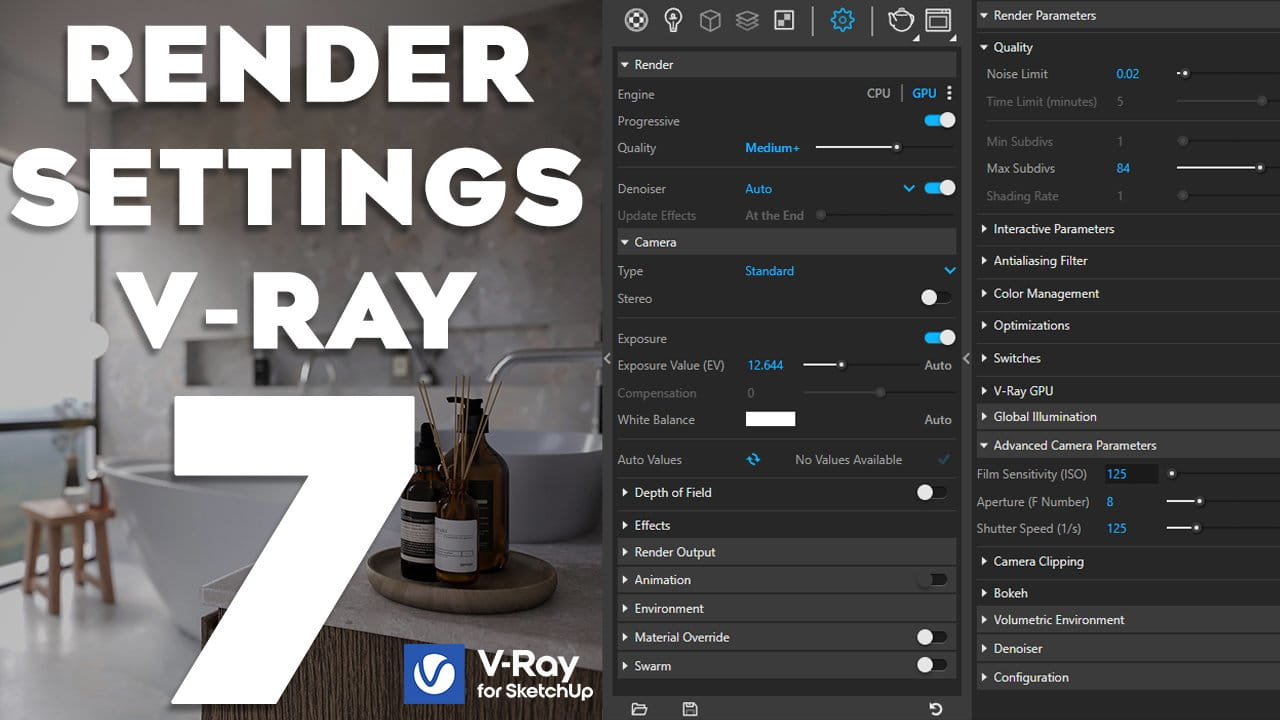
Adjusting render settings in V-Ray 7 is essential for creating realistic visualizations. Whether you’re a beginner or a pro, this guide will take you through the key V-Ray render settings, helping you achieve stunning results.
1. Build the Foundation: Lighting and Materials
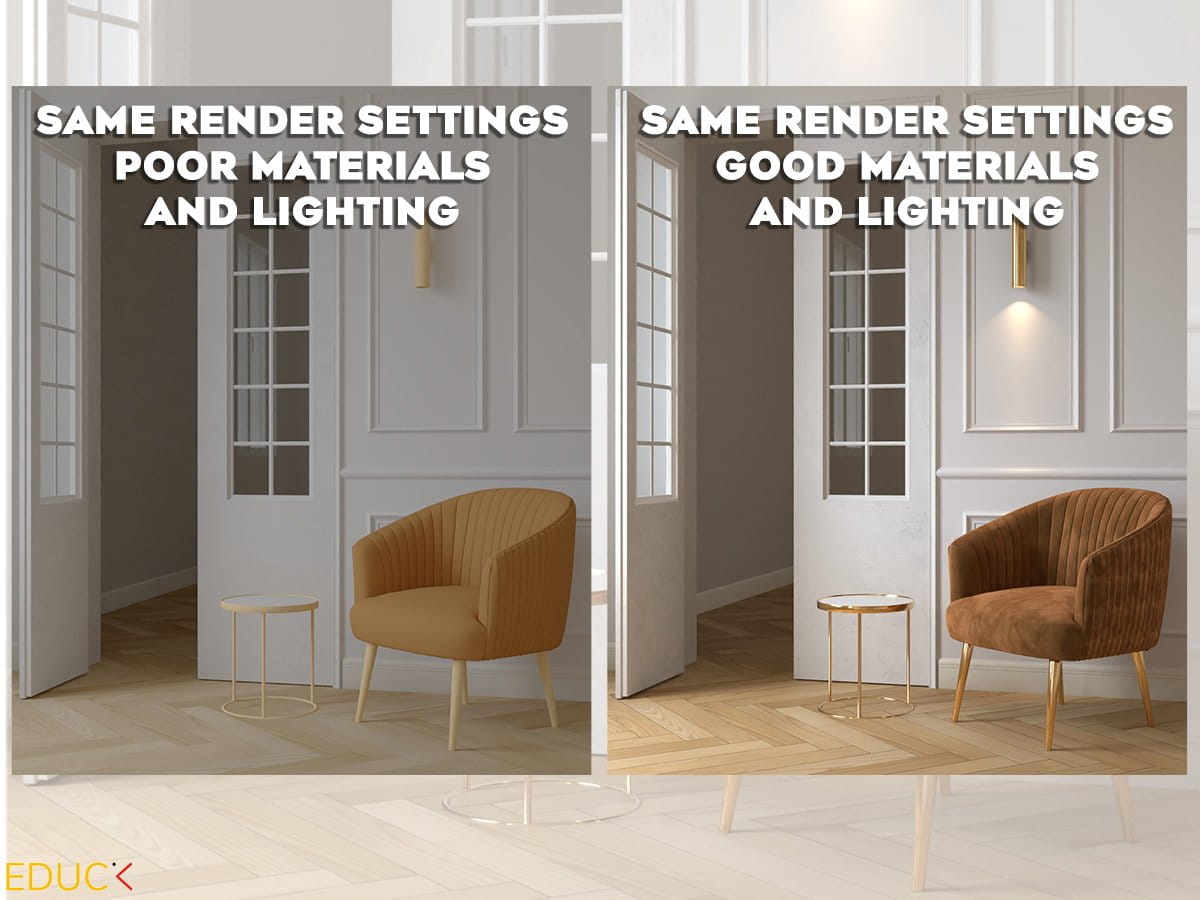
Before you we start with render settings, it’s crucial to establish a strong foundation with proper lighting and materials. These elements are the backbone of any realistic visualization.
Lighting Tips:
- Use a combination of primary, secondary, and accent lights to create depth and realism.
- Experiment with warm and cool lighting to find the right mood for your scene.
- Material Enhancements:
- Add bump maps to simulate textures like wood grain or fabric weave.
- Use reflection settings for materials like glass, metal, or polished surfaces to make them more realistic
With these basics ready, render settings can enhance your visualizations.
2. Accessing Render Settings
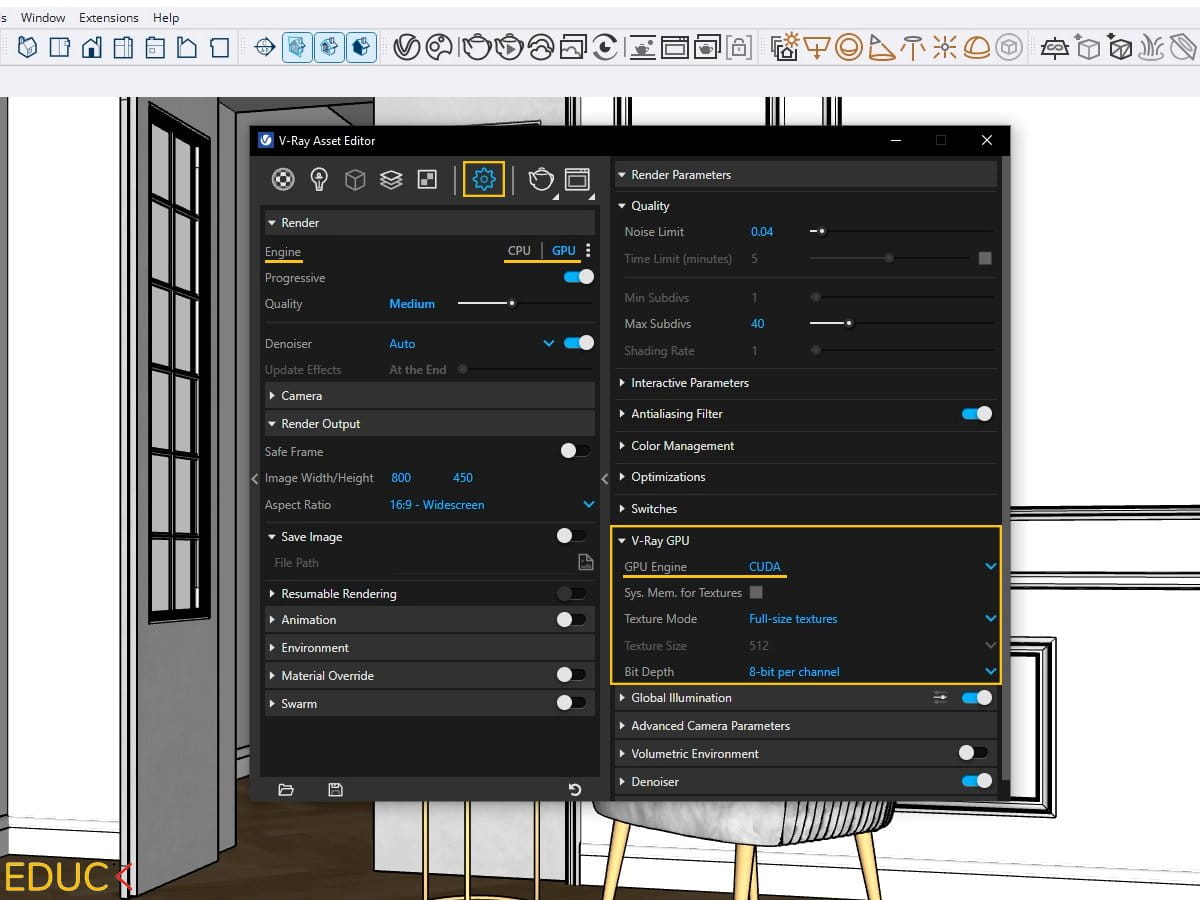
The render settings are accessible through the gear icon in the V-Ray toolbar. This is where all your configuration begins, and one of the first choices you’ll need to make is the rendering engine.
Rendering Engine
- CPU Rendering:
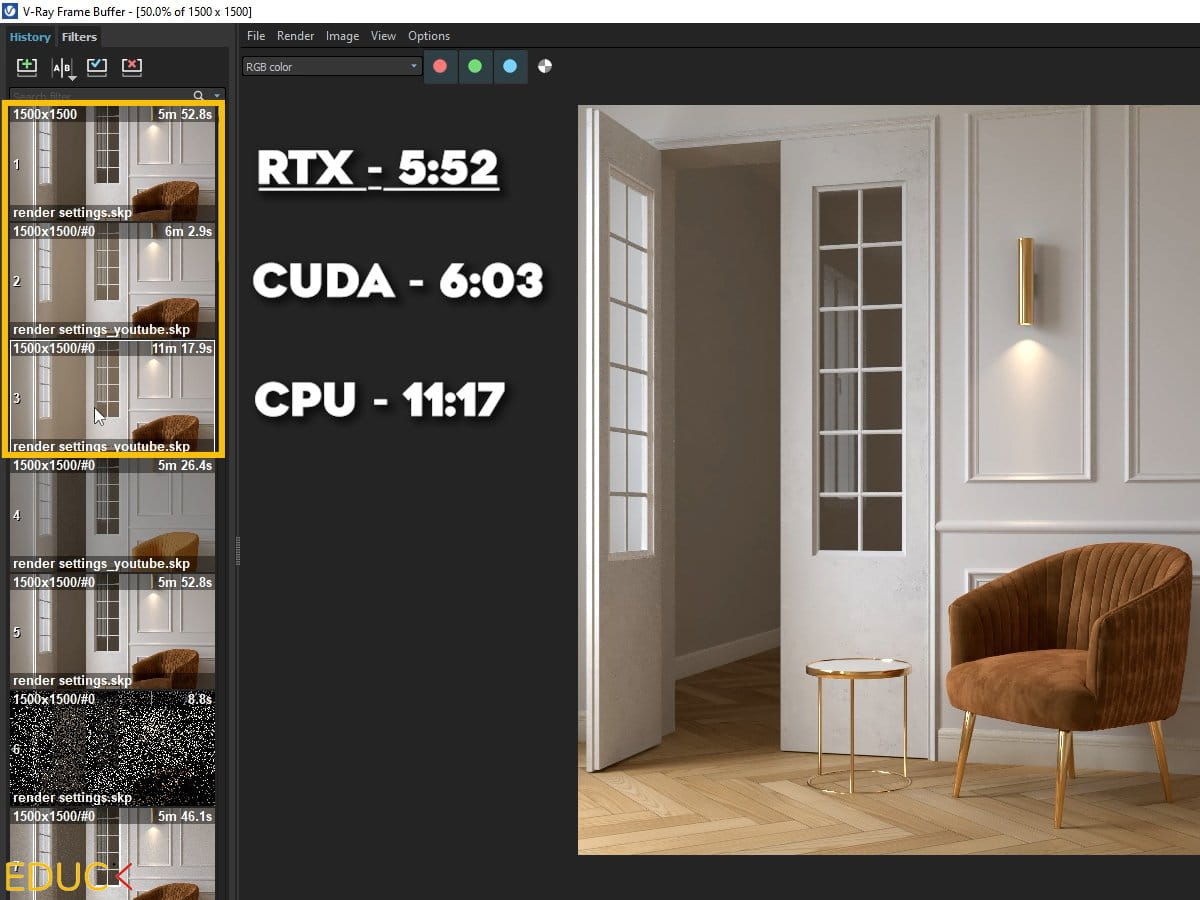
- Uses your computer’s processor. Best if your CPU is stronger than your GPU or your GPU doesn’t support CUDA or RTX.
- GPU Rendering:
- Uses your graphics card to speed up renders. Choose RTX for the best performance with NVIDIA RTX cards.
Understanding Rendering Modes
V-Ray 7 provides three rendering modes, each for specific tasks:
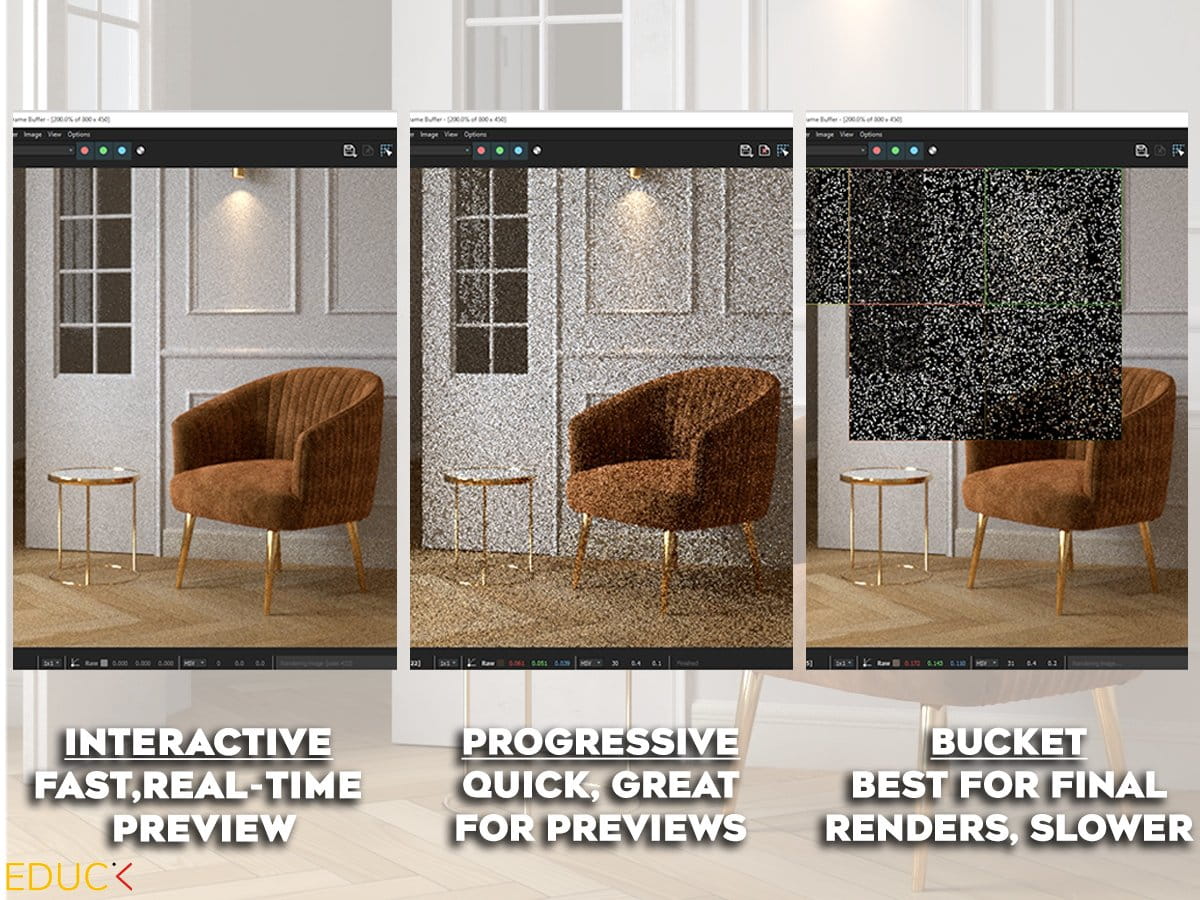
- Interactive Rendering Mode:
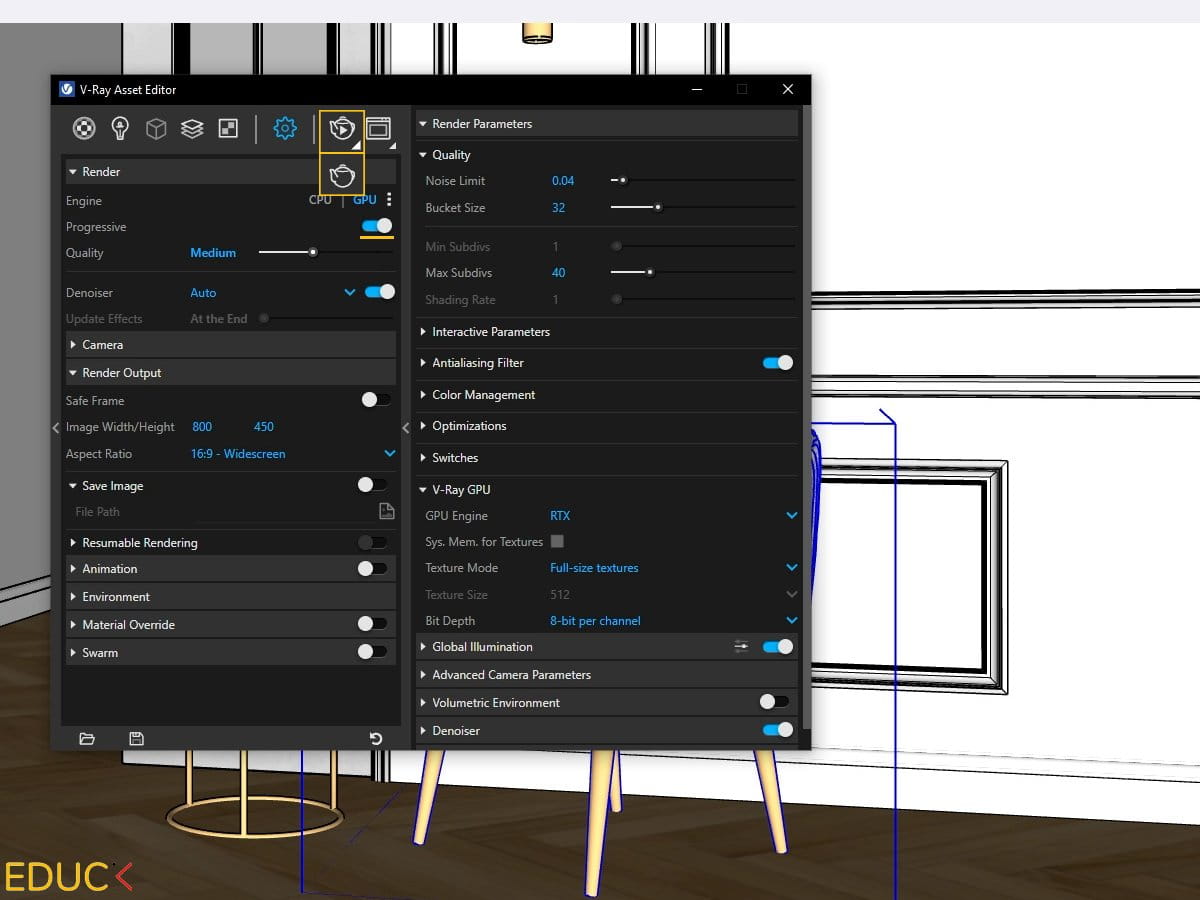
Gives real-time previews of changes like lighting or materials. Best for testing simple scenes but can be slow with complex ones. Interactive Rendering Mode isn’t visible by default. To access it, click the small triangle next to the teapot icon and switch to interactive mode. - Progressive Rendering Mode:
Generates quick previews without being real-time. Great for reviewing the composition before final renders. To enable this, turn on progressive rendering. - Bucket Rendering Mode:
Processes renders in sections, giving the best quality. Ideal for detailed final visualizations.To enable this, turn off progressive rendering.
When to Use Each Mode
- Use Interactive Rendering for quick edits during design.
- Switch to Progressive Rendering for detailed previews.
- Choose Bucket Rendering for high-quality, client-ready results.
Render Quality
Render quality affects the detail of your visualization and the time to complete it.
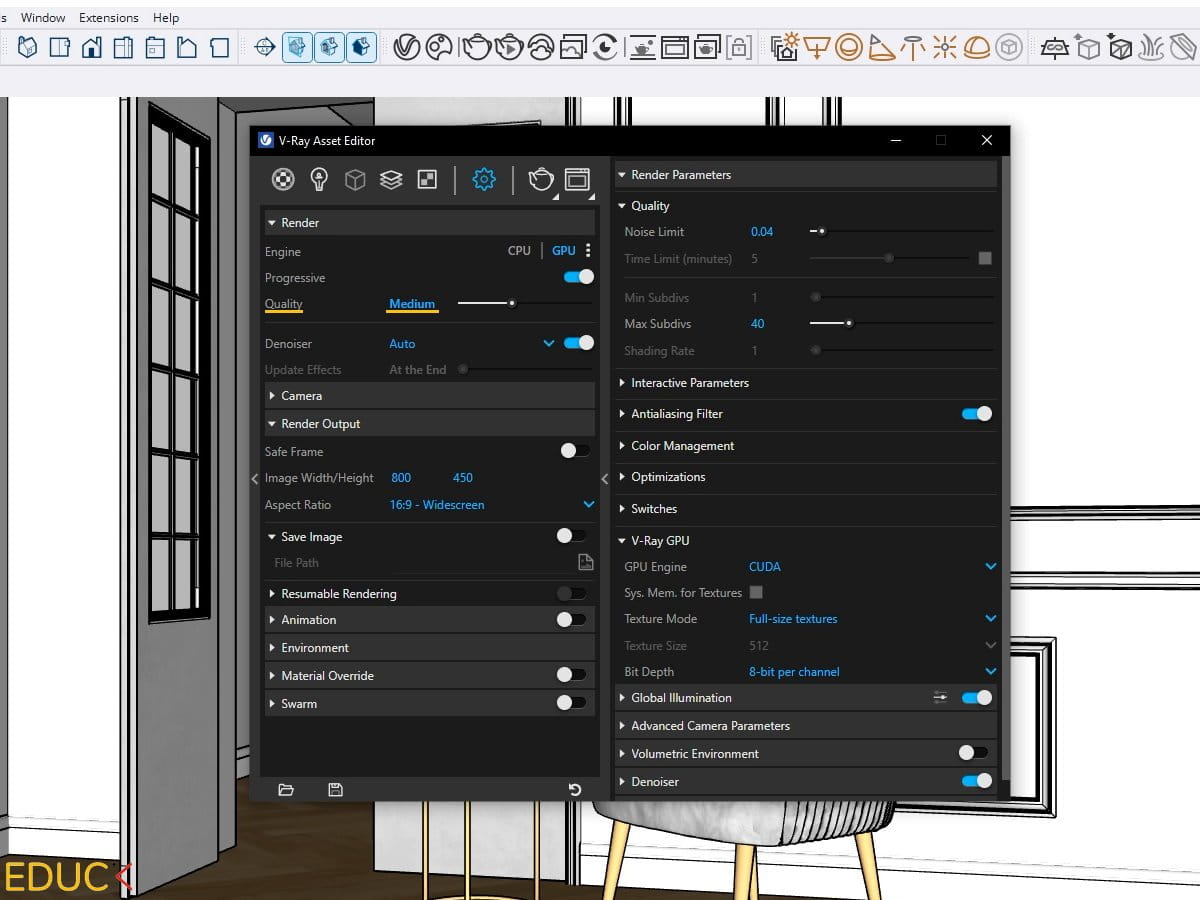
- Low+ or Medium Quality:
Perfect for previews to save time while keeping enough detail for adjustments. - Medium+ or High Quality:
Best for final renders, balancing quality and speed.
Why Avoid High+?
The difference between High and High+ is minimal but increases render time significantly, especially with the denoiser active.
Pro Tip: Start with Medium+ for final renders and only increase if necessary.
Denoiser
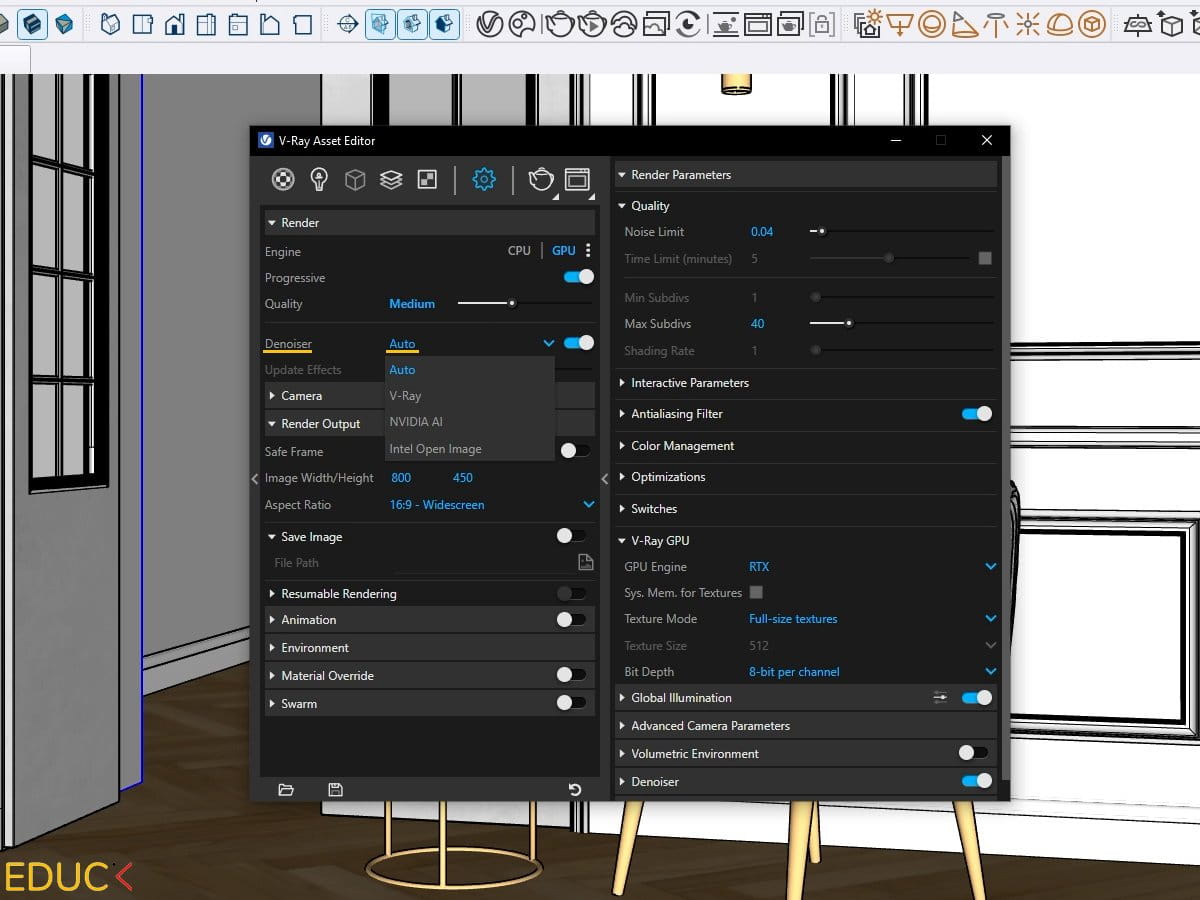
The V-Ray 7 denoiser smooths out noise in renders. The new Auto setting adjusts automatically based on the mode you choose, making it user-friendly.
Why Use Auto?
Previously, manual adjustments were needed, but Auto now simplifies the process. In Bucket Mode, the denoiser ensures clean visuals without extra rendering time.
Camera Settings for Realistic Lighting
Let’s focus on the Camera tab.
The most important option here is Exposure Value. This setting allows you to brighten or darken the scene. A higher exposure value makes the scene darker, while a lower value makes it brighter.
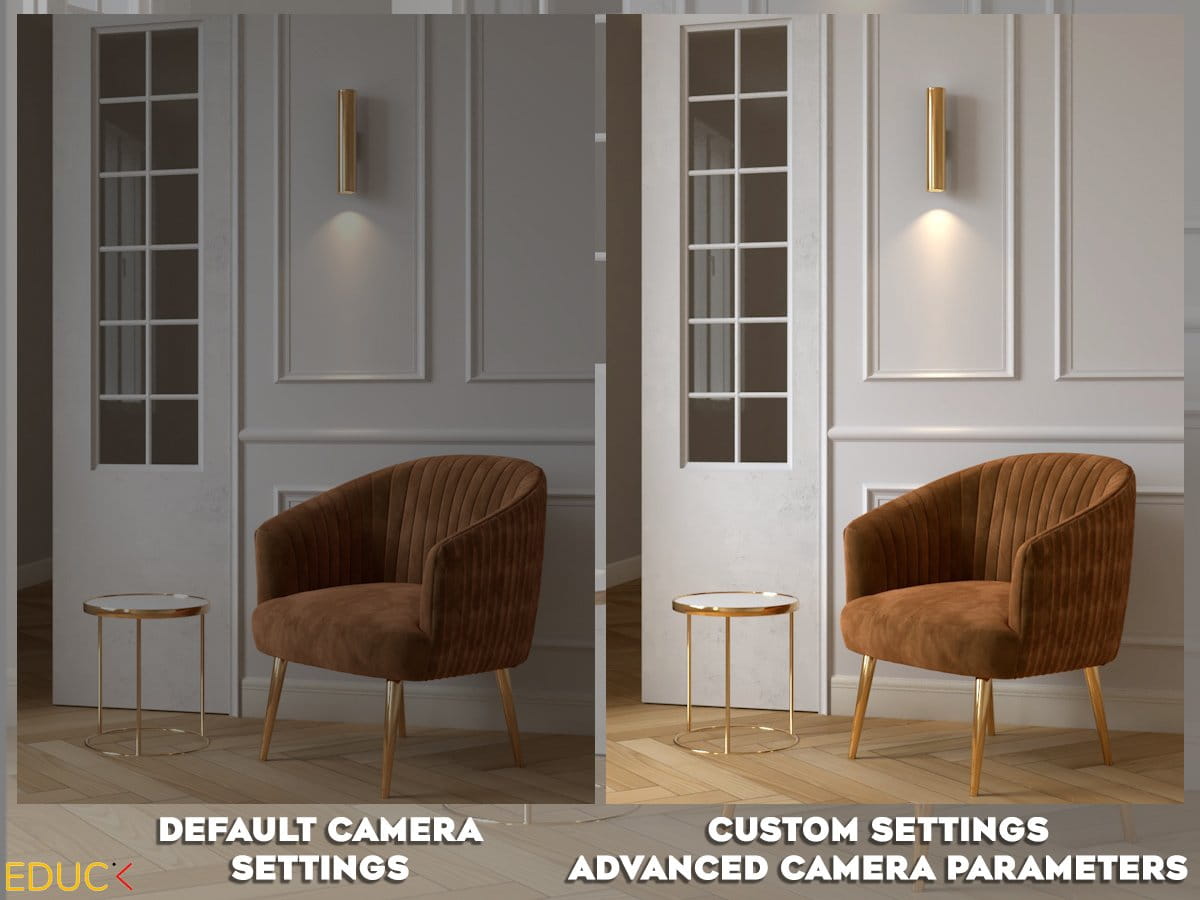
The Exposure Value in the Camera tab is linked to the Advanced Camera Parameters tab on the right. I prefer adjusting the Advanced Camera Parameters because, when set correctly, the lighting in the scene looks much better.
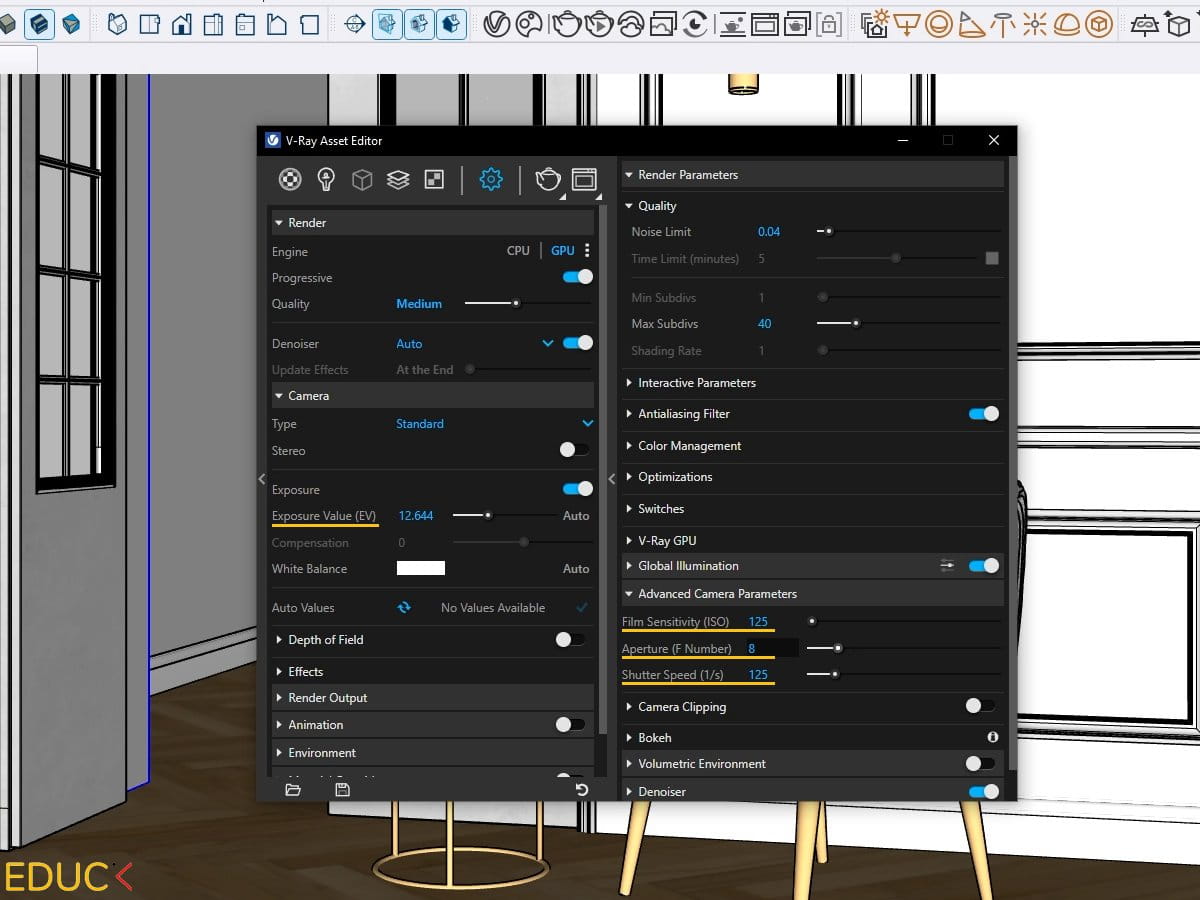
Key Camera Parameters
- ISO: Adjusts brightness.
Example: 125 for balanced lighting. - Aperture (F Number): Controls light entry.
Example: 8 for standard setups. - Shutter Speed: Regulates light intake.
Example: 125 for balance.
Adjust these together to create natural, well-lit scenes.
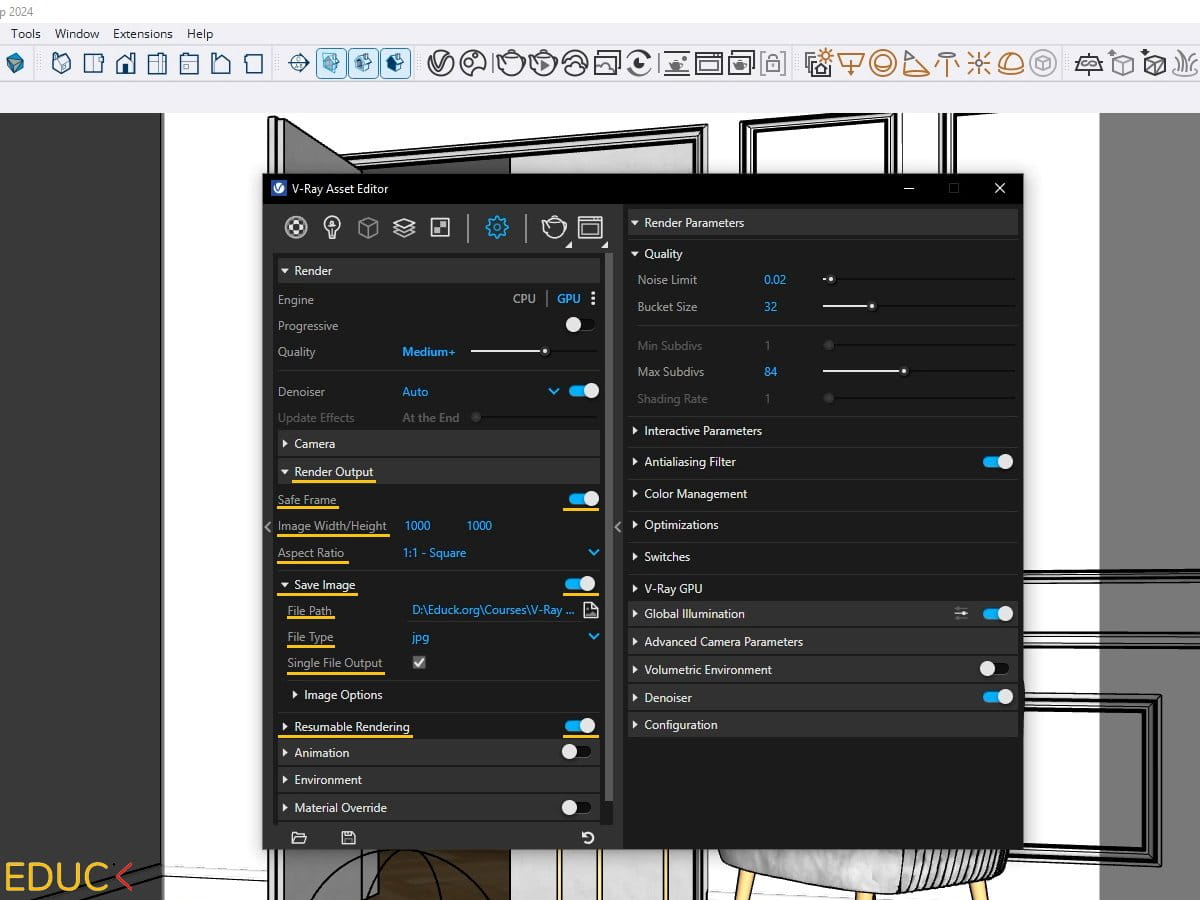
Render Output
In the Render Output tab, adjust these settings for better results:
- Safe Frame: Enable this to see what will appear in the final render.
- Resolution:
- Previews: 800-1000px.
- Final renders: 2000px or higher.
- Aspect Ratio: Choose a ratio that fits your scene. You can use presets, match the viewport, or set a custom aspect ratio manually.
- If you don’t want to save each render manually, turn on the Save Image option.
- Select the folder where you want to save the render automatically.
- Choose the file type – I usually select JPG.
- Check the Single File option to save only the final render without additional channels that aren’t necessary.
- Resumable Rendering in V-Ray for SketchUp allows you to pause and resume a render without starting over. Here’s how it works, simply:
- If you stop a render, V-Ray saves your progress.
- Later, you can continue later without starting over, saving time.
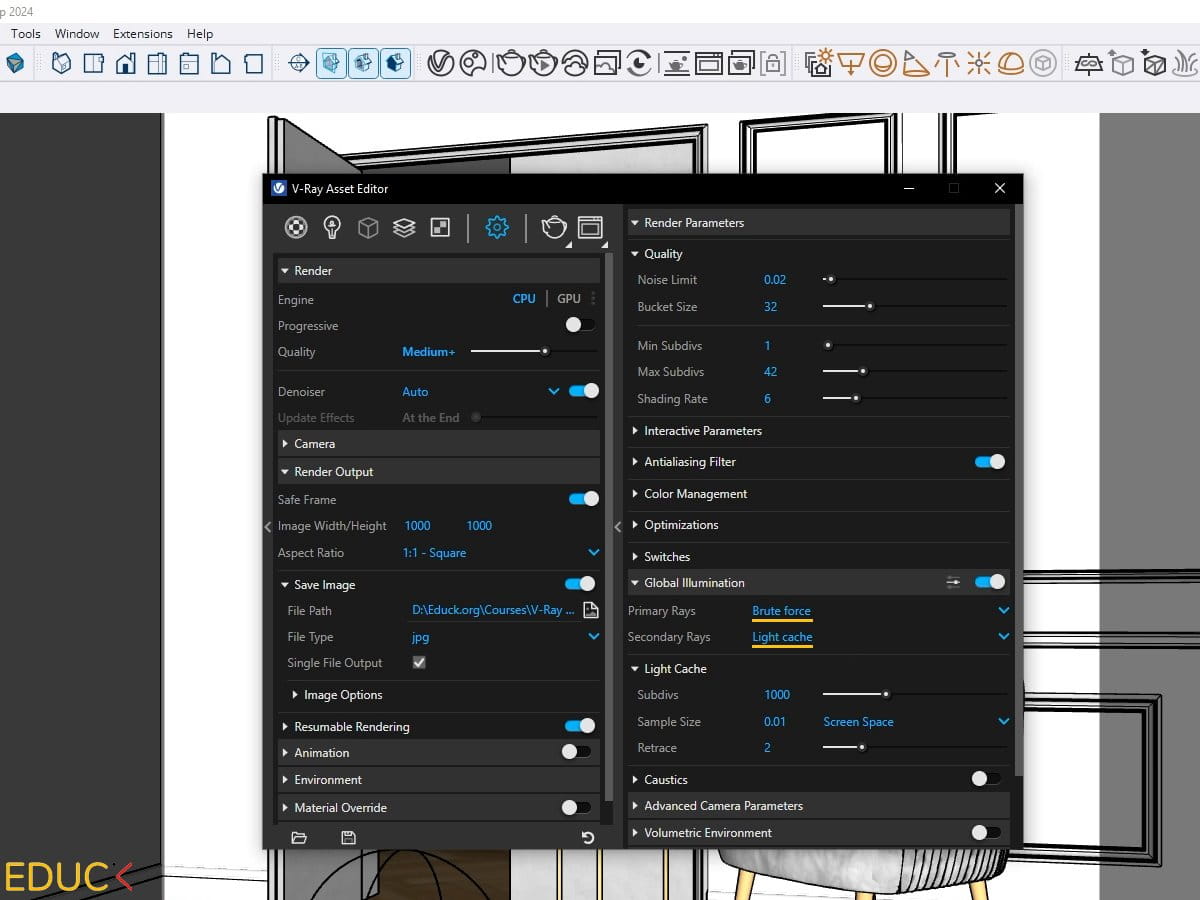
Global Illumination
If you’re using CPU, you can set the primary light to either Brute Force or Irradiance Map.
- Brute Force is more accurate, and I often use this option.
- Irradiance Map is faster but less accurate. In V-Ray 7, this option is deprecated, meaning it may be removed or no longer developed in future versions. I recommend sticking with Brute Force.
If you’re using GPU, you can’t change the Primary Rays – it’s set by default.
For Secondary Rays, I recommend leaving the settings as they are for both CPU and GPU.
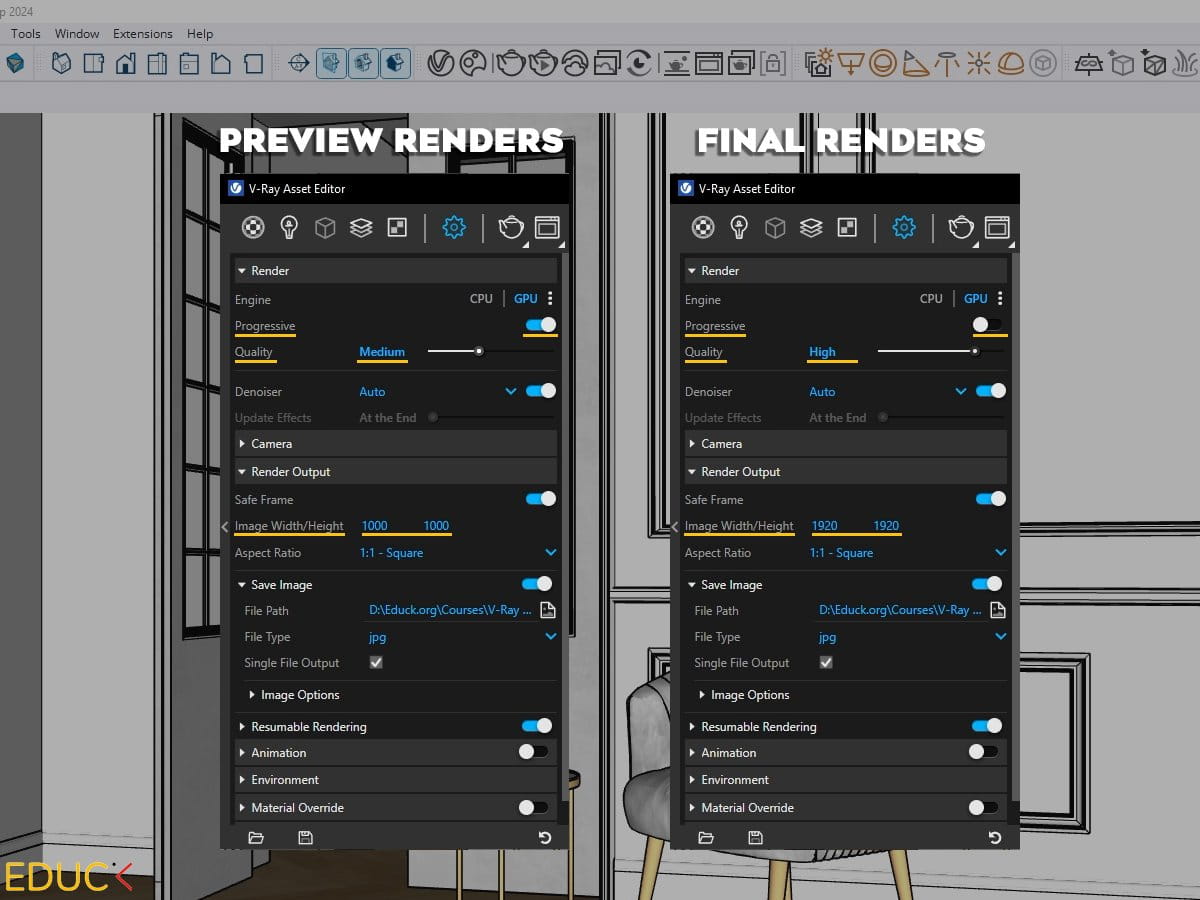
Recommended Settings for Preview and Final Renders
Preview Renders:
- Mode: Progressive Rendering
- Quality: Low+ or Medium
- Resolution: 800-1000px
Final Renders:
- Mode: Bucket Rendering
- Quality: Medium+ or High
- Resolution: 2000px or higher
Conclusion
Mastering V-Ray 7 render settings involves understanding lighting, materials, and the nuances of rendering modes. By following this comprehensive guide, you’ll be able to create visually stunning and professional-quality renders for any project.
