
Create a Photorealistic Visualization in Just 1 Hour!
Start creating professional visualizations without stress, complicated settings, or spending hours on YouTube.
In this mini-course, you’ll go through the entire process with me – from a SketchUp model to a finished visualization. I’ll show you how to light the interior, set up the camera, fine-tune materials, and render an image that looks amazing.
You don’t need advanced knowledge – all you need is SketchUp, V-Ray, and the desire to learn something new.
Our method is based on practical lessons that will instantly take your work to the next level.
Take your projects to the next level.
I’ll show you how to use SketchUp and V-Ray to create visualizations that don’t just look great — they sell your ideas.
You will get access to 10 video lessons, divided into chapters that you can watch whenever you want. Each lesson shows the next steps in creating one consistent visualization.
Ready-to-use files: textures, lights, materials, and the SketchUp model – everything you need to recreate the scene on your own.
Additionally, you will get a video lesson where I show you how to create PBR materials using libraries from various websites. This will help you better understand the entire process of creating photorealistic materials.
Practical knowledge you can use right away: You don’t need to know V-Ray inside out. You’ll learn exactly the settings that make a difference – lighting, camera, and materials. No unnecessary options or information overload.
A complete result: Instead of focusing on theory, this mini-course walks you through the entire visualization process from A to Z. No shortcuts, no speed-ups – I show you every step in real time.
Years of experience: Our knowledge comes from years of hands-on work and real projects for various clients. We teach only proven methods that we use in our daily workflow.
Lifetime access: Once you sign up, you get lifetime access to all materials, so you can revisit lessons anytime and learn at your own pace.
Professional textures, lights, and materials – for now and later: You’ll download a package of textures, lights, and materials that you can also use in your future projects. It’s your starter kit for creating more visualizations.
You want to understand how the visualization process works – from the model, through lighting, to the final render? This course will guide you step by step through the entire workflow. No complicated language, just a finished result at the end.
You create visualizations, but feel like “something’s missing”? This course will help you understand how to improve lighting, materials, and composition to add realism, depth, and character to your work.
Don’t want to invest in a full course right away? I get it. This mini-course is the perfect way to see how I teach and find out if this format works for you – no risk, and with a clear result in just 75 minutes.
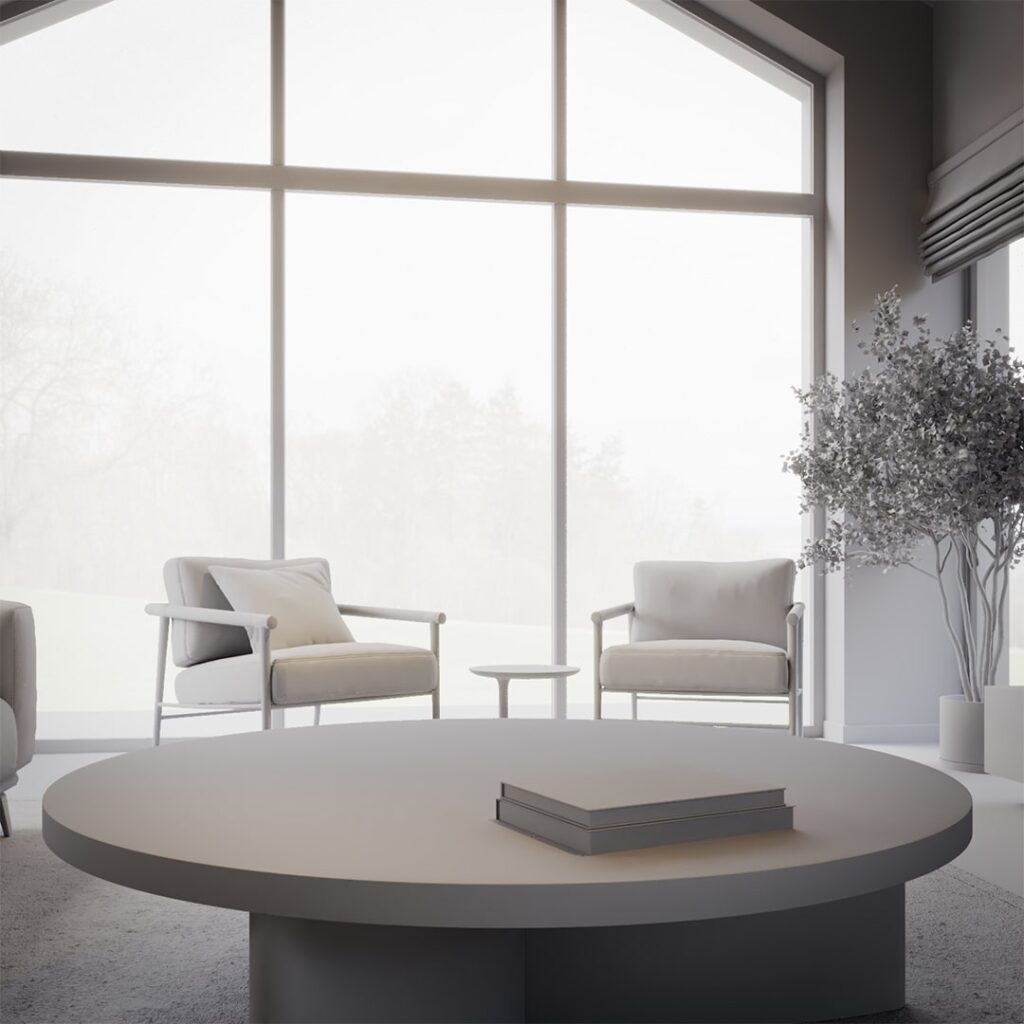
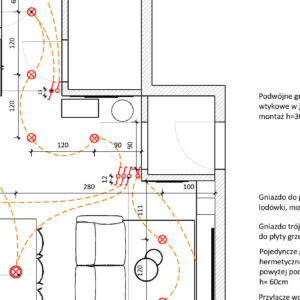
You’ll learn how to build a clean and organized model in SketchUp – without common mistakes that ruin the visualization. I’ll show you what to focus on so your render looks professional right from the first stage.

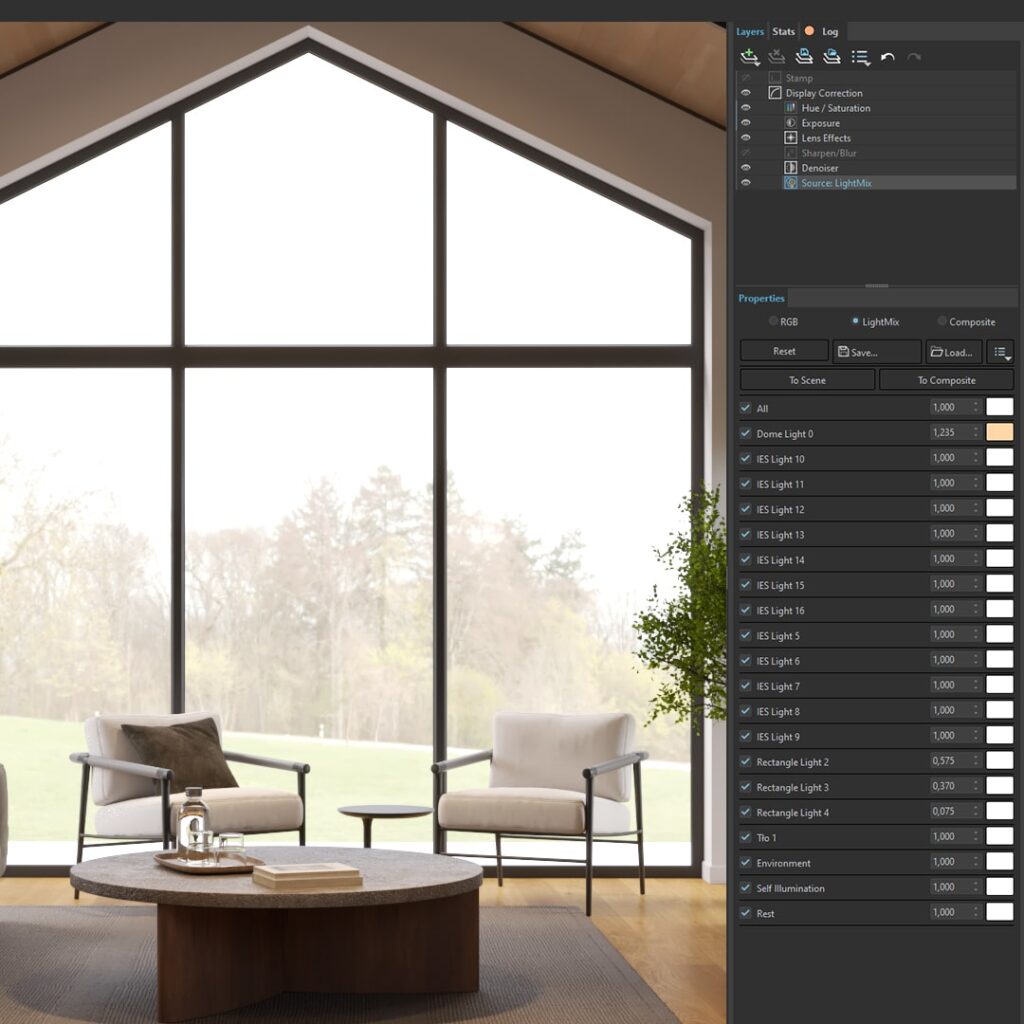
Before we start working on the visualization, we’ll go over the most important render settings. We’ll choose the right render mode, set up the camera, resolution, aspect ratio, and visualization quality – both for quick previews and final renders.

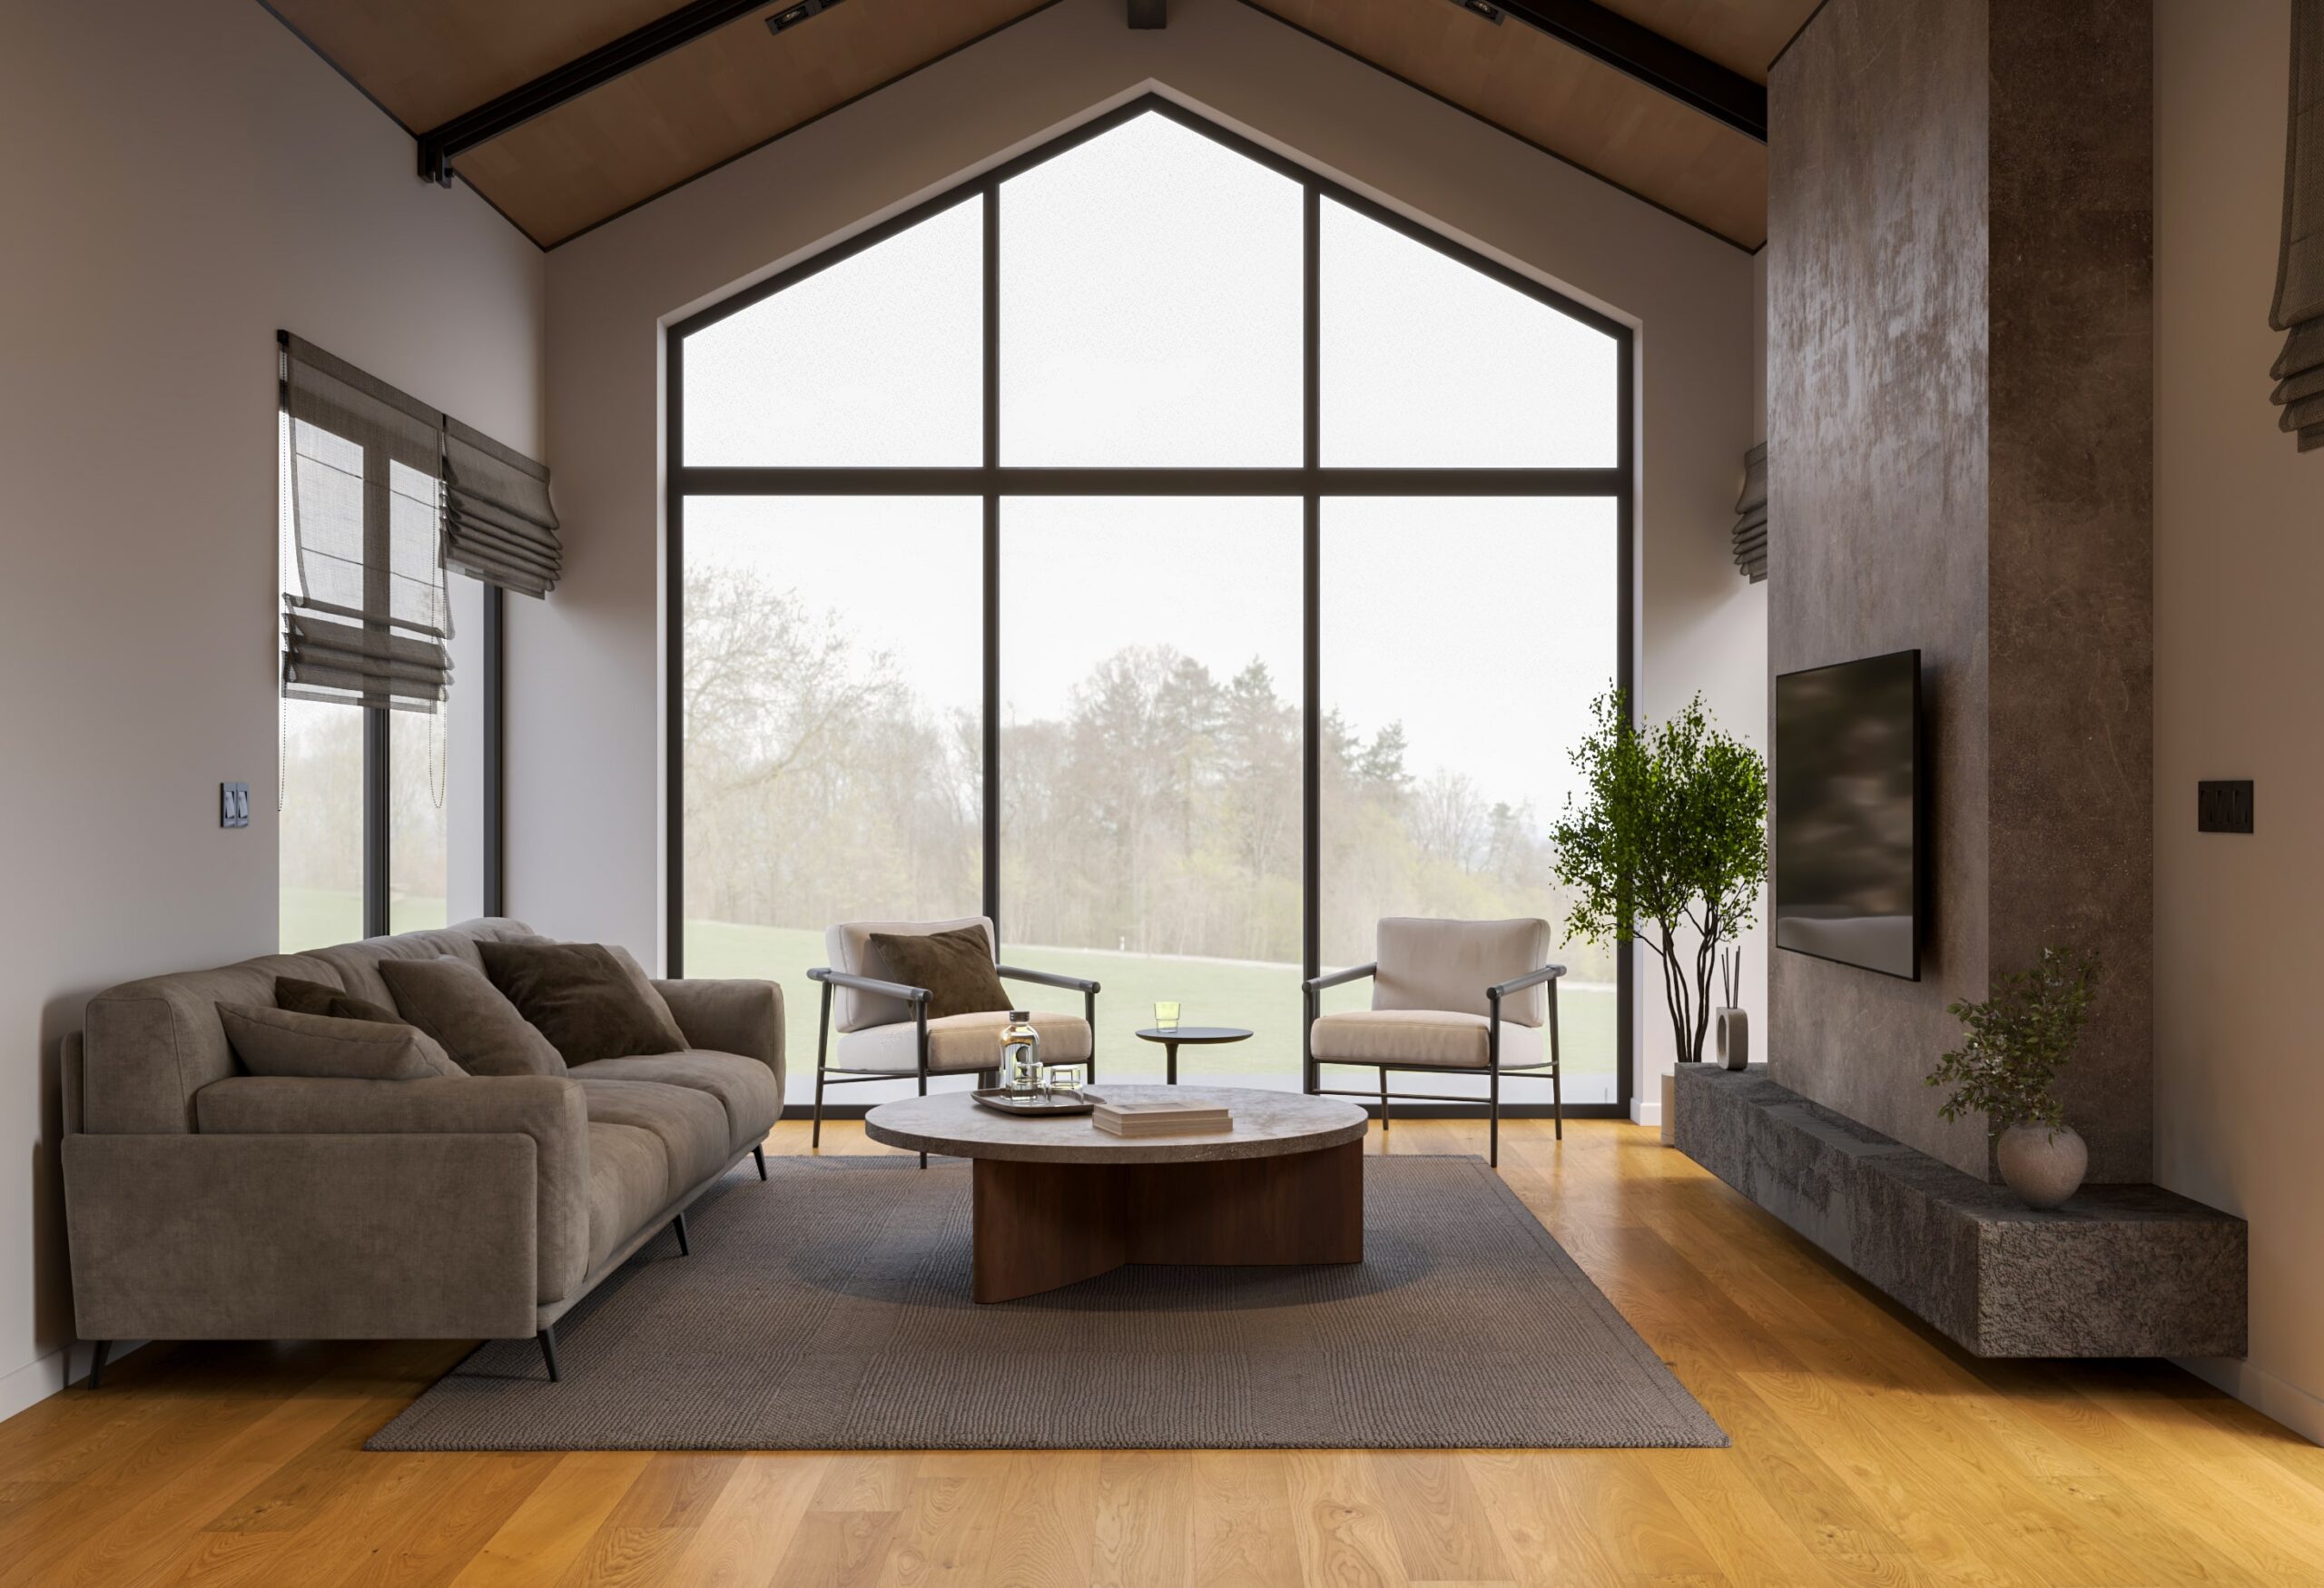
Professional interior lighting is based on the intentional selection and setup of light sources. In the course, I’ll show you how to use three key types:
With the right combination of these lights, your scene will gain depth, atmosphere, and a professional look.
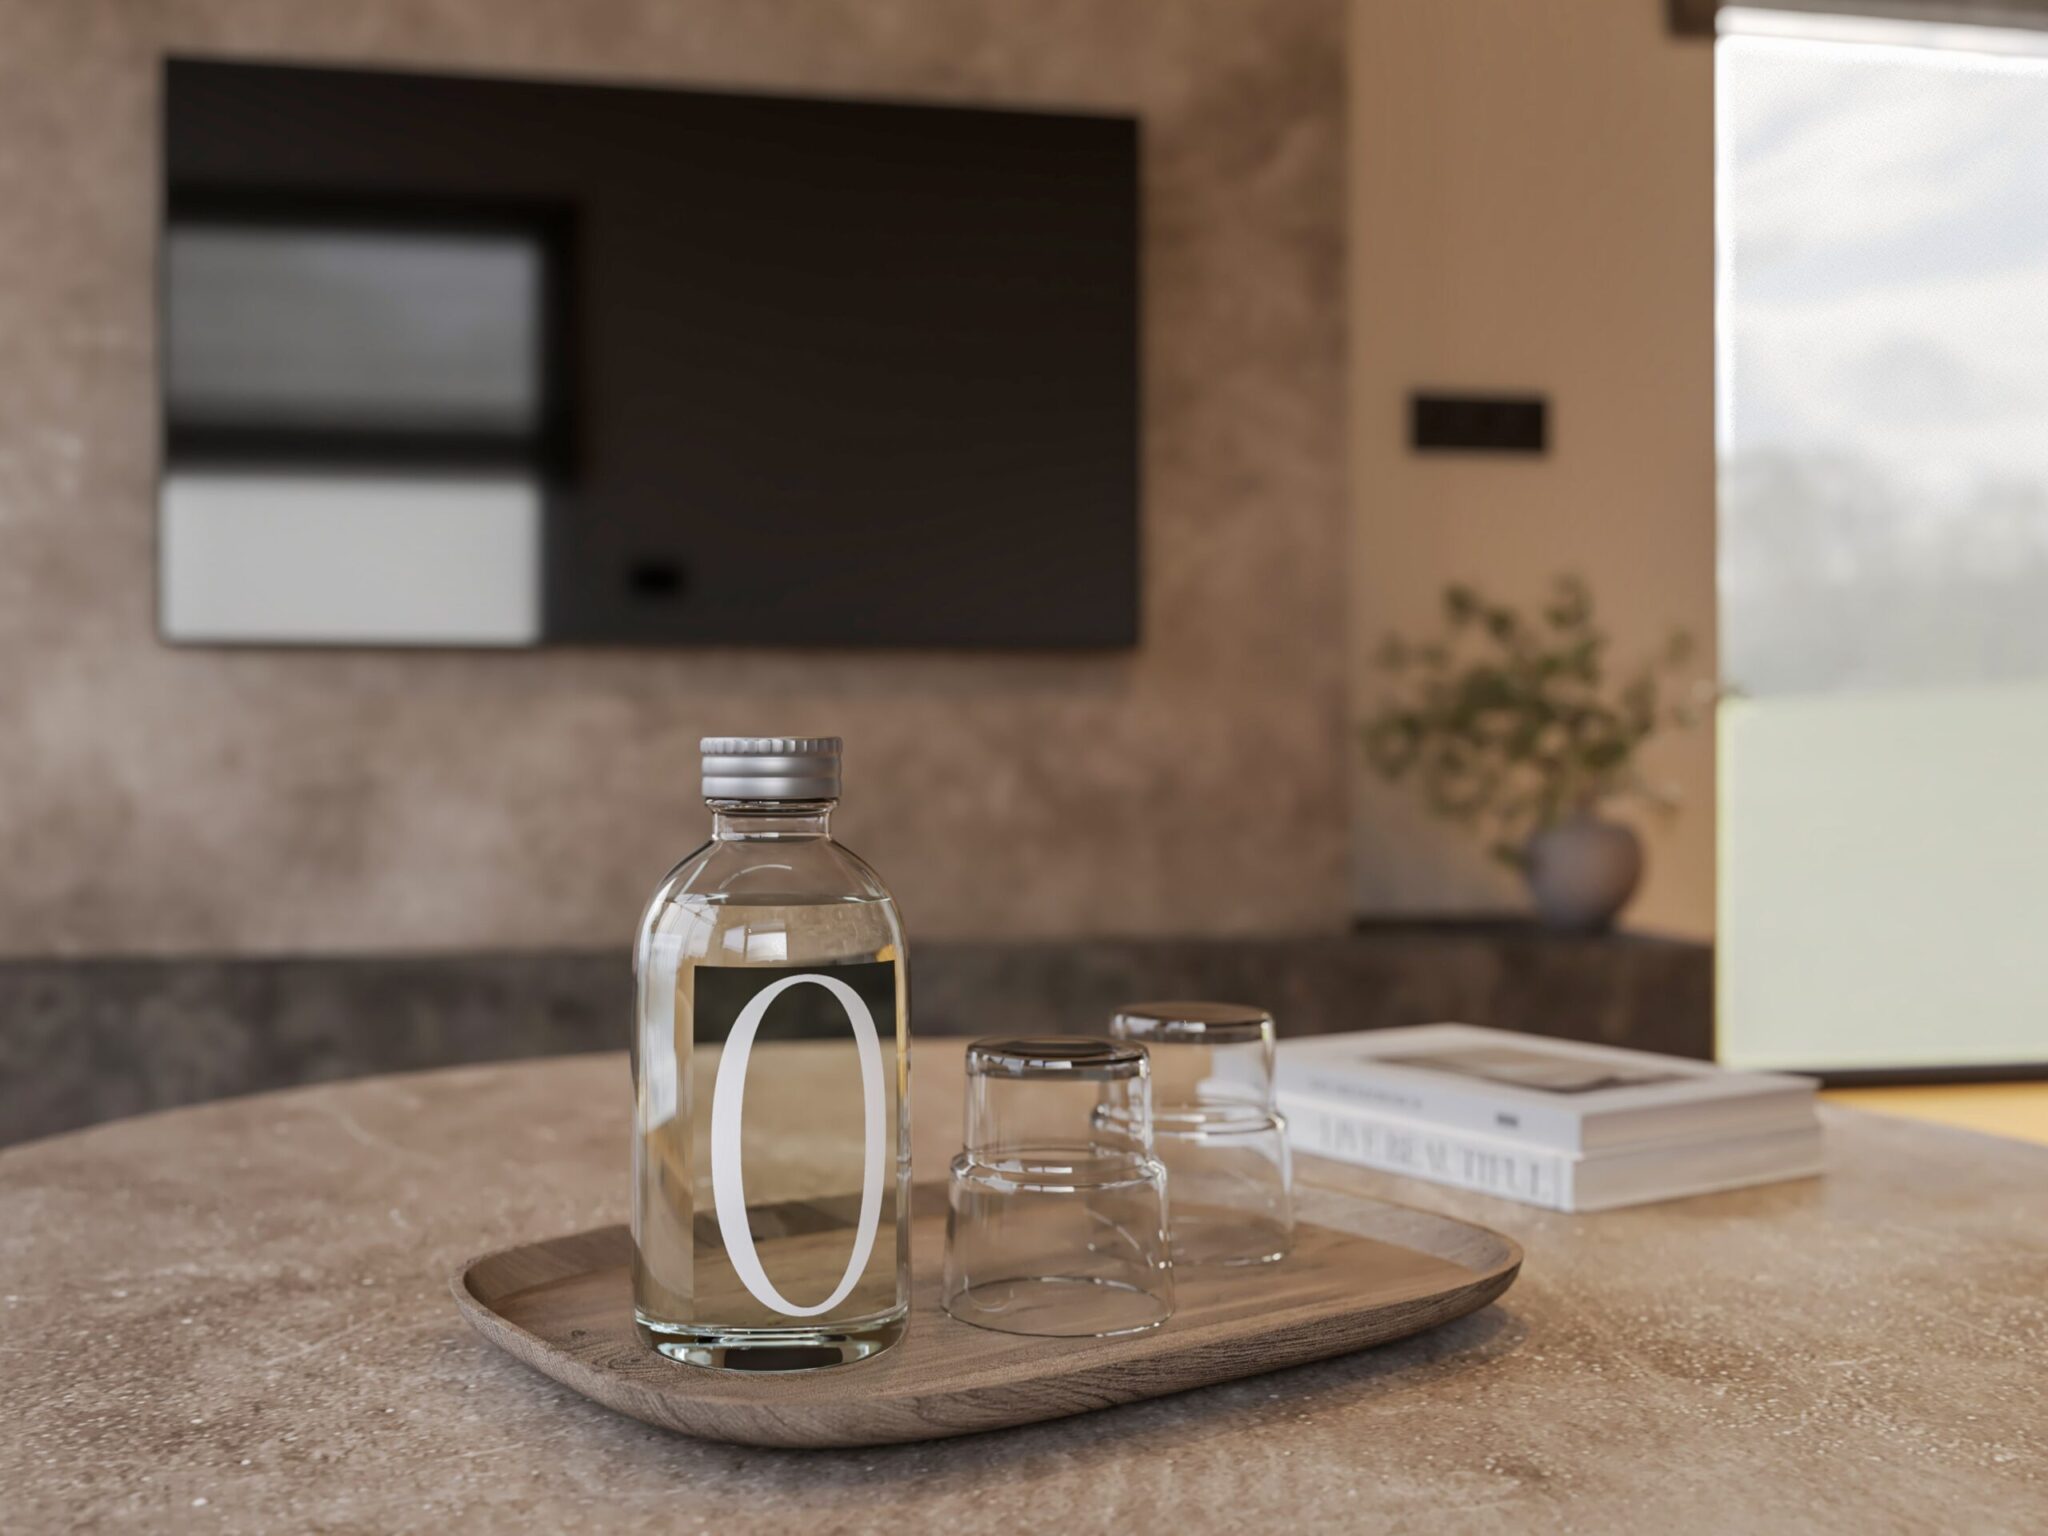
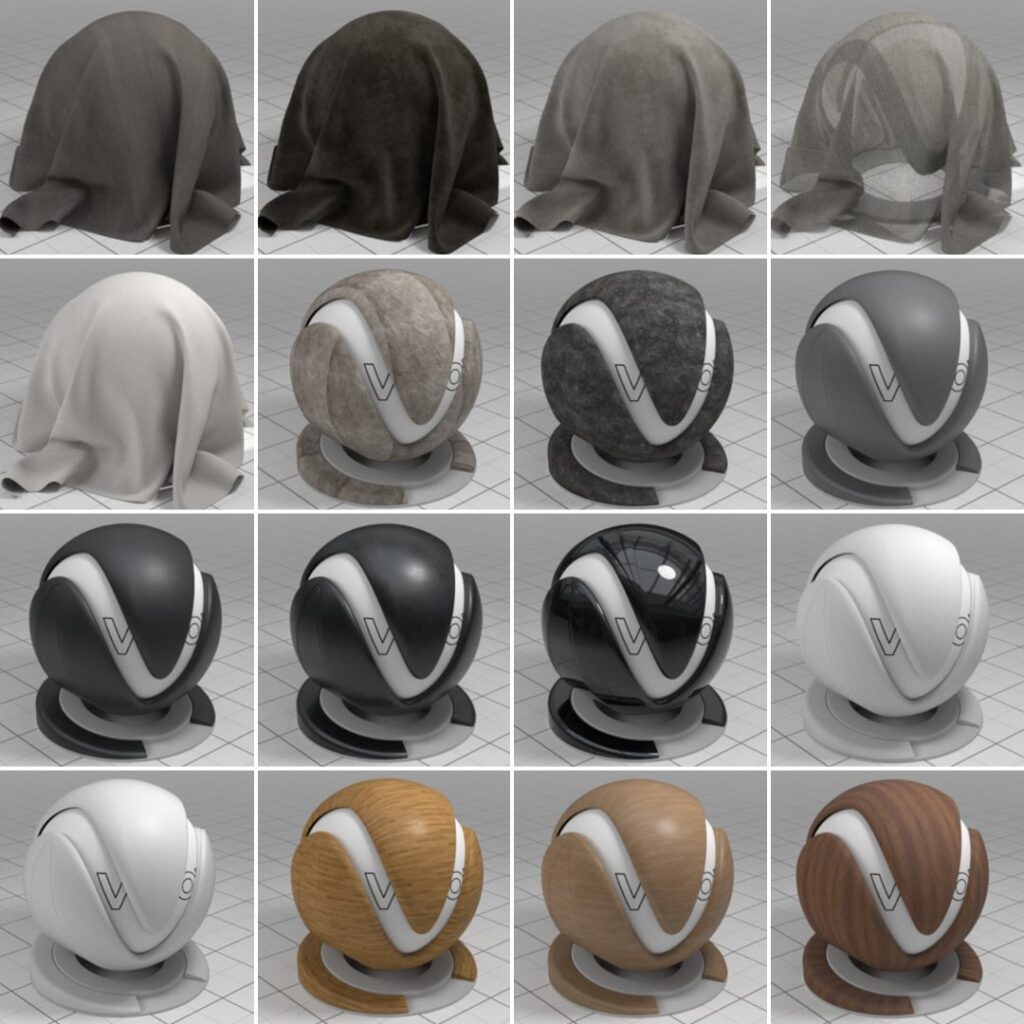
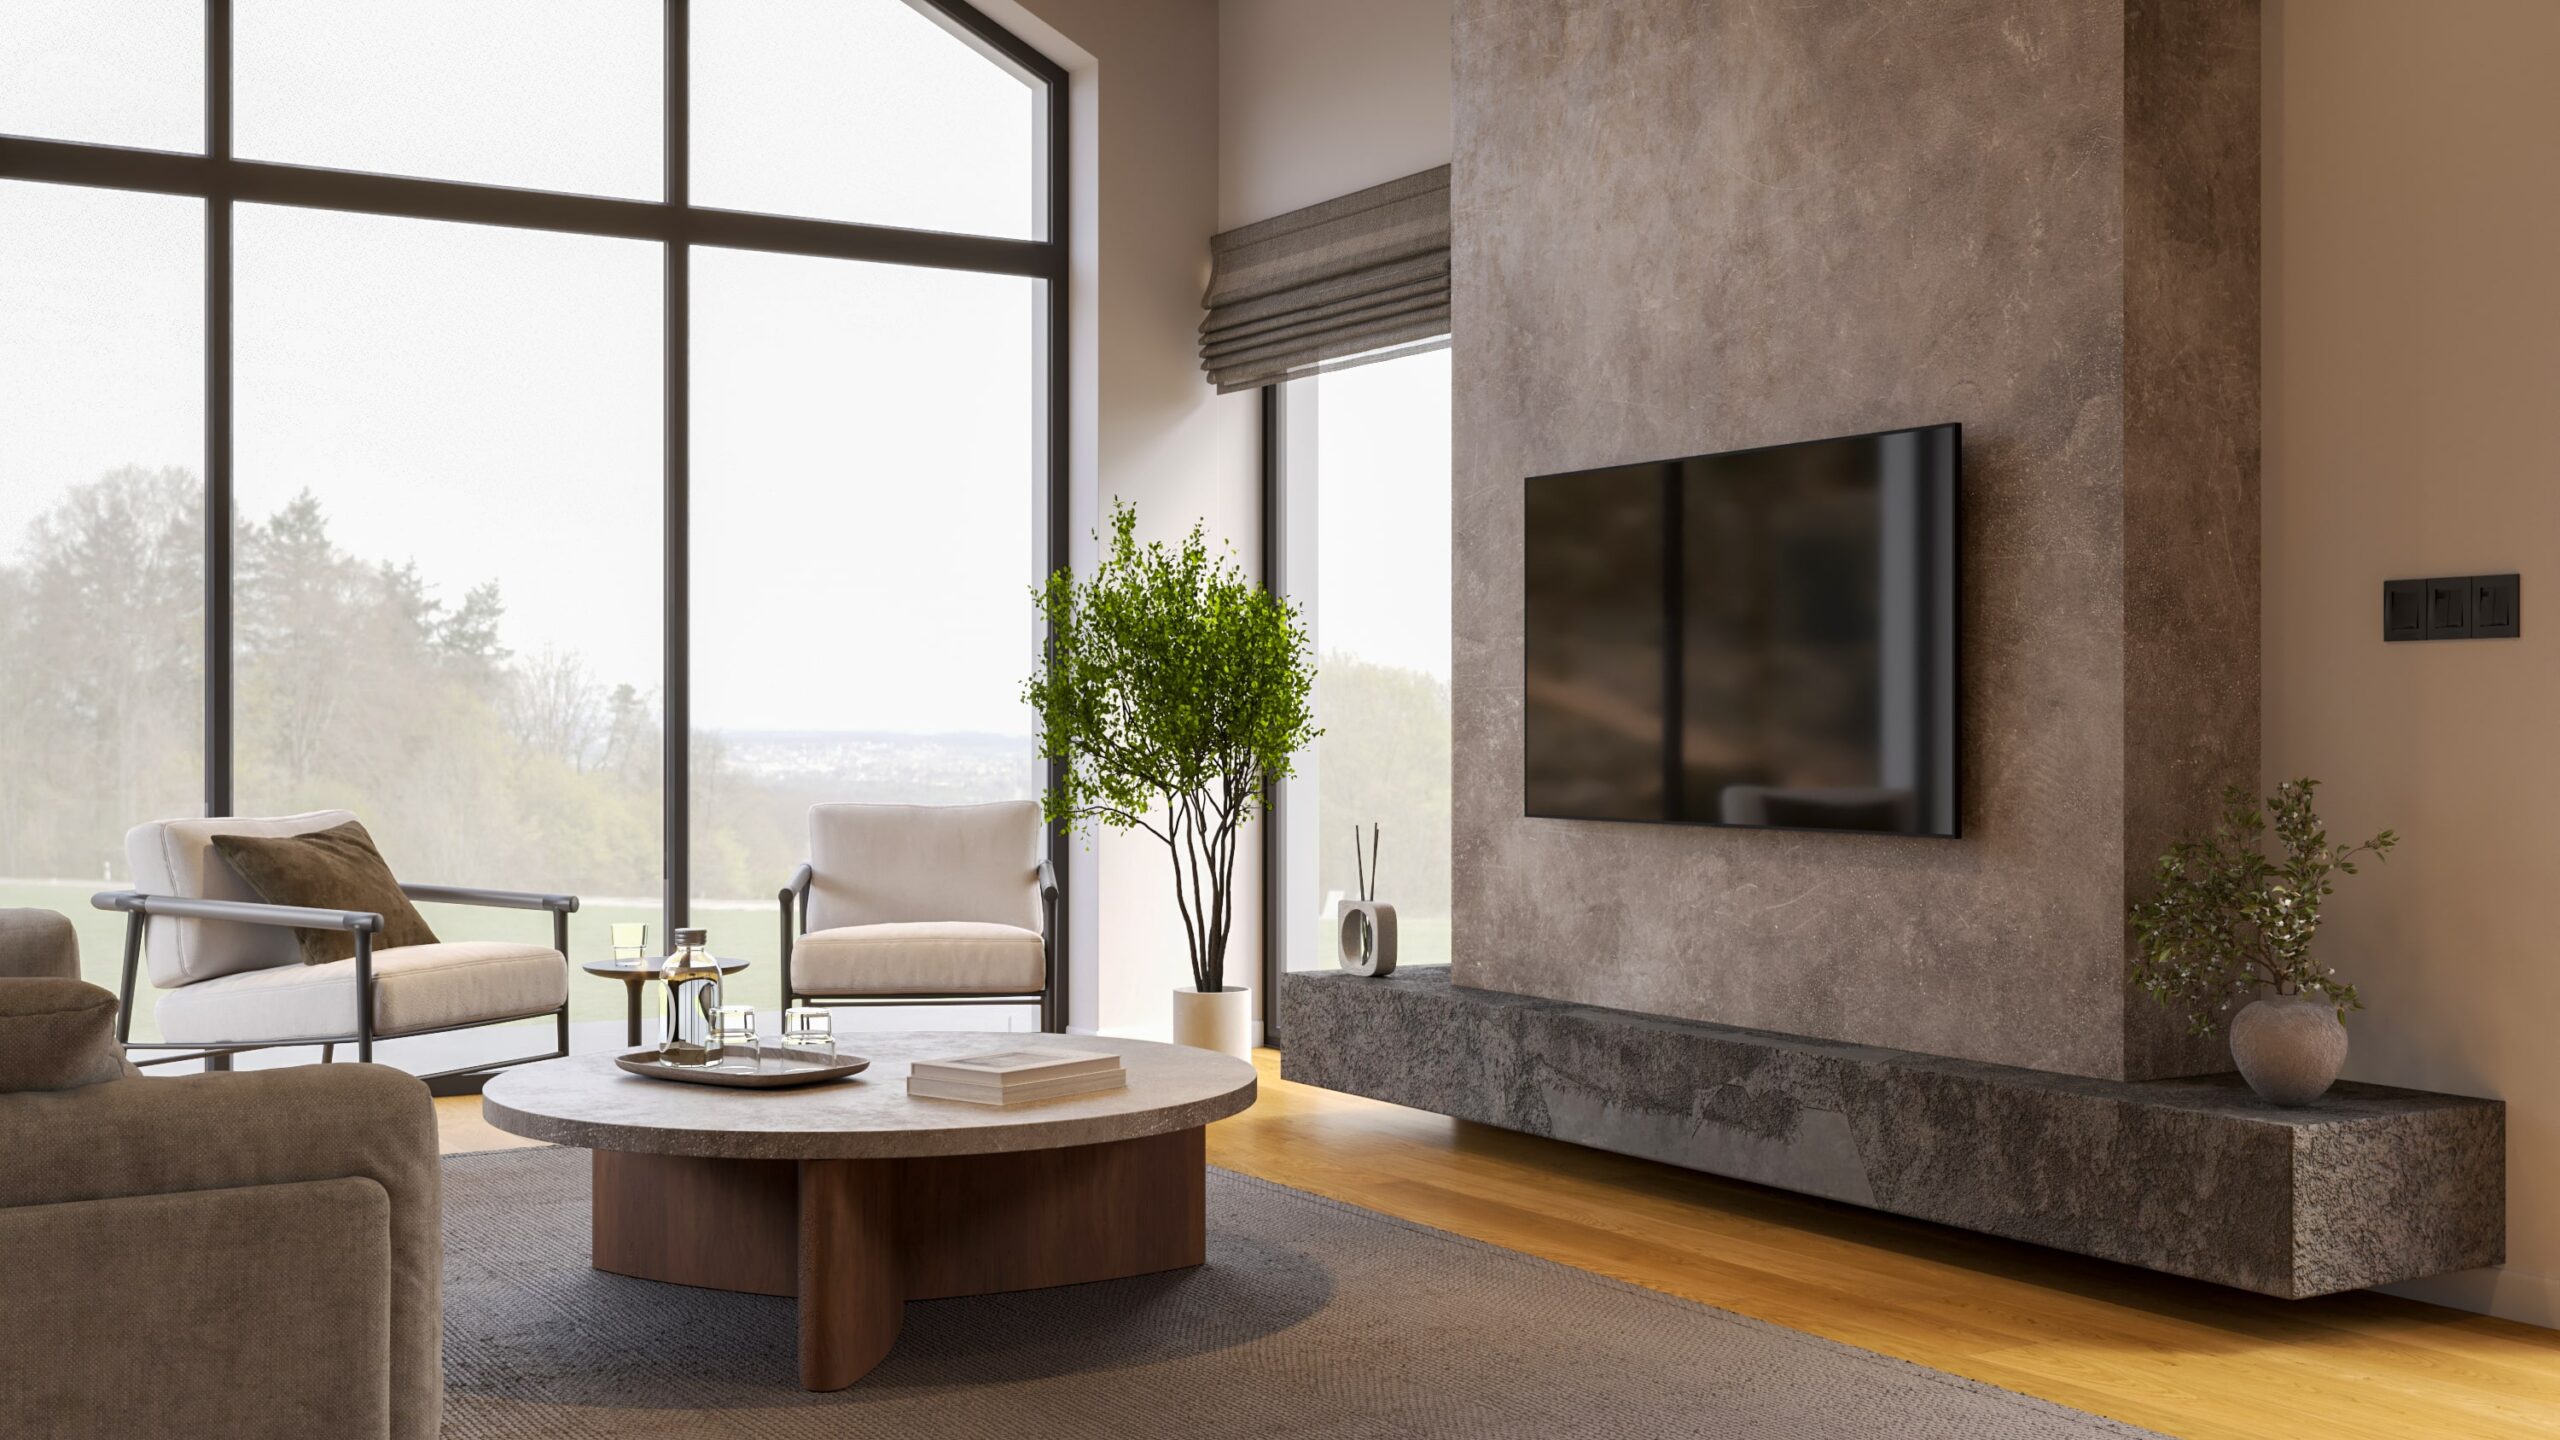
You will create PBR materials that bring high quality and realism to your visualizations. You’ll build over 15 photorealistic materials and get access to more than 50 textures. Additionally, you’ll discover the best sources for downloading PBR materials, helping you continue improving your future projects.
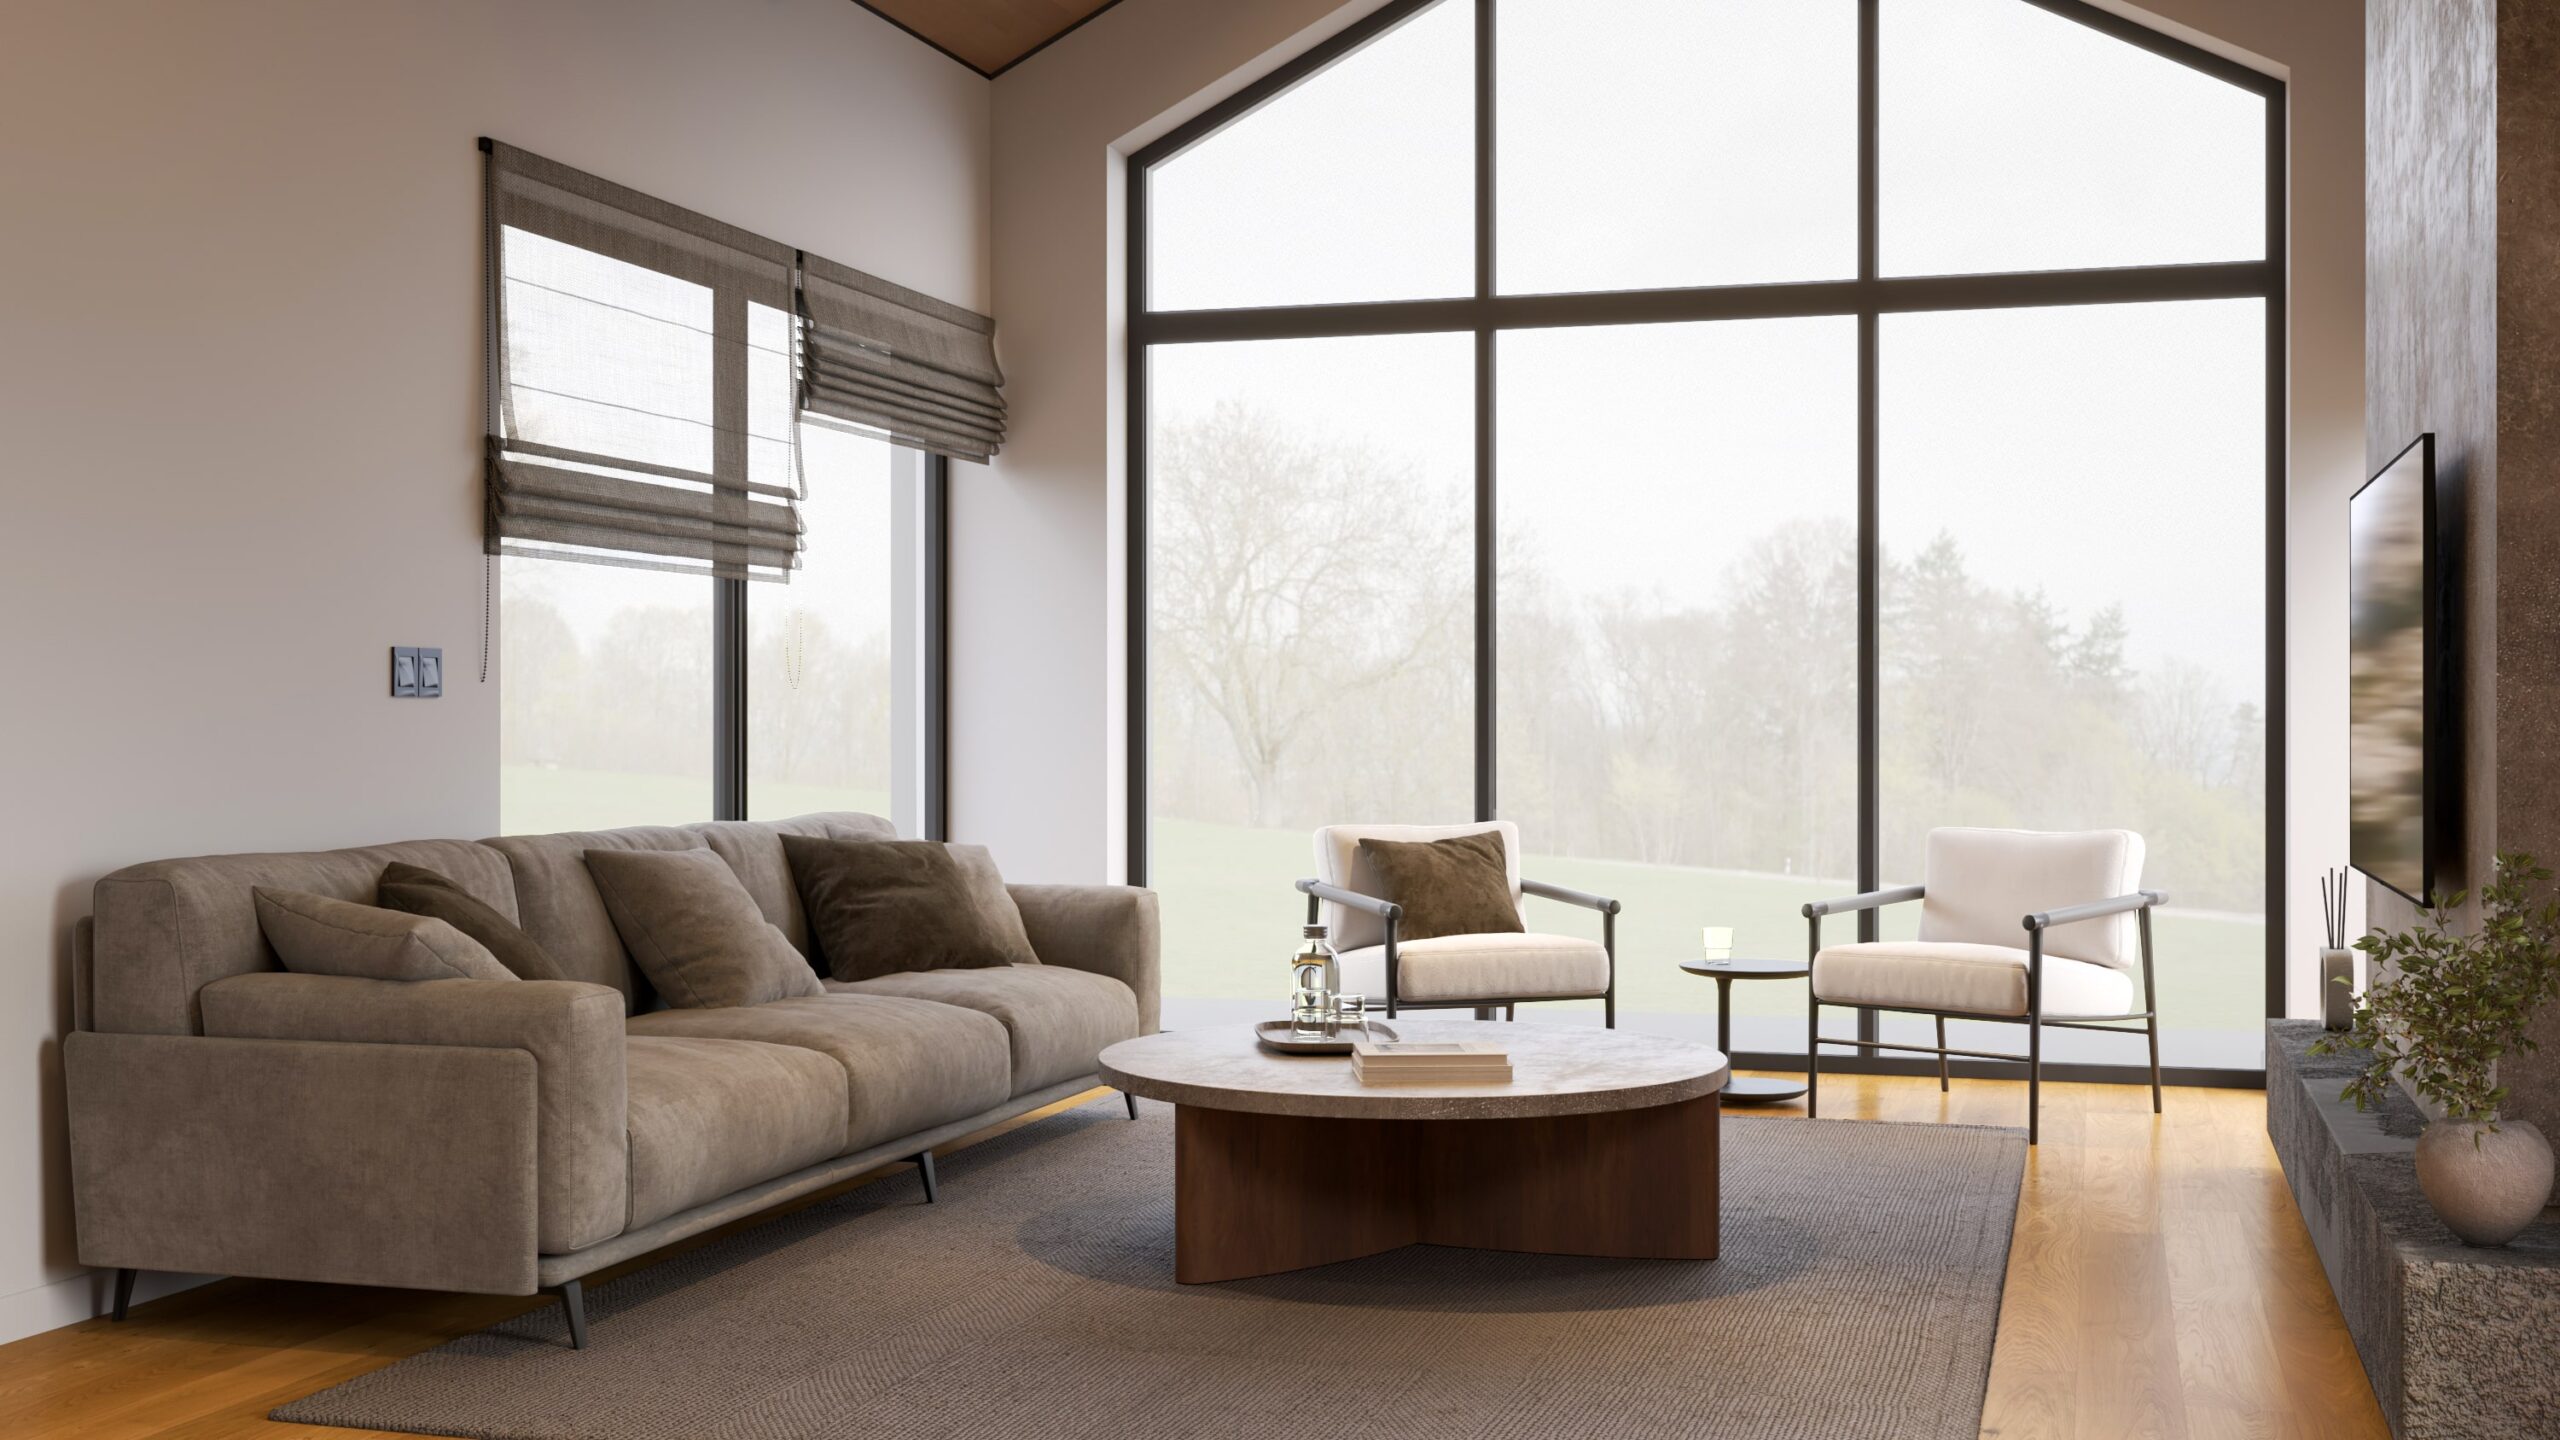
You’ll learn composition rules that will make your visualizations more attractive and professional. You’ll gain the skills to set up the camera to capture the best angles and give your projects the right perspective. You’ll also discover how to use different camera settings to achieve the desired effect and mood.
0. Materials to download and course introduction
1. Project overview and render settings 5:28
2. Dome Light and Rectangle Light 8:08
3. Setting the view outside the window, IES lights 4:15
4. Wall, floor, and ceiling material 5:56
5. Screen, plastic, and metal material 8:01
6. LED lamp, stone, and wood material 7:34
7. Fabric material for sofa and armchair 7:05
8. Carpet material, blinds, and rounding edges 5:21
9. Adding accessories and plants 4:02
10. Final visualizations and post-production 5:40
BONUS LESSON: PBR Materials 14:59

I am an architect with over 10 years of experience in teaching visualization and interior design. Throughout the years, I have gained vast expertise working on architectural projects in China and Shanghai and many others.
Through my English courses on educk.org and Polish courses on educk.pl, I have helped thousands of students from over 70 countries develop their skills. My passion for sharing knowledge has led me to build a YouTube community of over 21,000 subscribers, where I share proven techniques for visualization and design in SketchUp.
As a lecturer at SWPS University in Kraków, I understand what it takes to create professional visualizations. I focus on practical, real-world examples that help my students quickly apply their knowledge in their work.
I invite you to explore my courses! I’m confident that learning together will not only be effective but also enjoyable, equipping you with the essential skills to create stunning visualizations that impress your clients.
Mini Visualization Course – V-Ray for SketchUp
€99,00 €80,49 excl. VAT
Mini Visualization Course – V-Ray for SketchUp
€99,00 €80,49 excl. VAT